
HRV Grips®
Medallion Installation Help Page
Medallion Installation Guide
Welcome to our medallion installation help page. Currently we have pictures of the procedures described here located at the bottom of this page, eventually we hope to integrate them. This section is intended exclusively for our customers — those who purchase and wish to install our products. While many people will sell medallions, very few if any will provide real guidance for proper installation. We’ve installed thousands of medallions across a wide variety of materials and grip styles, including Wood, Bonded Ivory, Pearl, and G10. This guide reflects our personal experience — including lessons learned through years of hands-on work.
That said, this is not a certified instructional manual or warranty of results. The information provided here is for general guidance only, and you may choose to use all, part, or none of the suggestions at your own discretion.
HRV Customs assumes no responsibility or liability for the outcome of your project.
Installation of medallions requires care, experience, and proper tooling. If you’re unsure of your ability or equipment, we strongly recommend working with a qualified gunsmith, woodworker, or other professional.
By using this help page, you accept full responsibility for your own process and results.
Take your time, go slow, and don’t rush the process. Read through this entire section before you begin. A clean, well-fitted medallion is worth the patience.
What You'll Need
Before you begin, gather the following tools and materials to ensure a smooth installation process:
Essential Tools & Materials:
Medallions (correct size for your grips)
Drill (handheld or drill press)
Forstner bit (proper size for your medallion — test fit first!)
3/16" drill bit (for pilot hole) This is the perfect size for relief, it may also help in the event of a catastrophic failure!
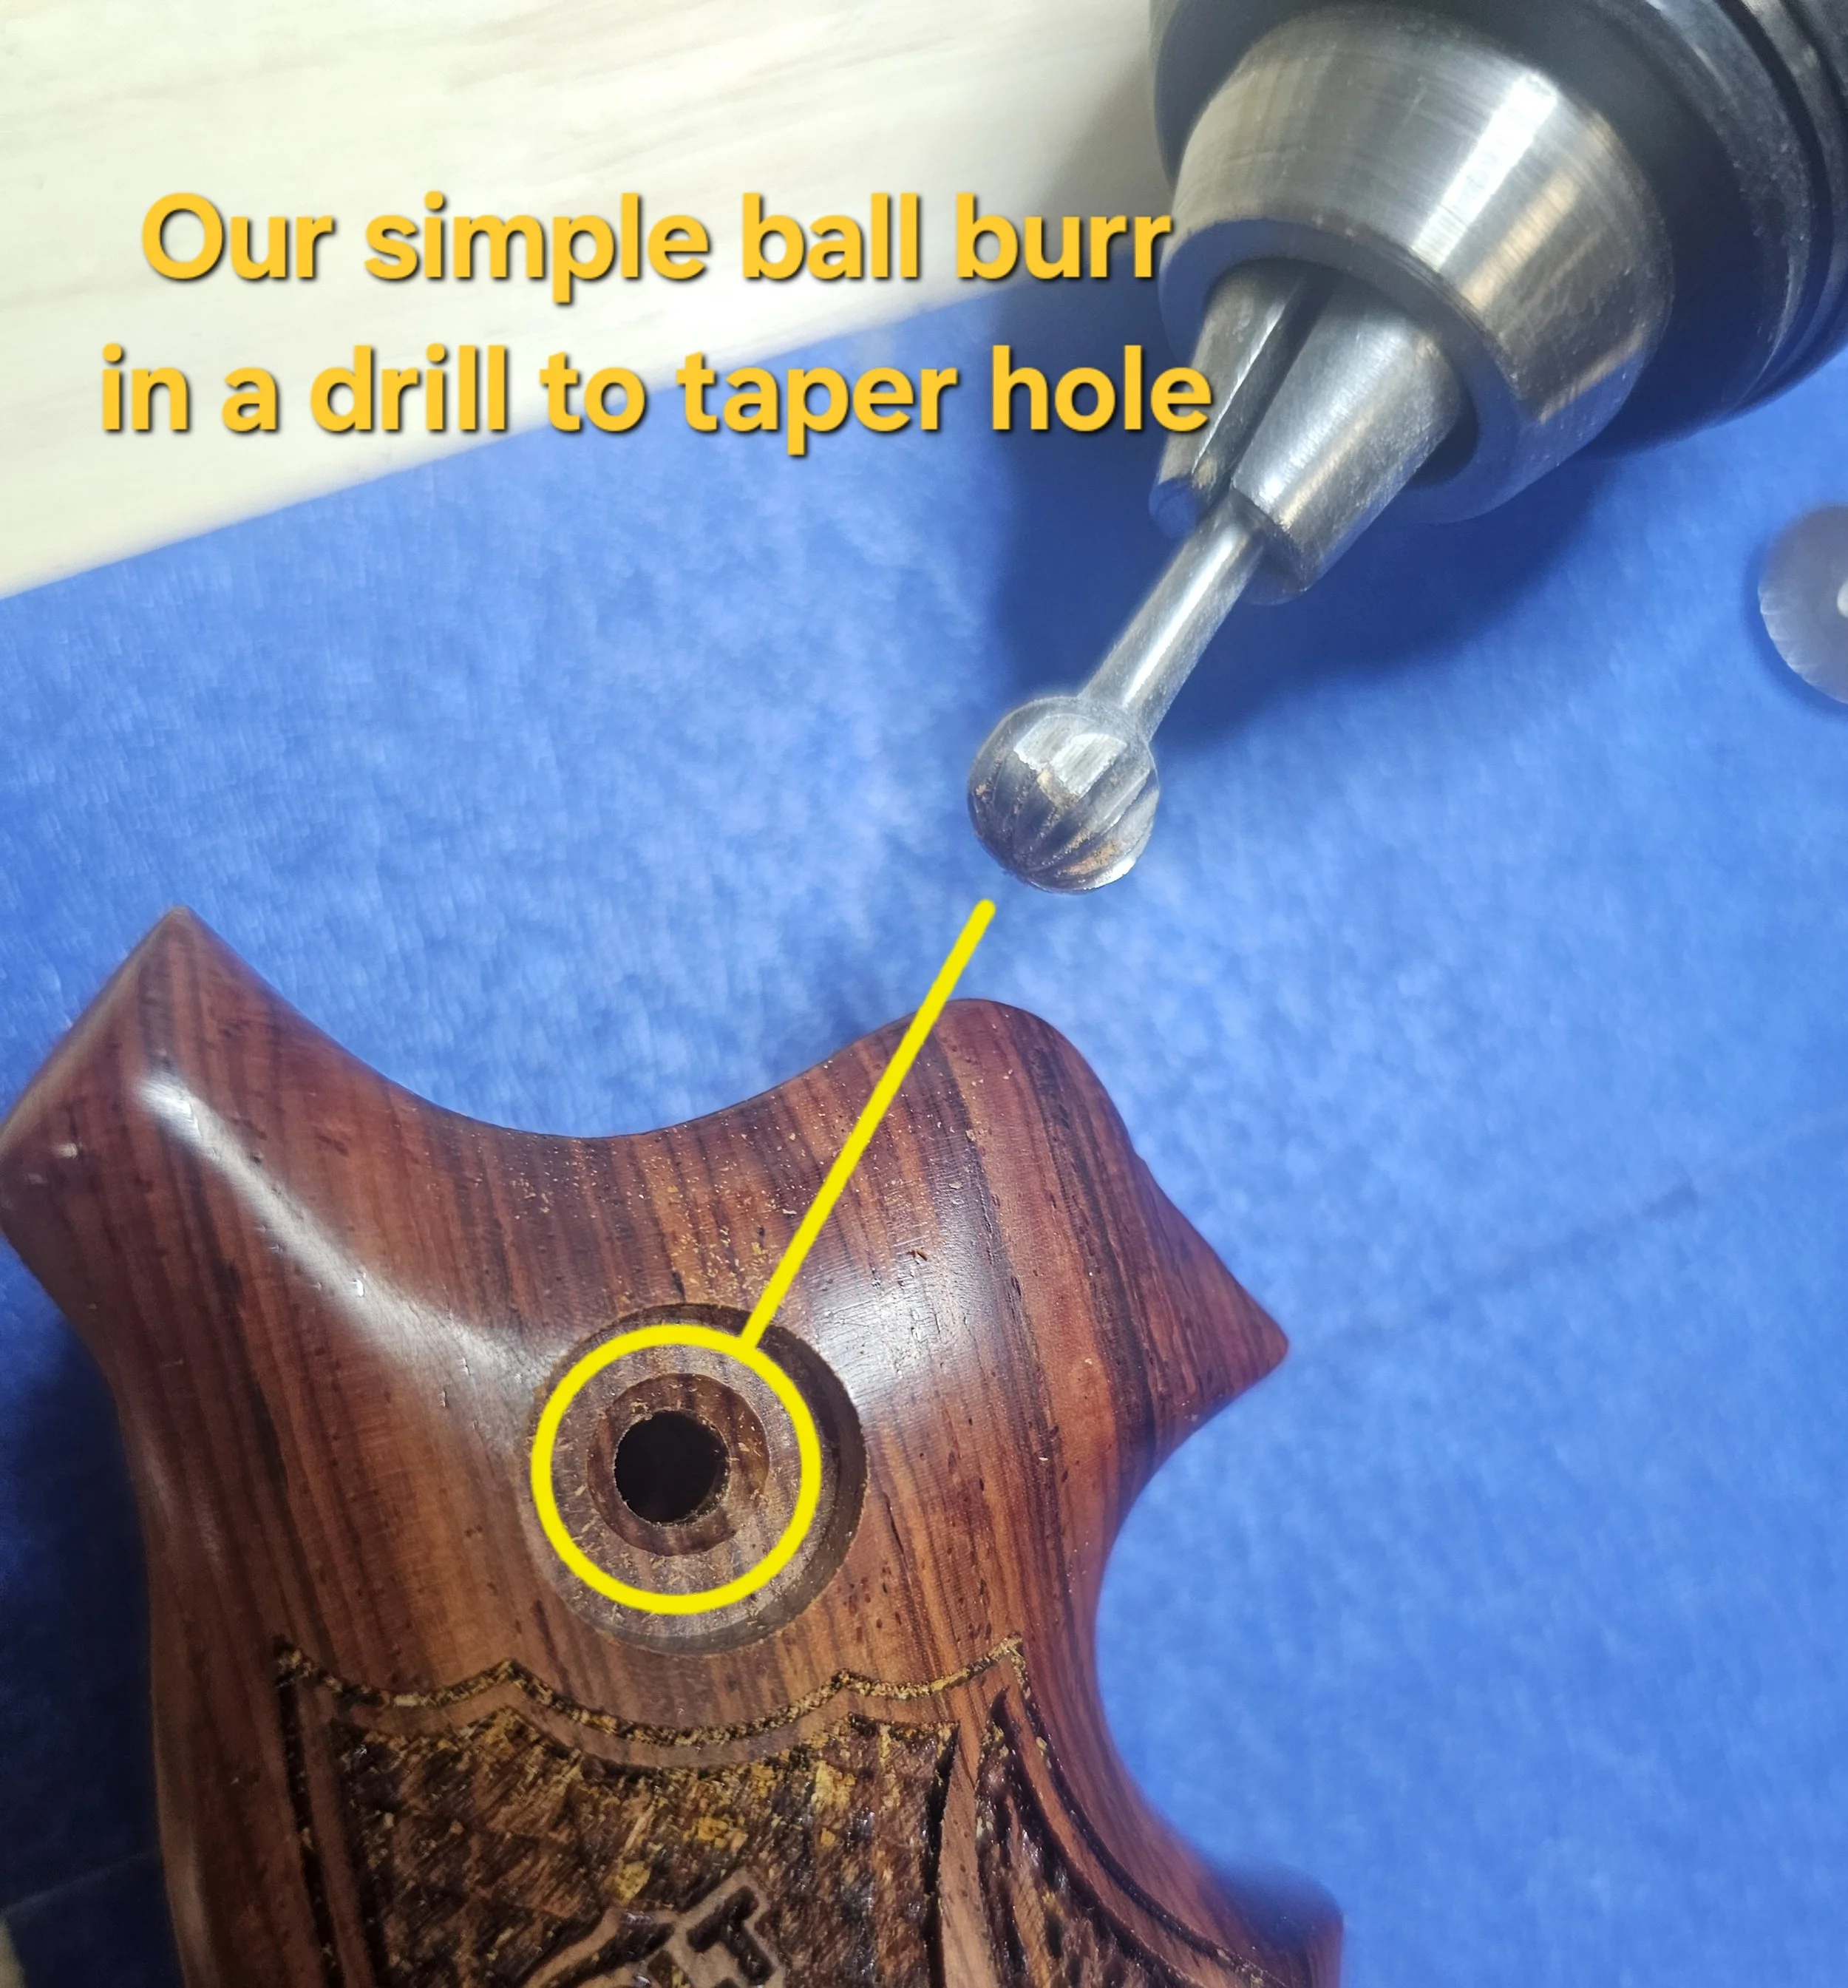
(Optional but helpful) Taper bit or countersink bit for back relief (very helpful, I use a ball burr)
Fine-grit sandpaper {400-600 grit} (for smoothing raised edges around drilled holes)
Permatex® Clear RTV Silicone #80050 (recommended adhesive)
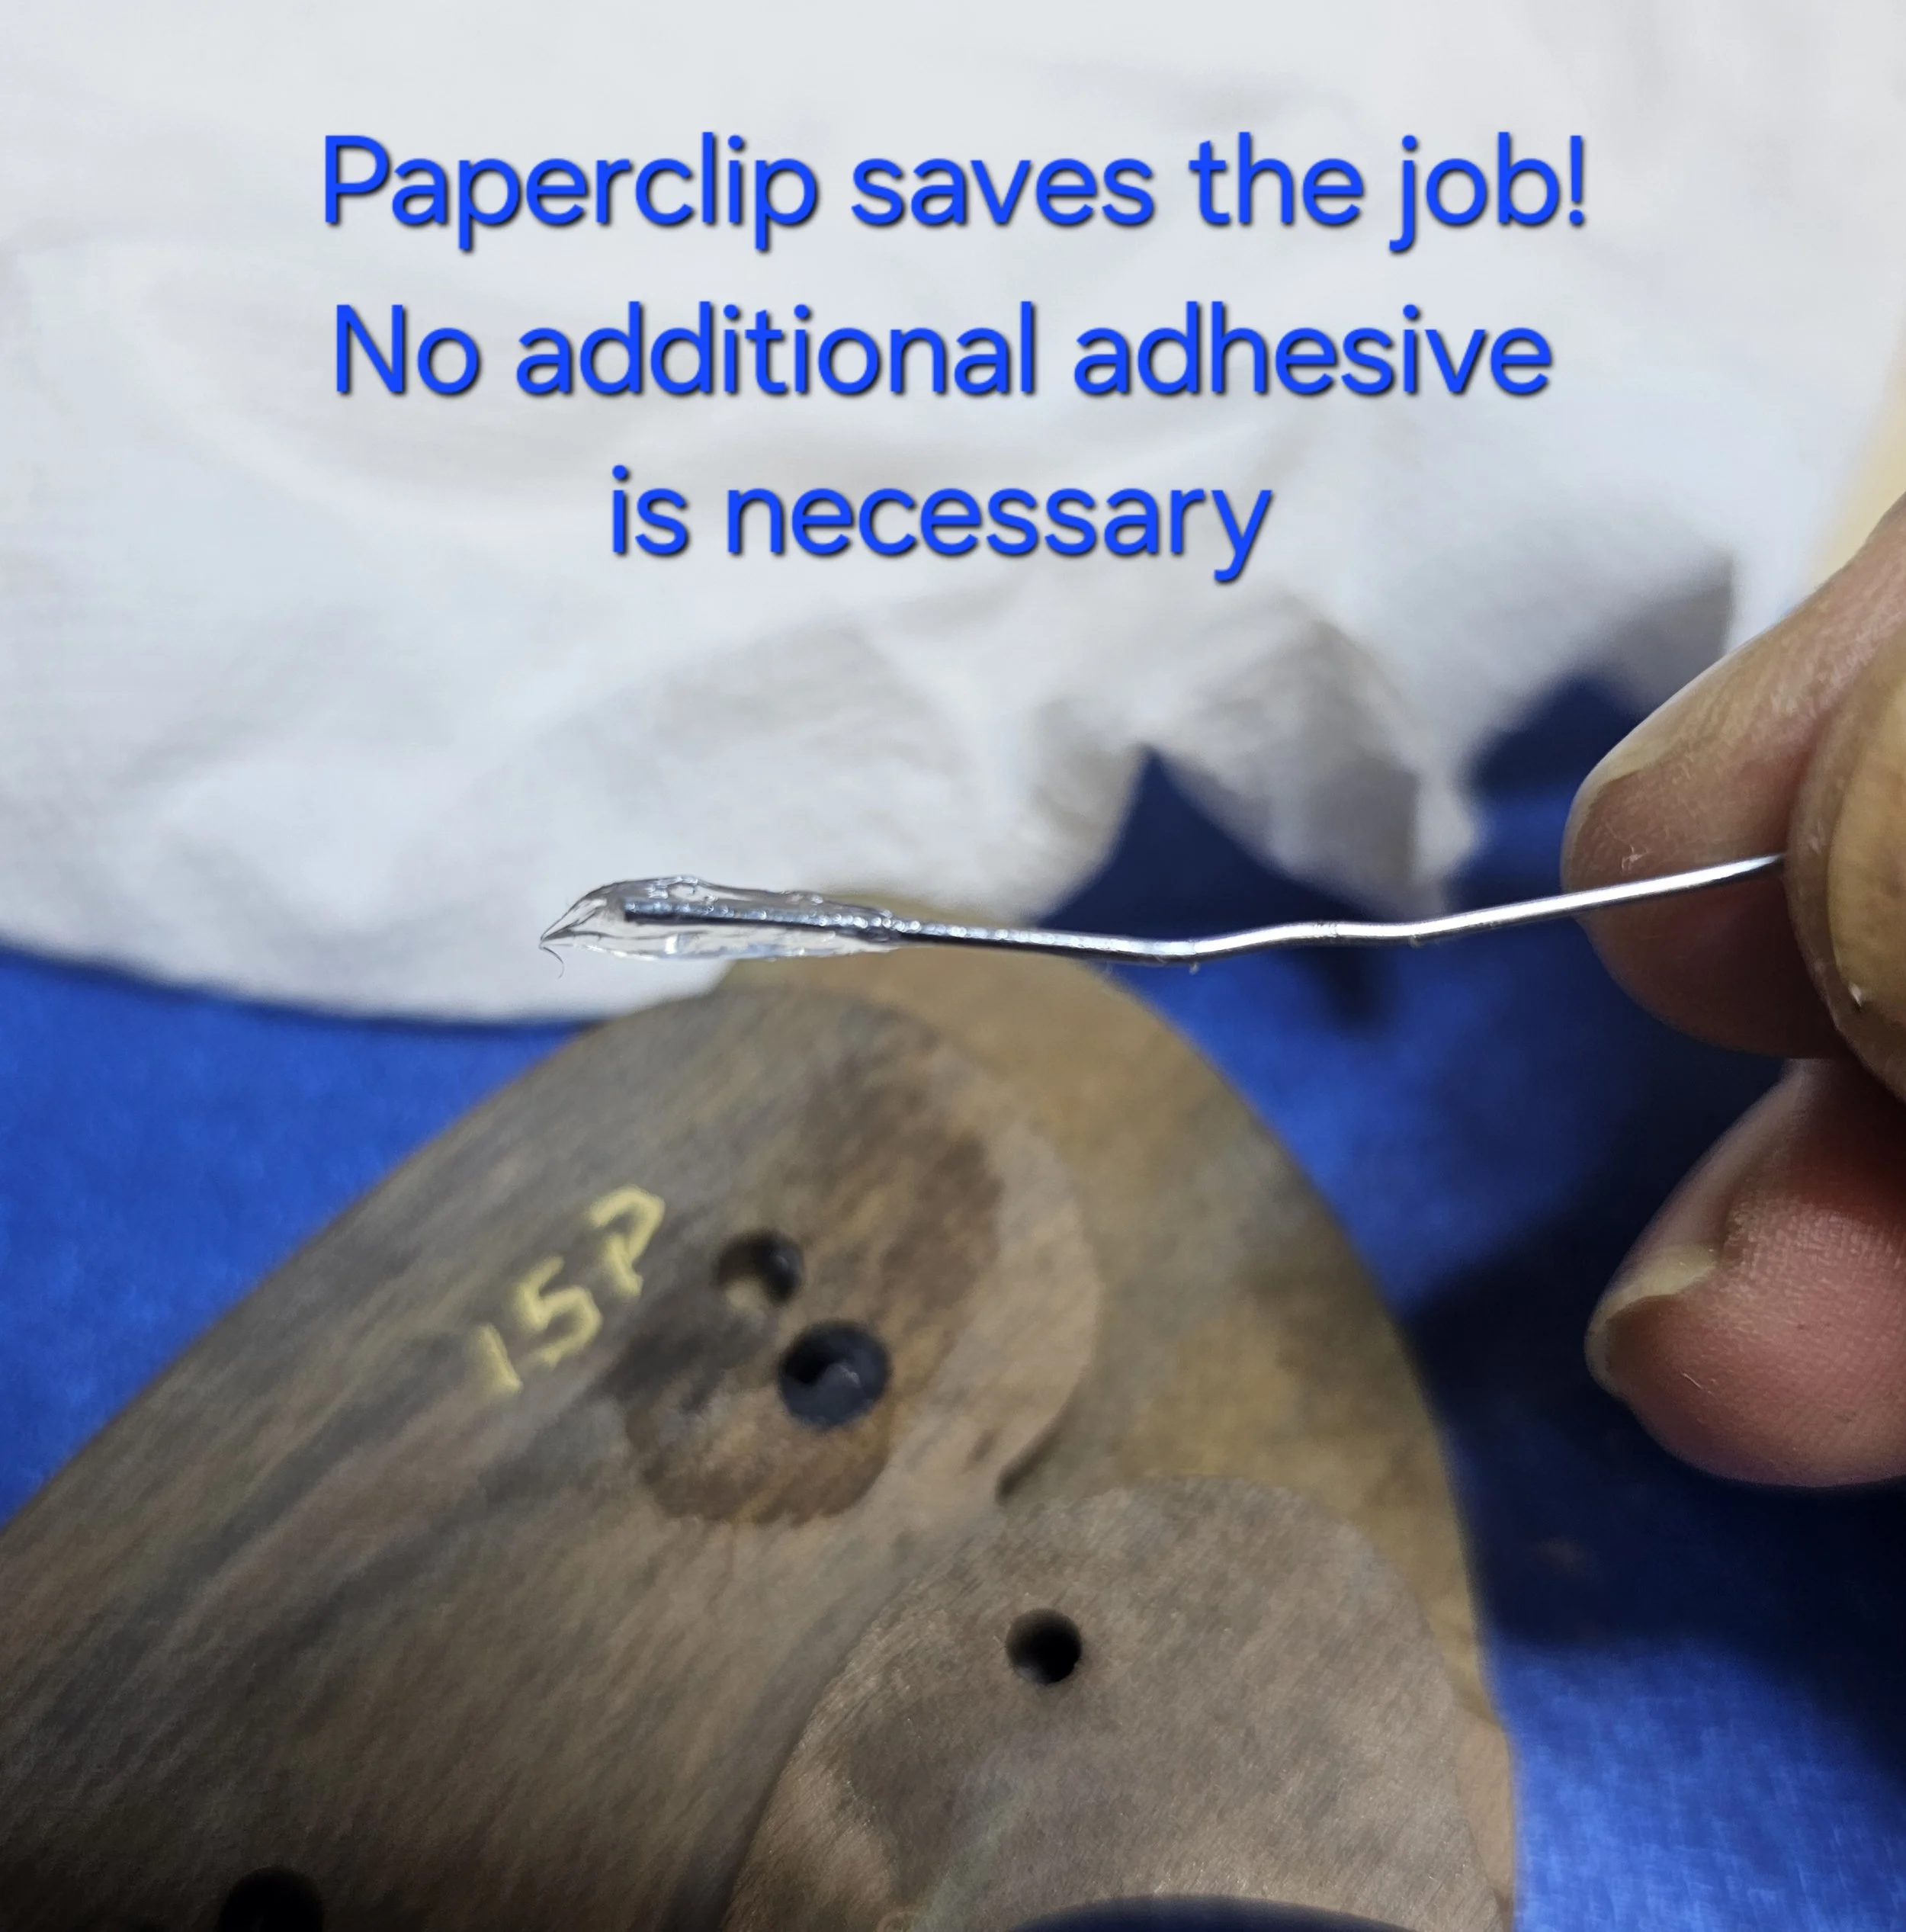
Wooden coffee stirrers (for applying silicone into holes)
1" painter’s tape
Recommended: FrogTape® Yellow (easy-release)
Alternative: Blue painter’s tape (de-tacked by pressing on clothing)
Paper towels or soft napkins (for wiping excess adhesive)
Clean flat surface (for working with medallions)
Clenzoil or Similar finish cleaner/protectant CLP (Our Two towel option is a great value)
Step One: Did You Buy the Right Size Medallions?
If your medallions are too small, installation becomes more difficult, but it’s still doable.
If they’re too large, it’s a problem. Some grips, like the Hogue® King Cobra, will not accept a 15mm medallion near the top. In some cases, a medallion can be installed farther down in the body — but this is advanced and requires precision.
Make sure the medallions you’ve purchased fit the space intended on your grip. Ideally, you’re reading this right after placing your order. We typically ship within 24 business hours (During business days), and changes can be made before shipment.
Step Two: Preparing to Drill the Grips
Do not buy your drill bit before your medallions arrive.
While our medallions are a consistent size, drill bit sizes can vary slightly between manufacturers. A hole that’s too small or too tight may ruin the fit.
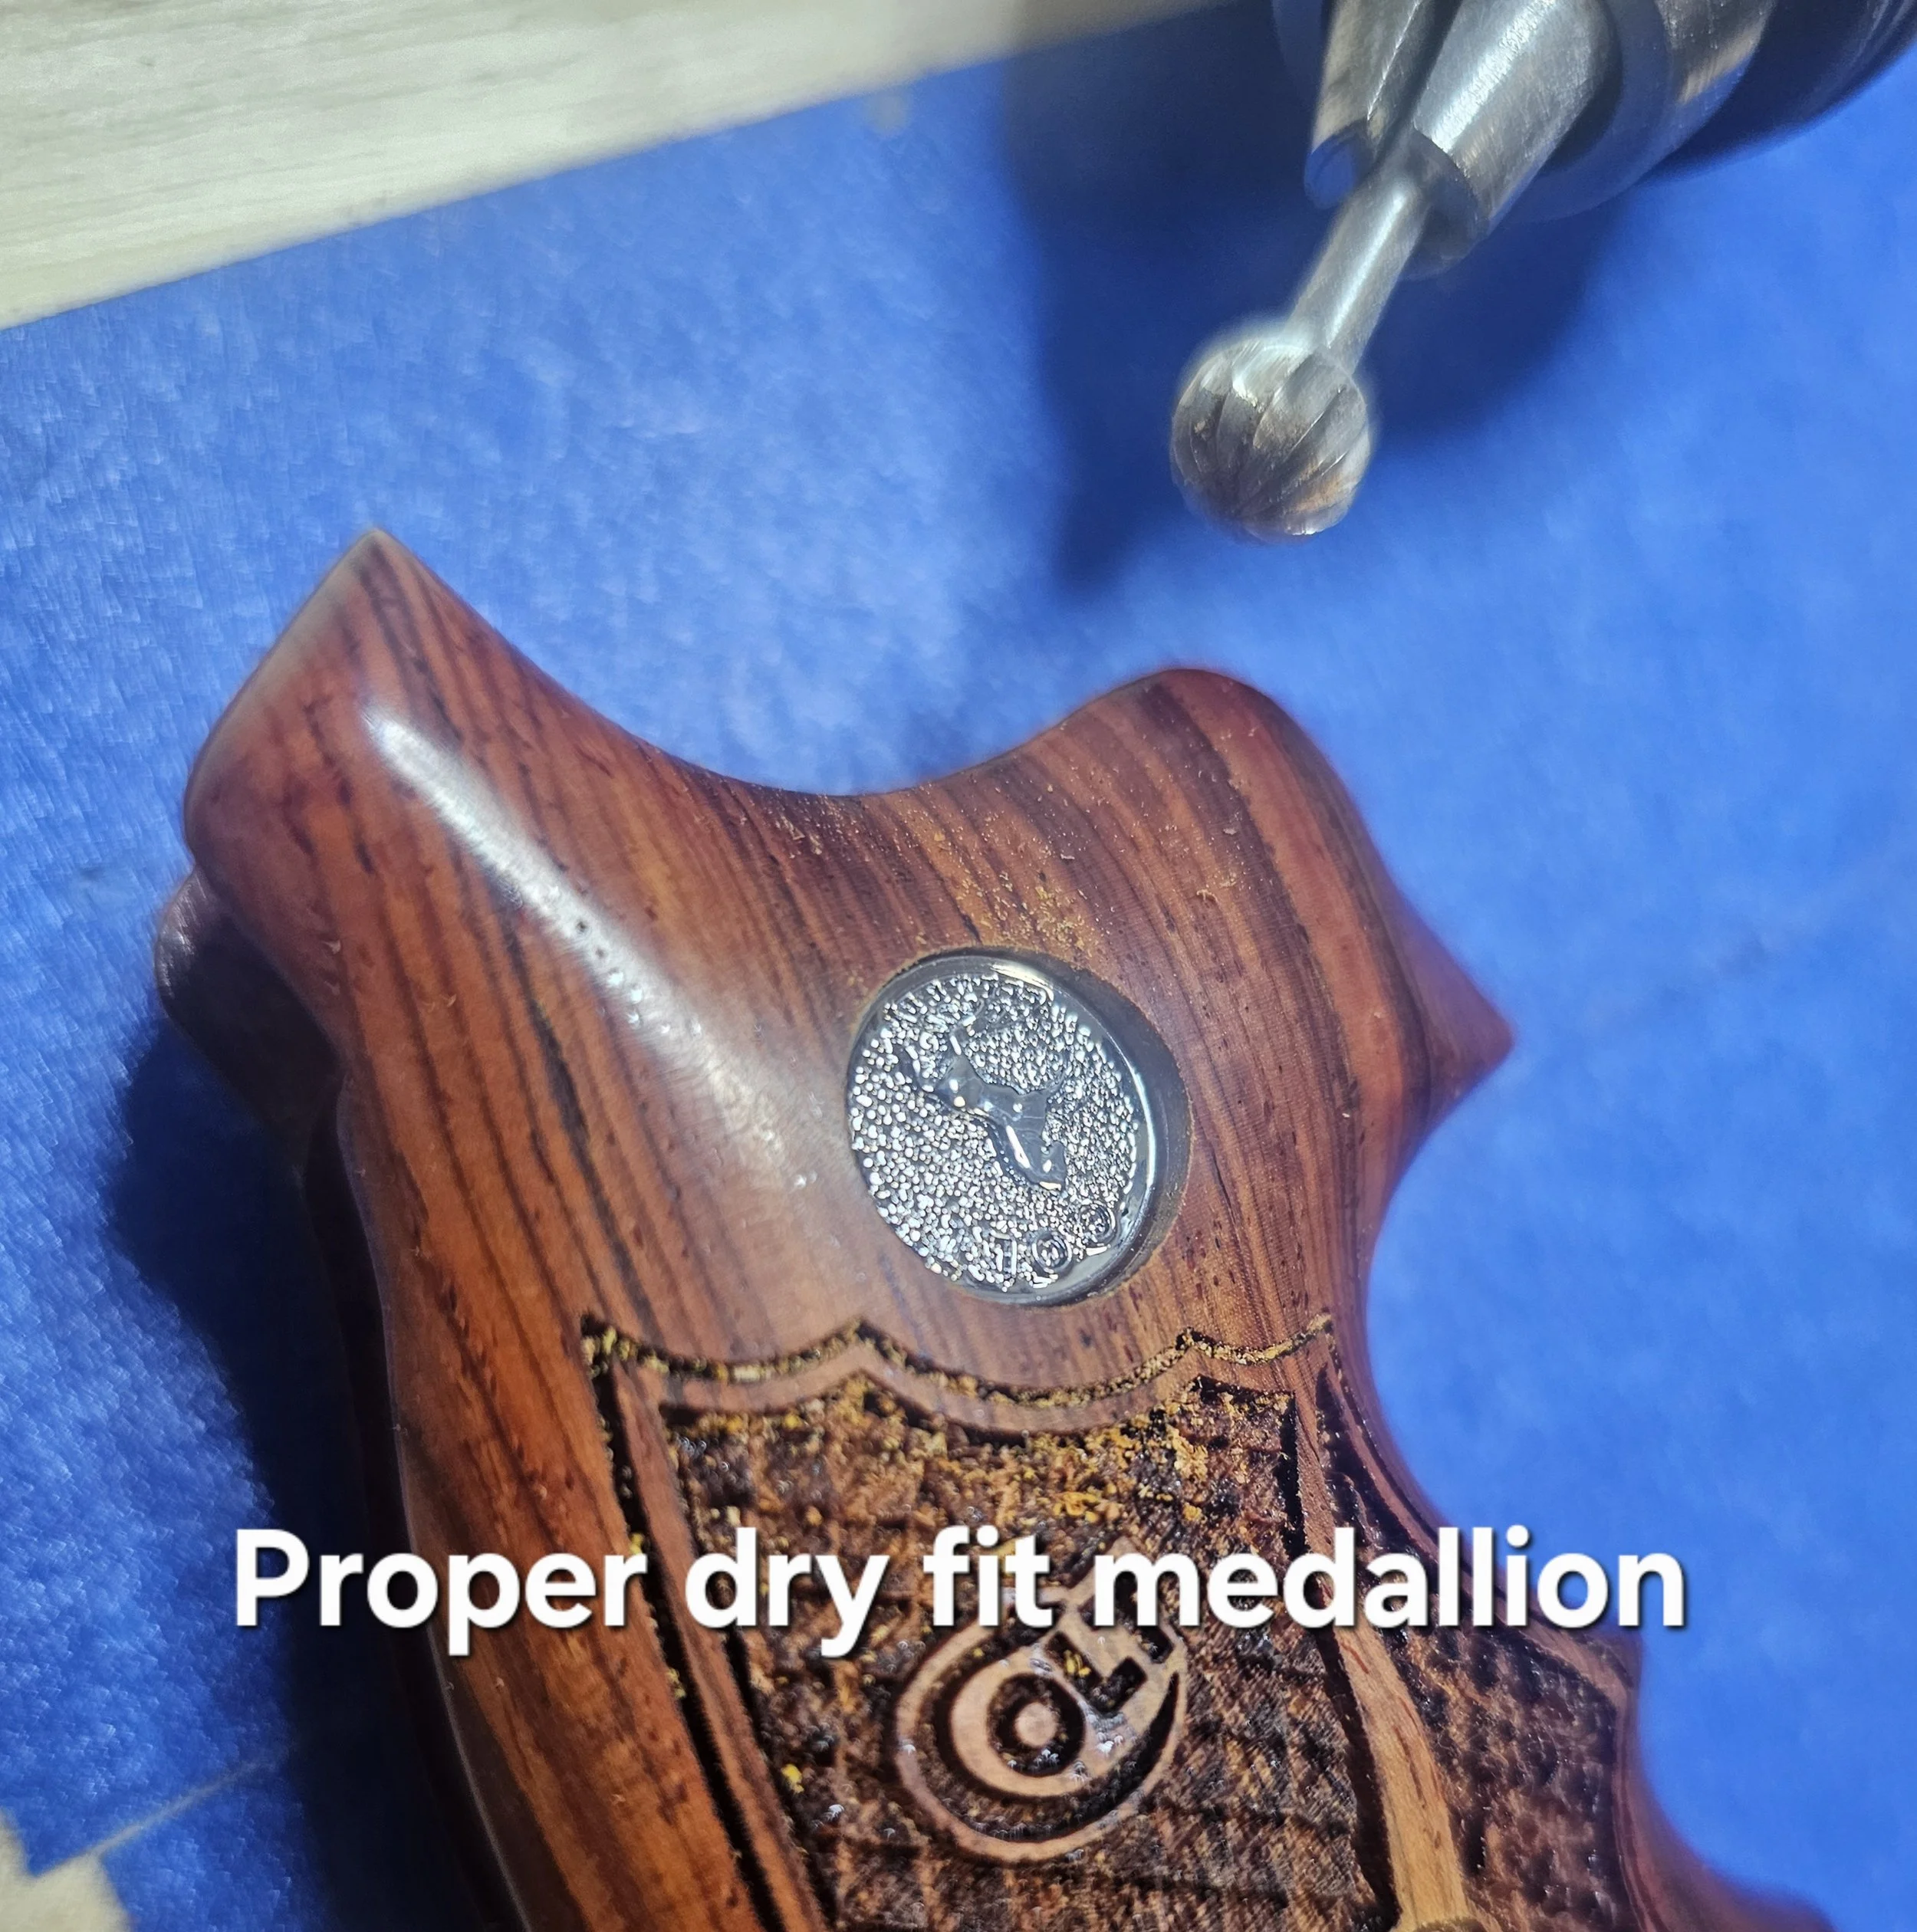
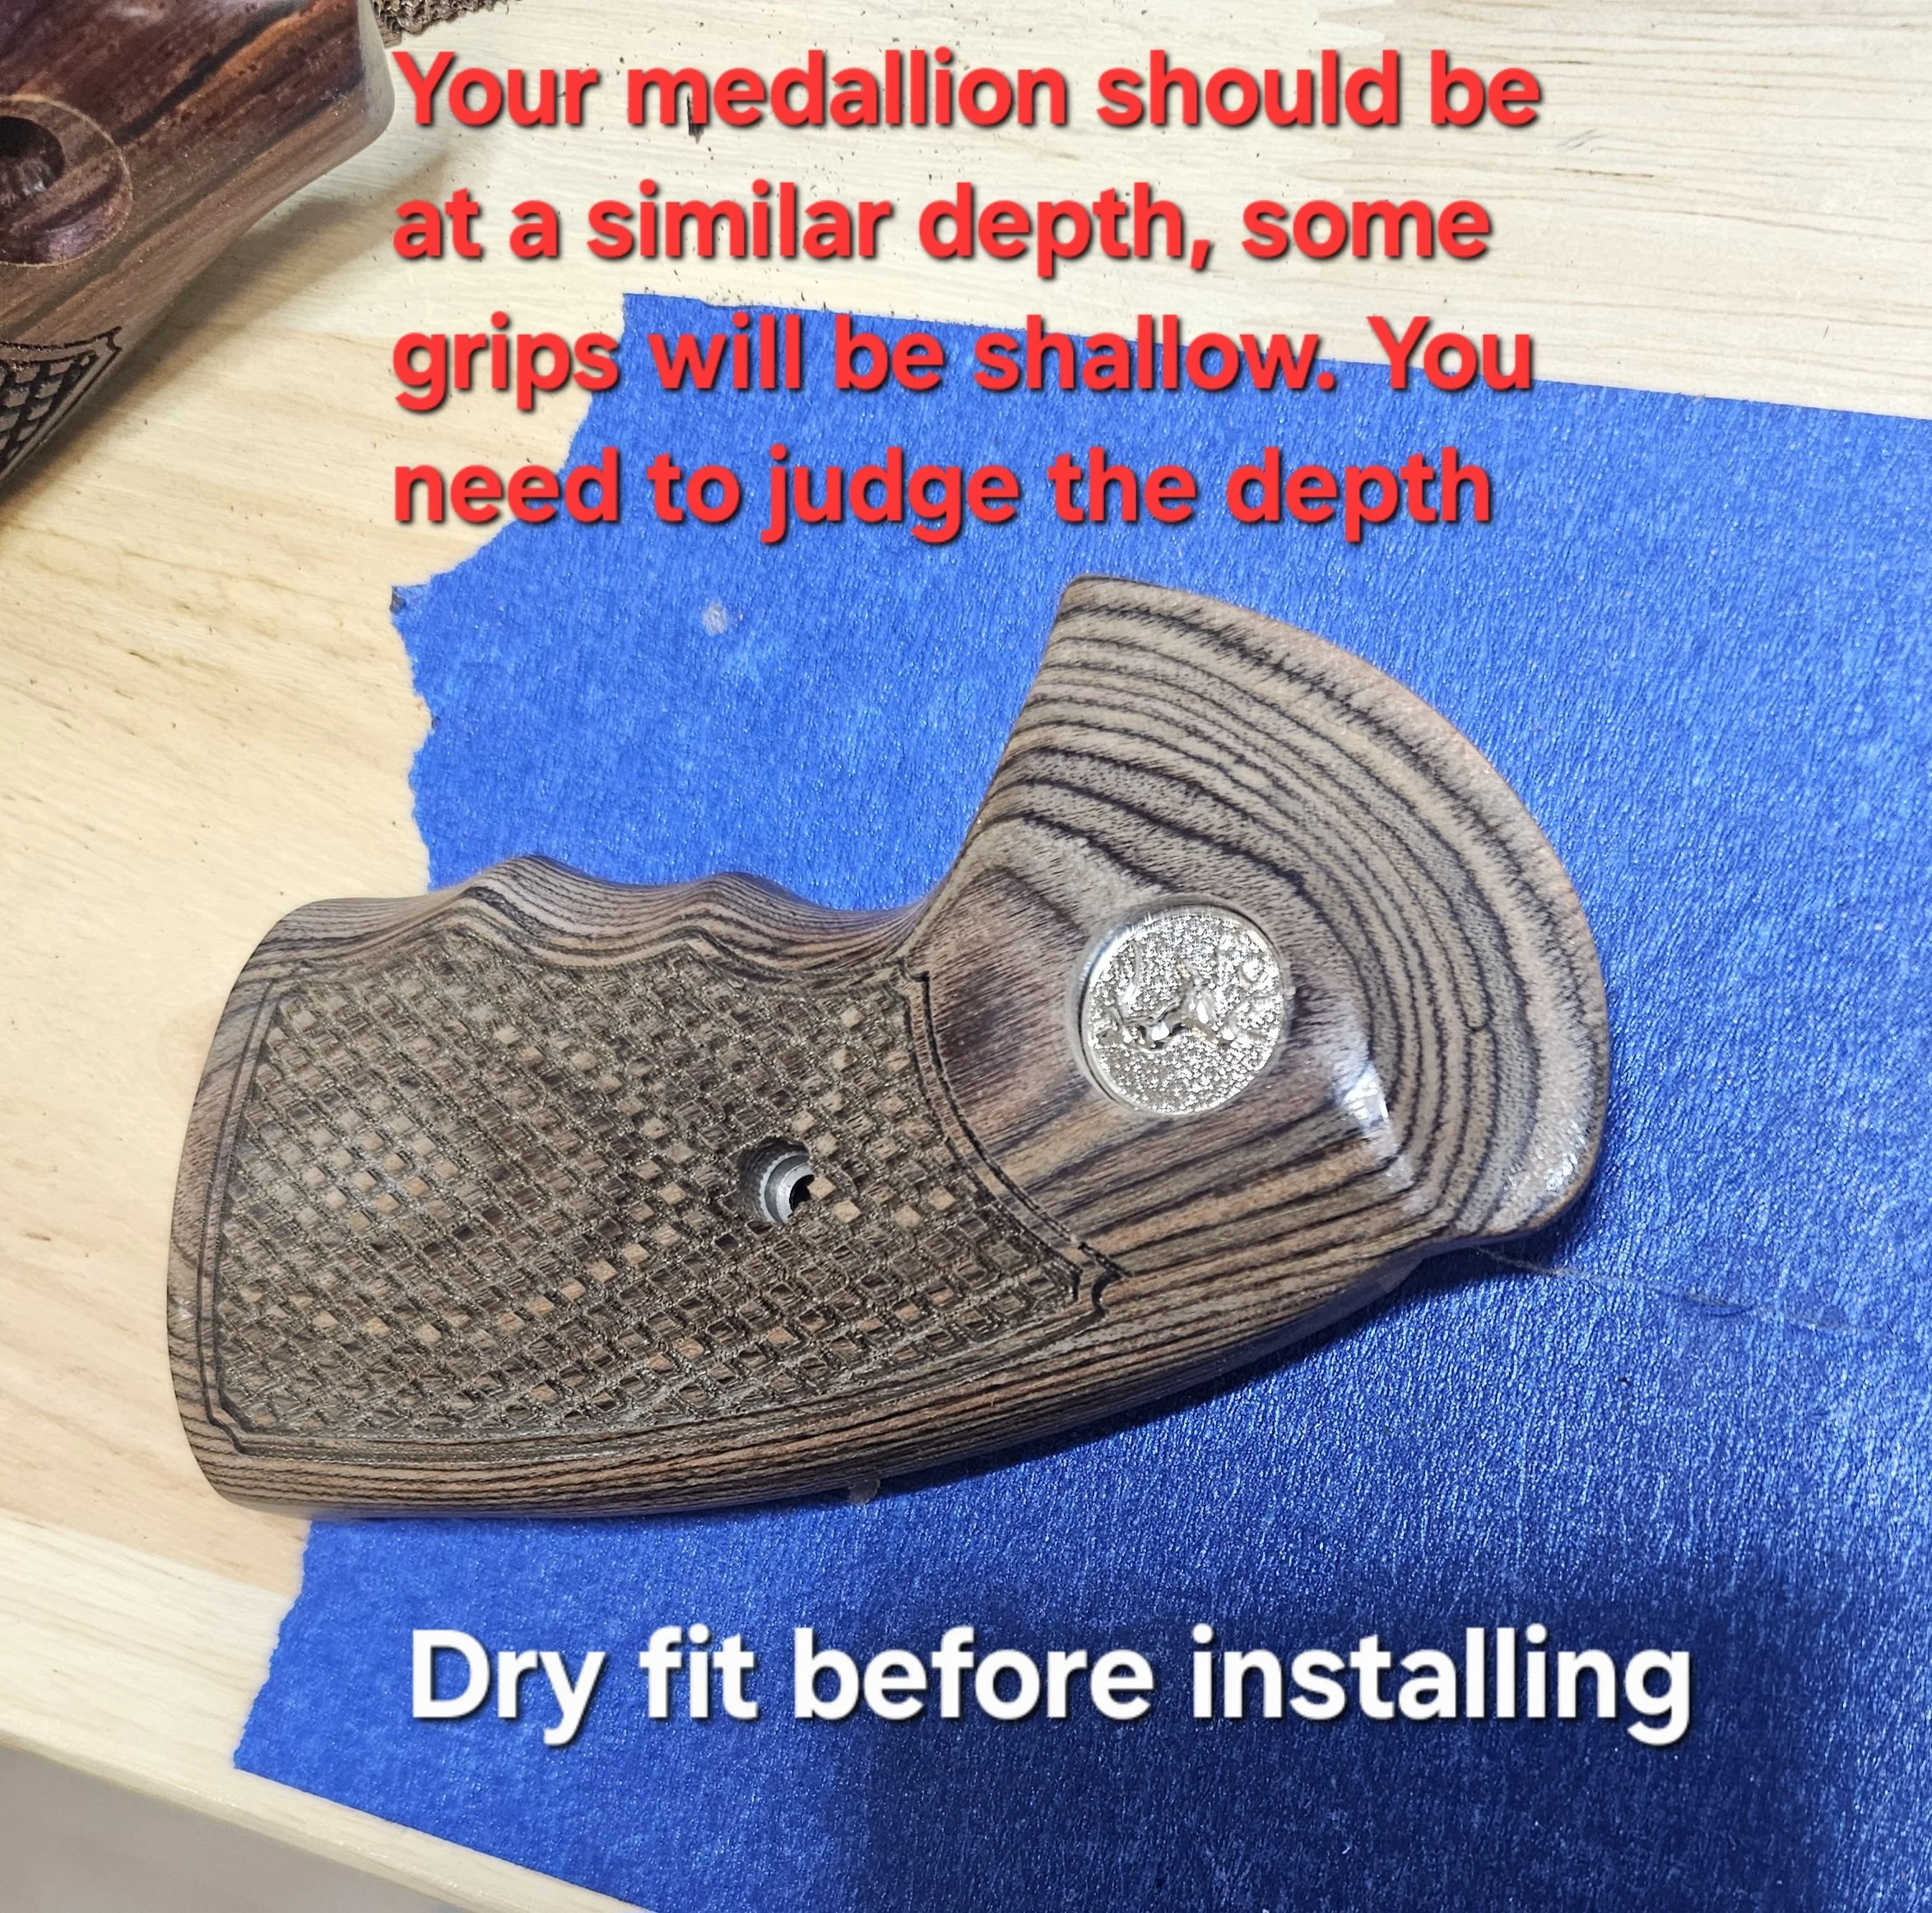
Once your medallions arrive, test-fit the proper-sized Forstner bit by drilling into scrap wood. You want the hole just slightly larger than the medallion diameter, especially if the grip surface is curved or uneven. When the hole is the proper size the medallion will drop in easily.
Choosing the Right Bit:
Never use a spade bit. It will tear out the surface of your grip.
Use a Forstner bit at a minimum — it makes a clean, flat-bottomed hole.
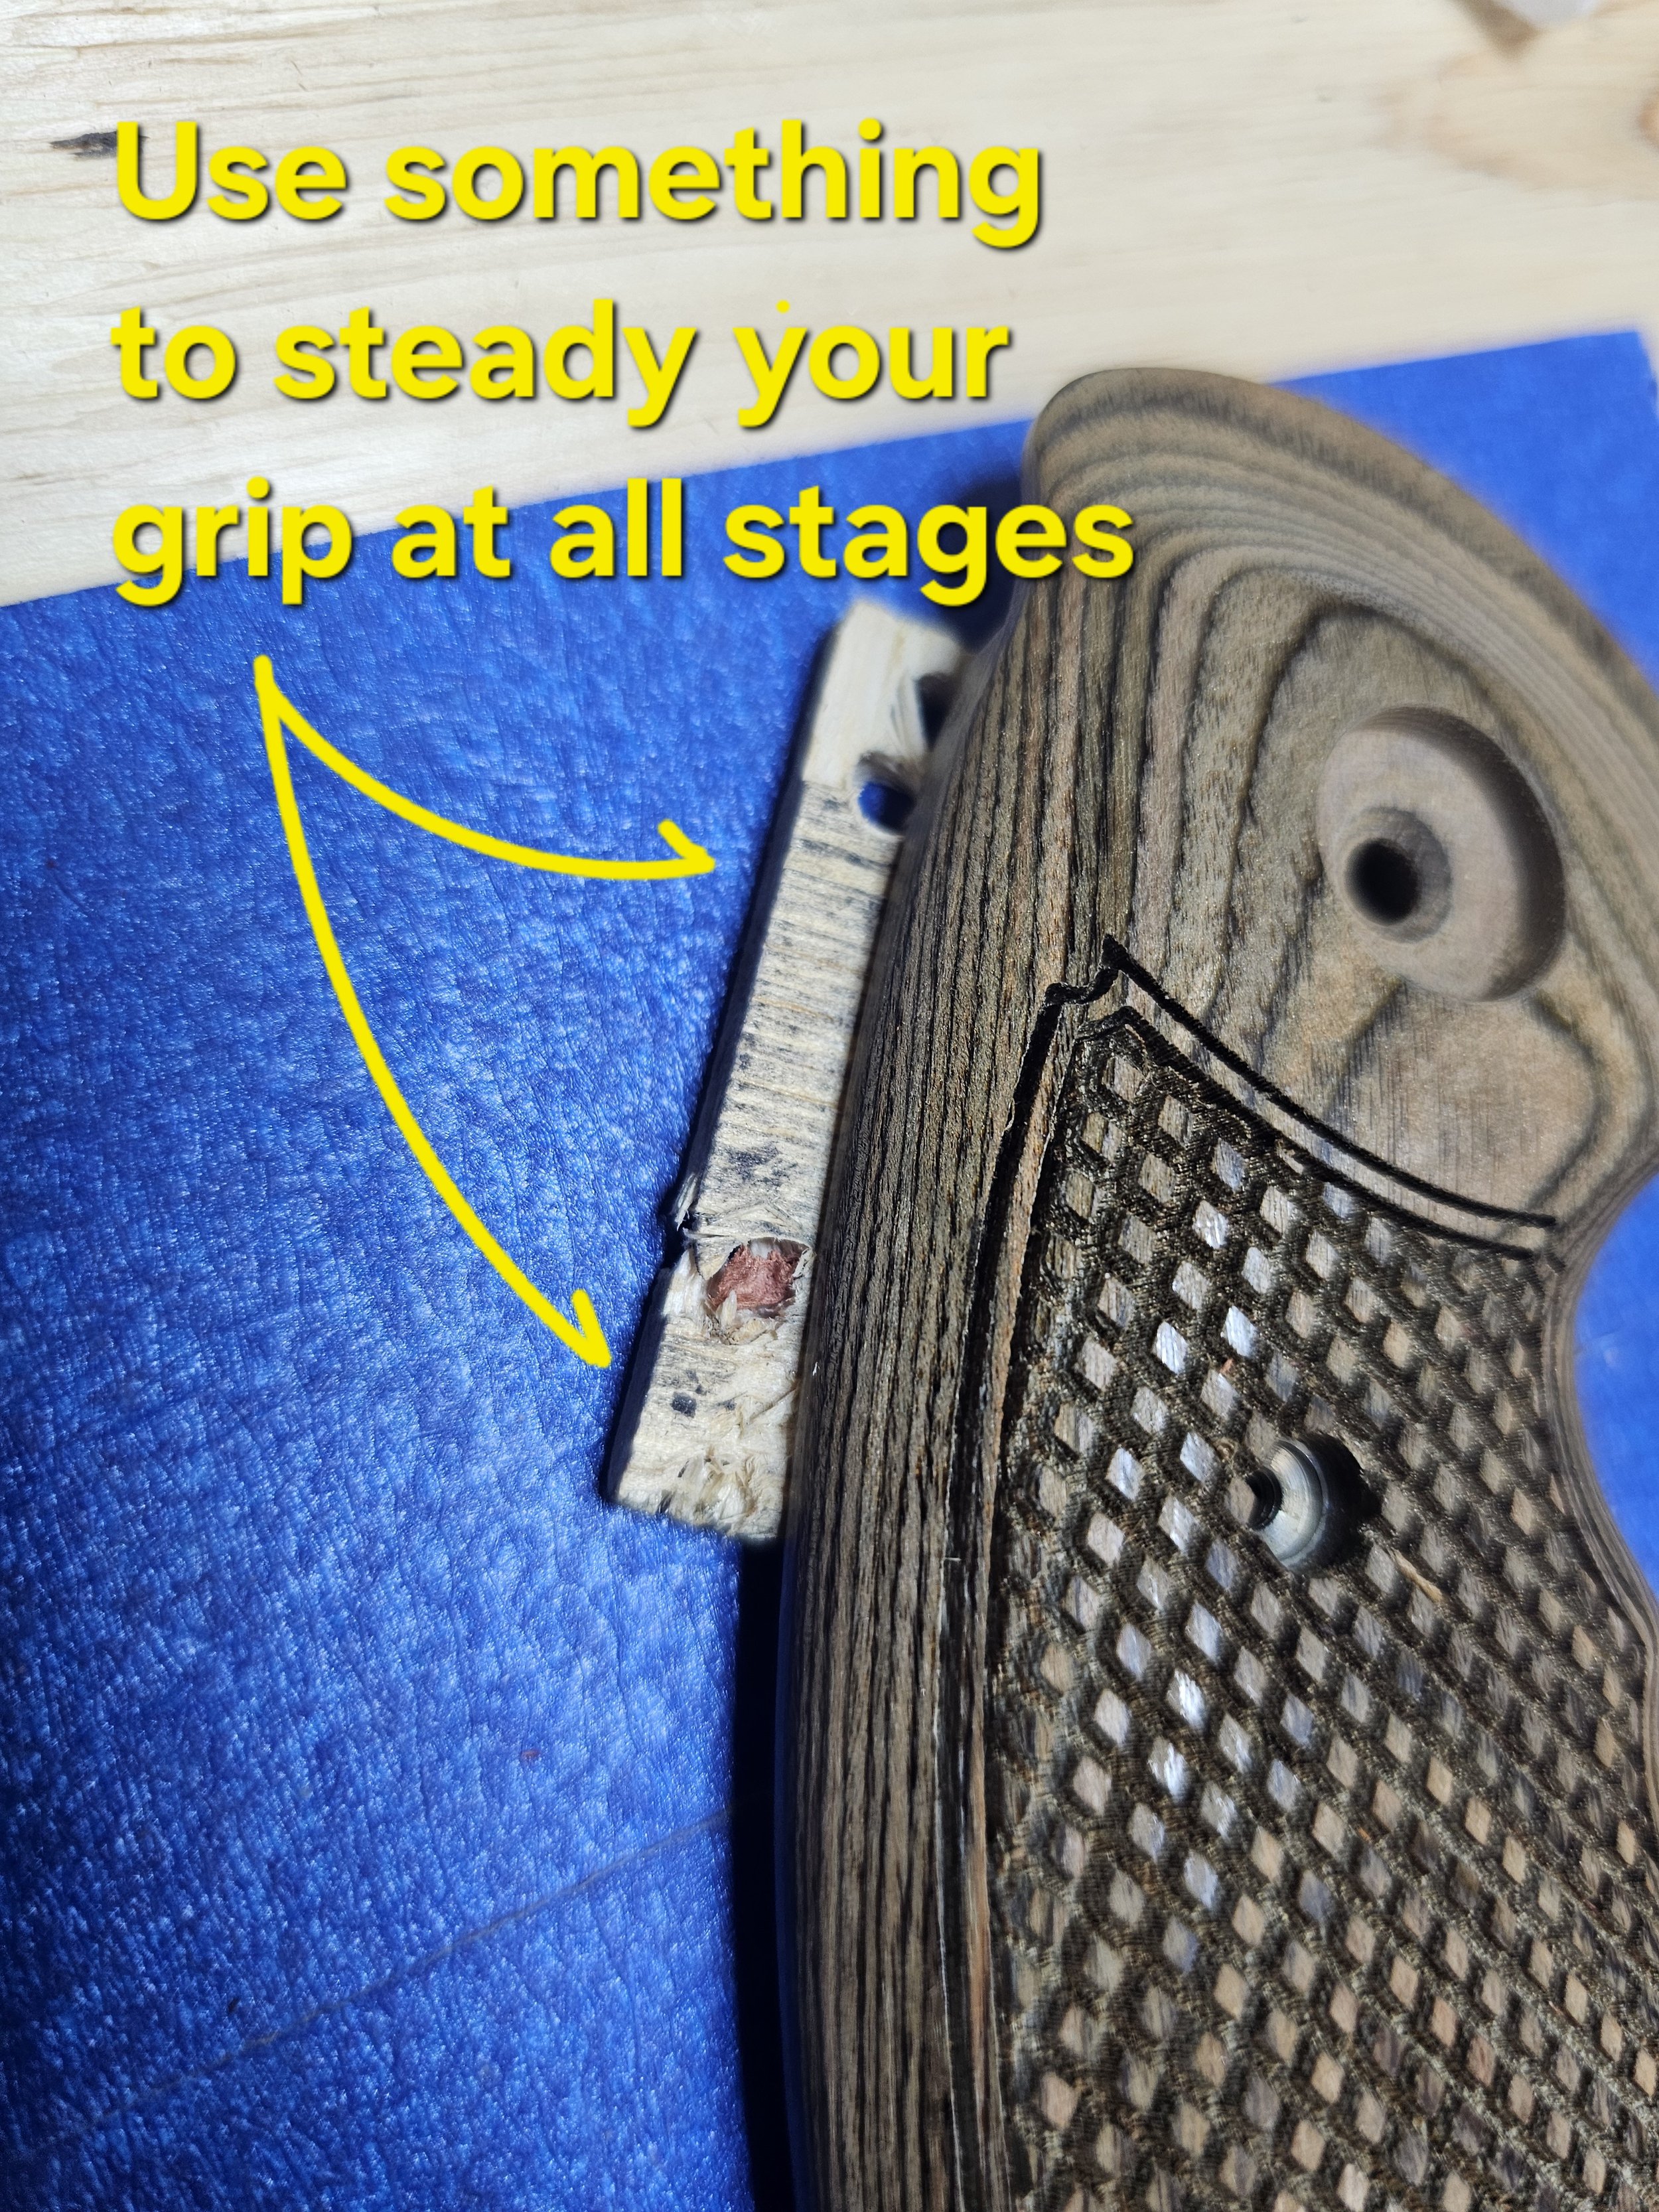
Finding the perfect size may take effort, but it’s worth it. Now drill your medallion hole in the desired space, do not try to get the perfect bottom to top square, just drill the hole deep enough to hold the medallion and adhesive, as long as you don’t drill all the way through you will be fine, the RTV silicone is amazing at filling the space and securing the medallions. There are many ways you can do this, by hand if you’re very skilled with a drill, set it in a vise but make sure you protect the grip! There are many gadgets you can buy to safely clamp items in a vise, however these items are usually too stiff to form into a grip and they usually don’t work. Now I don’t know of all the available ways to clamp an uneven wood piece, however I use this trick for all of our grips and it has worked for many years.
Tip: Get one foot of rubber automotive hose, a minimum of 1” I.D. (inside diameter), cut it in half and slice it (carefully) long ways. Now you have two pieces to loop over a vise jaws to protect the grips)
After Drilling: Pilot Hole and Surface Check
Once your medallion hole is drilled:
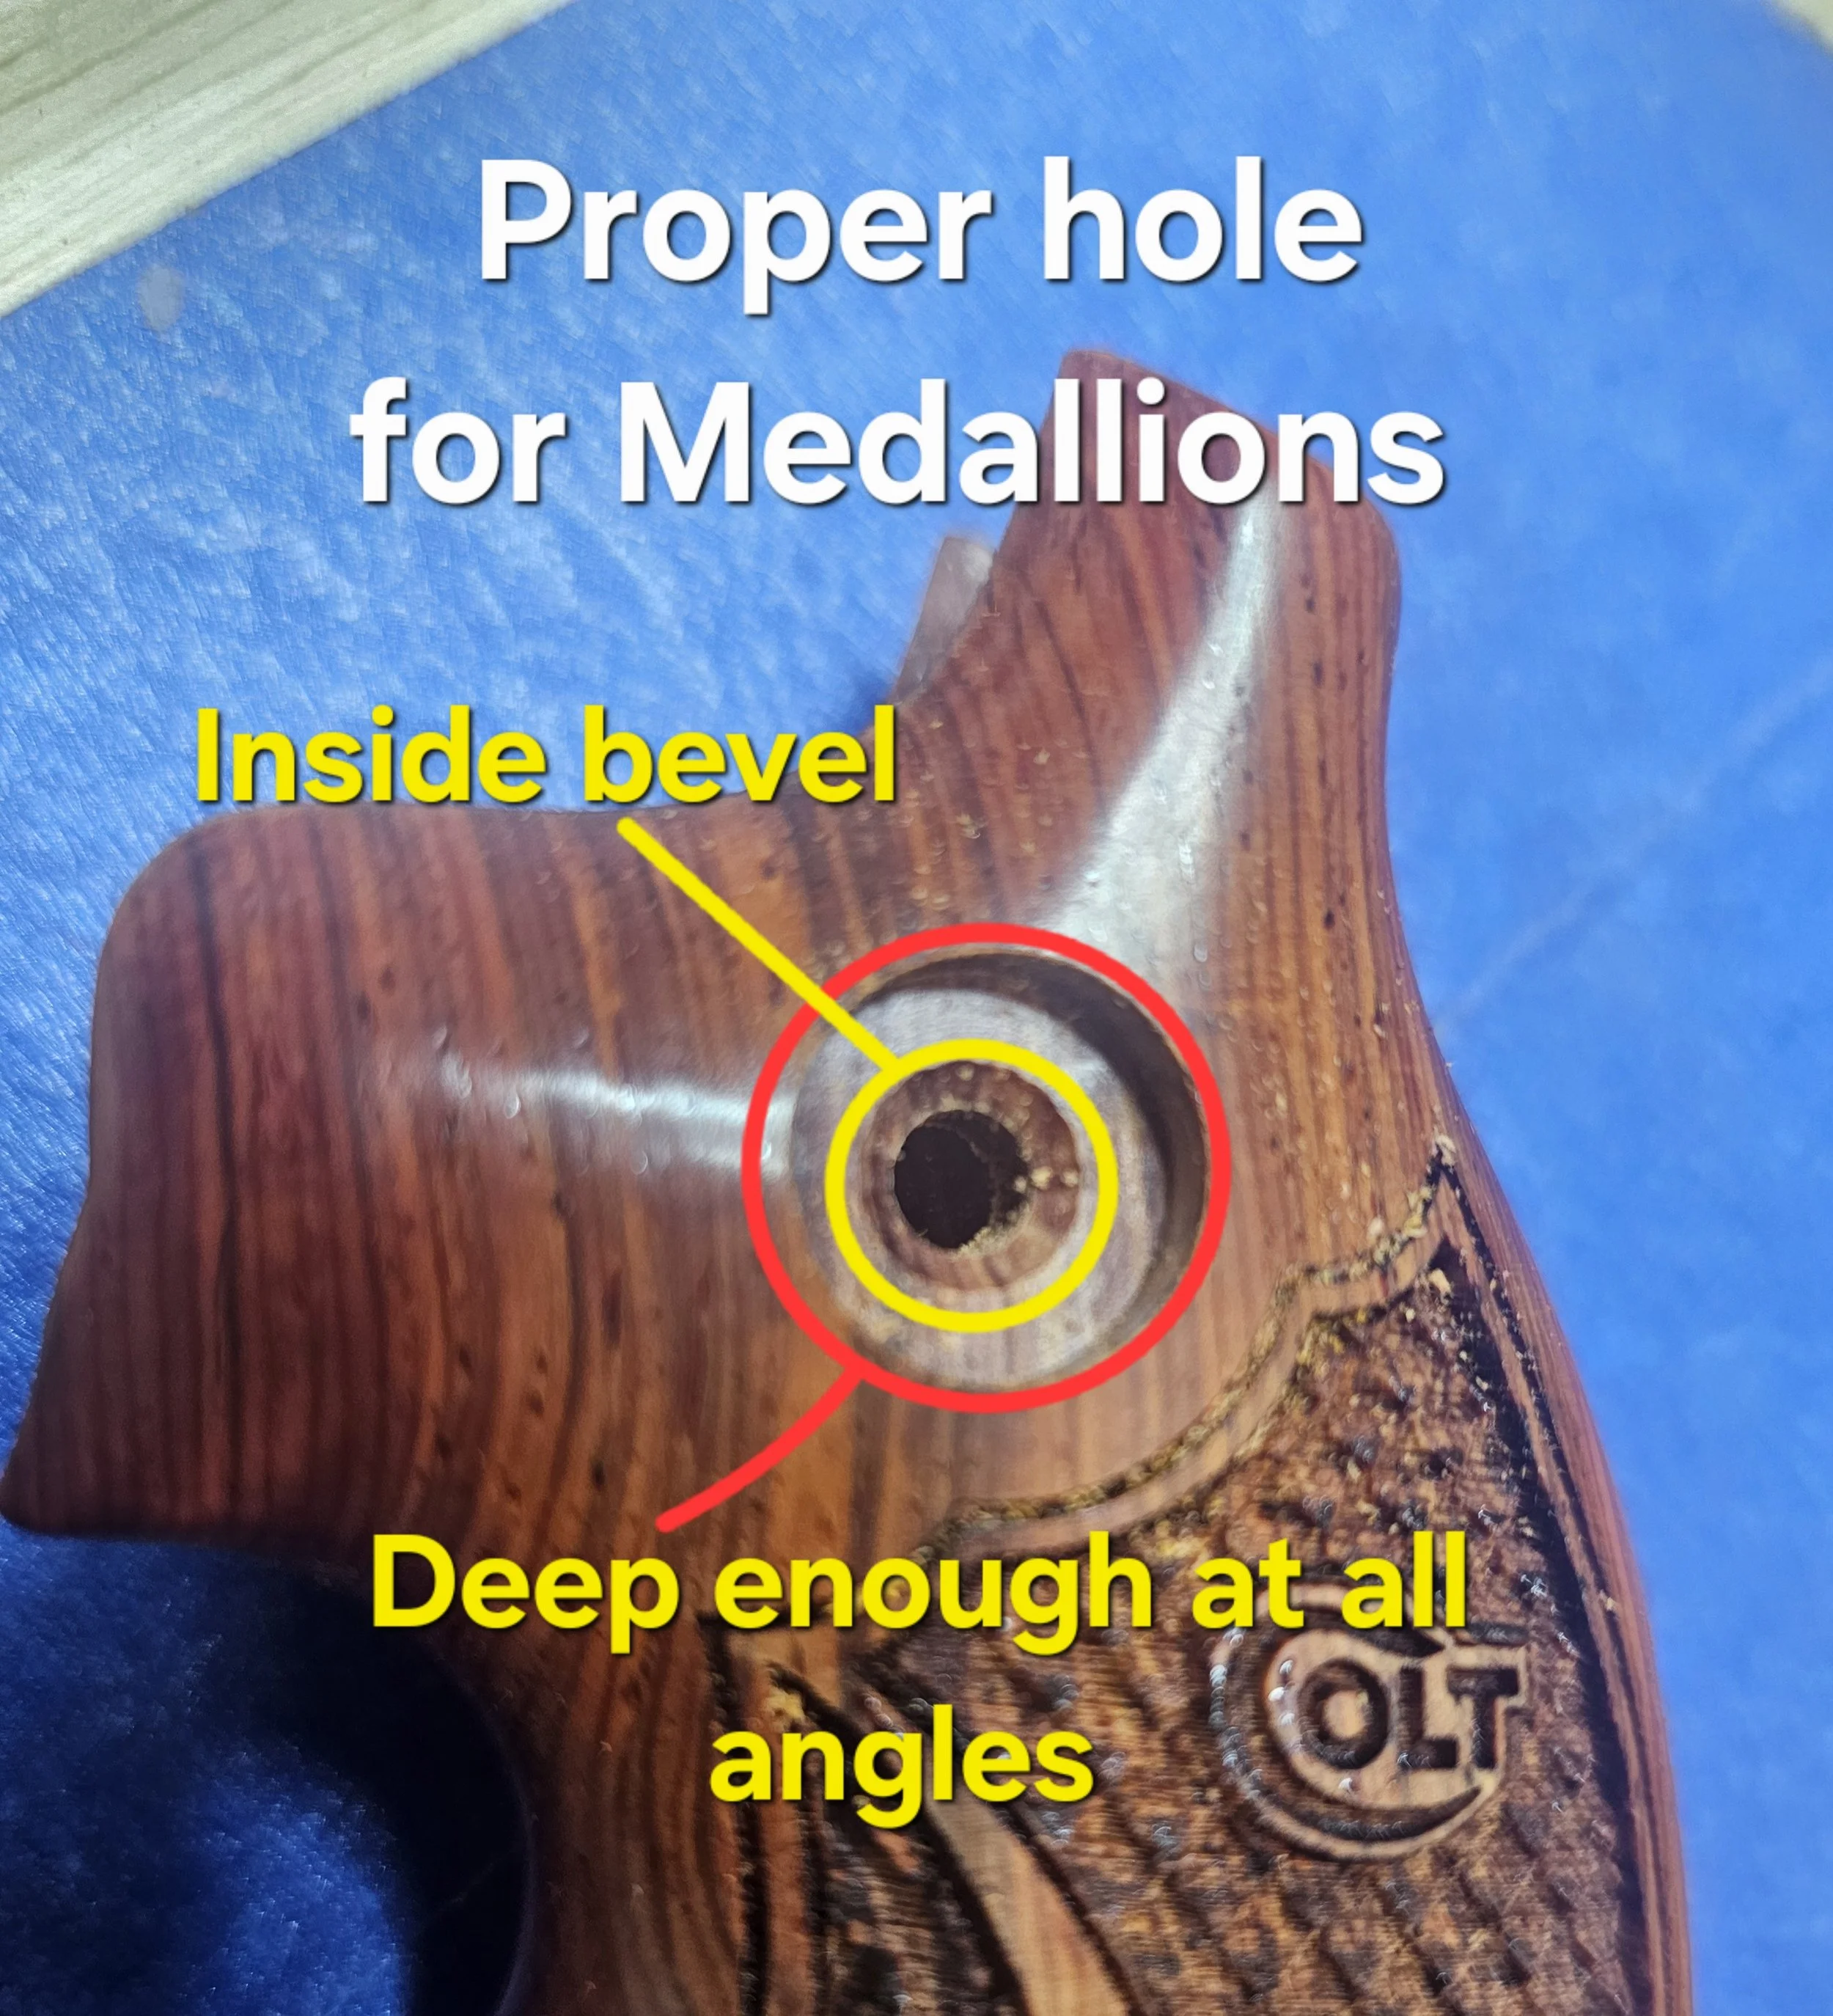
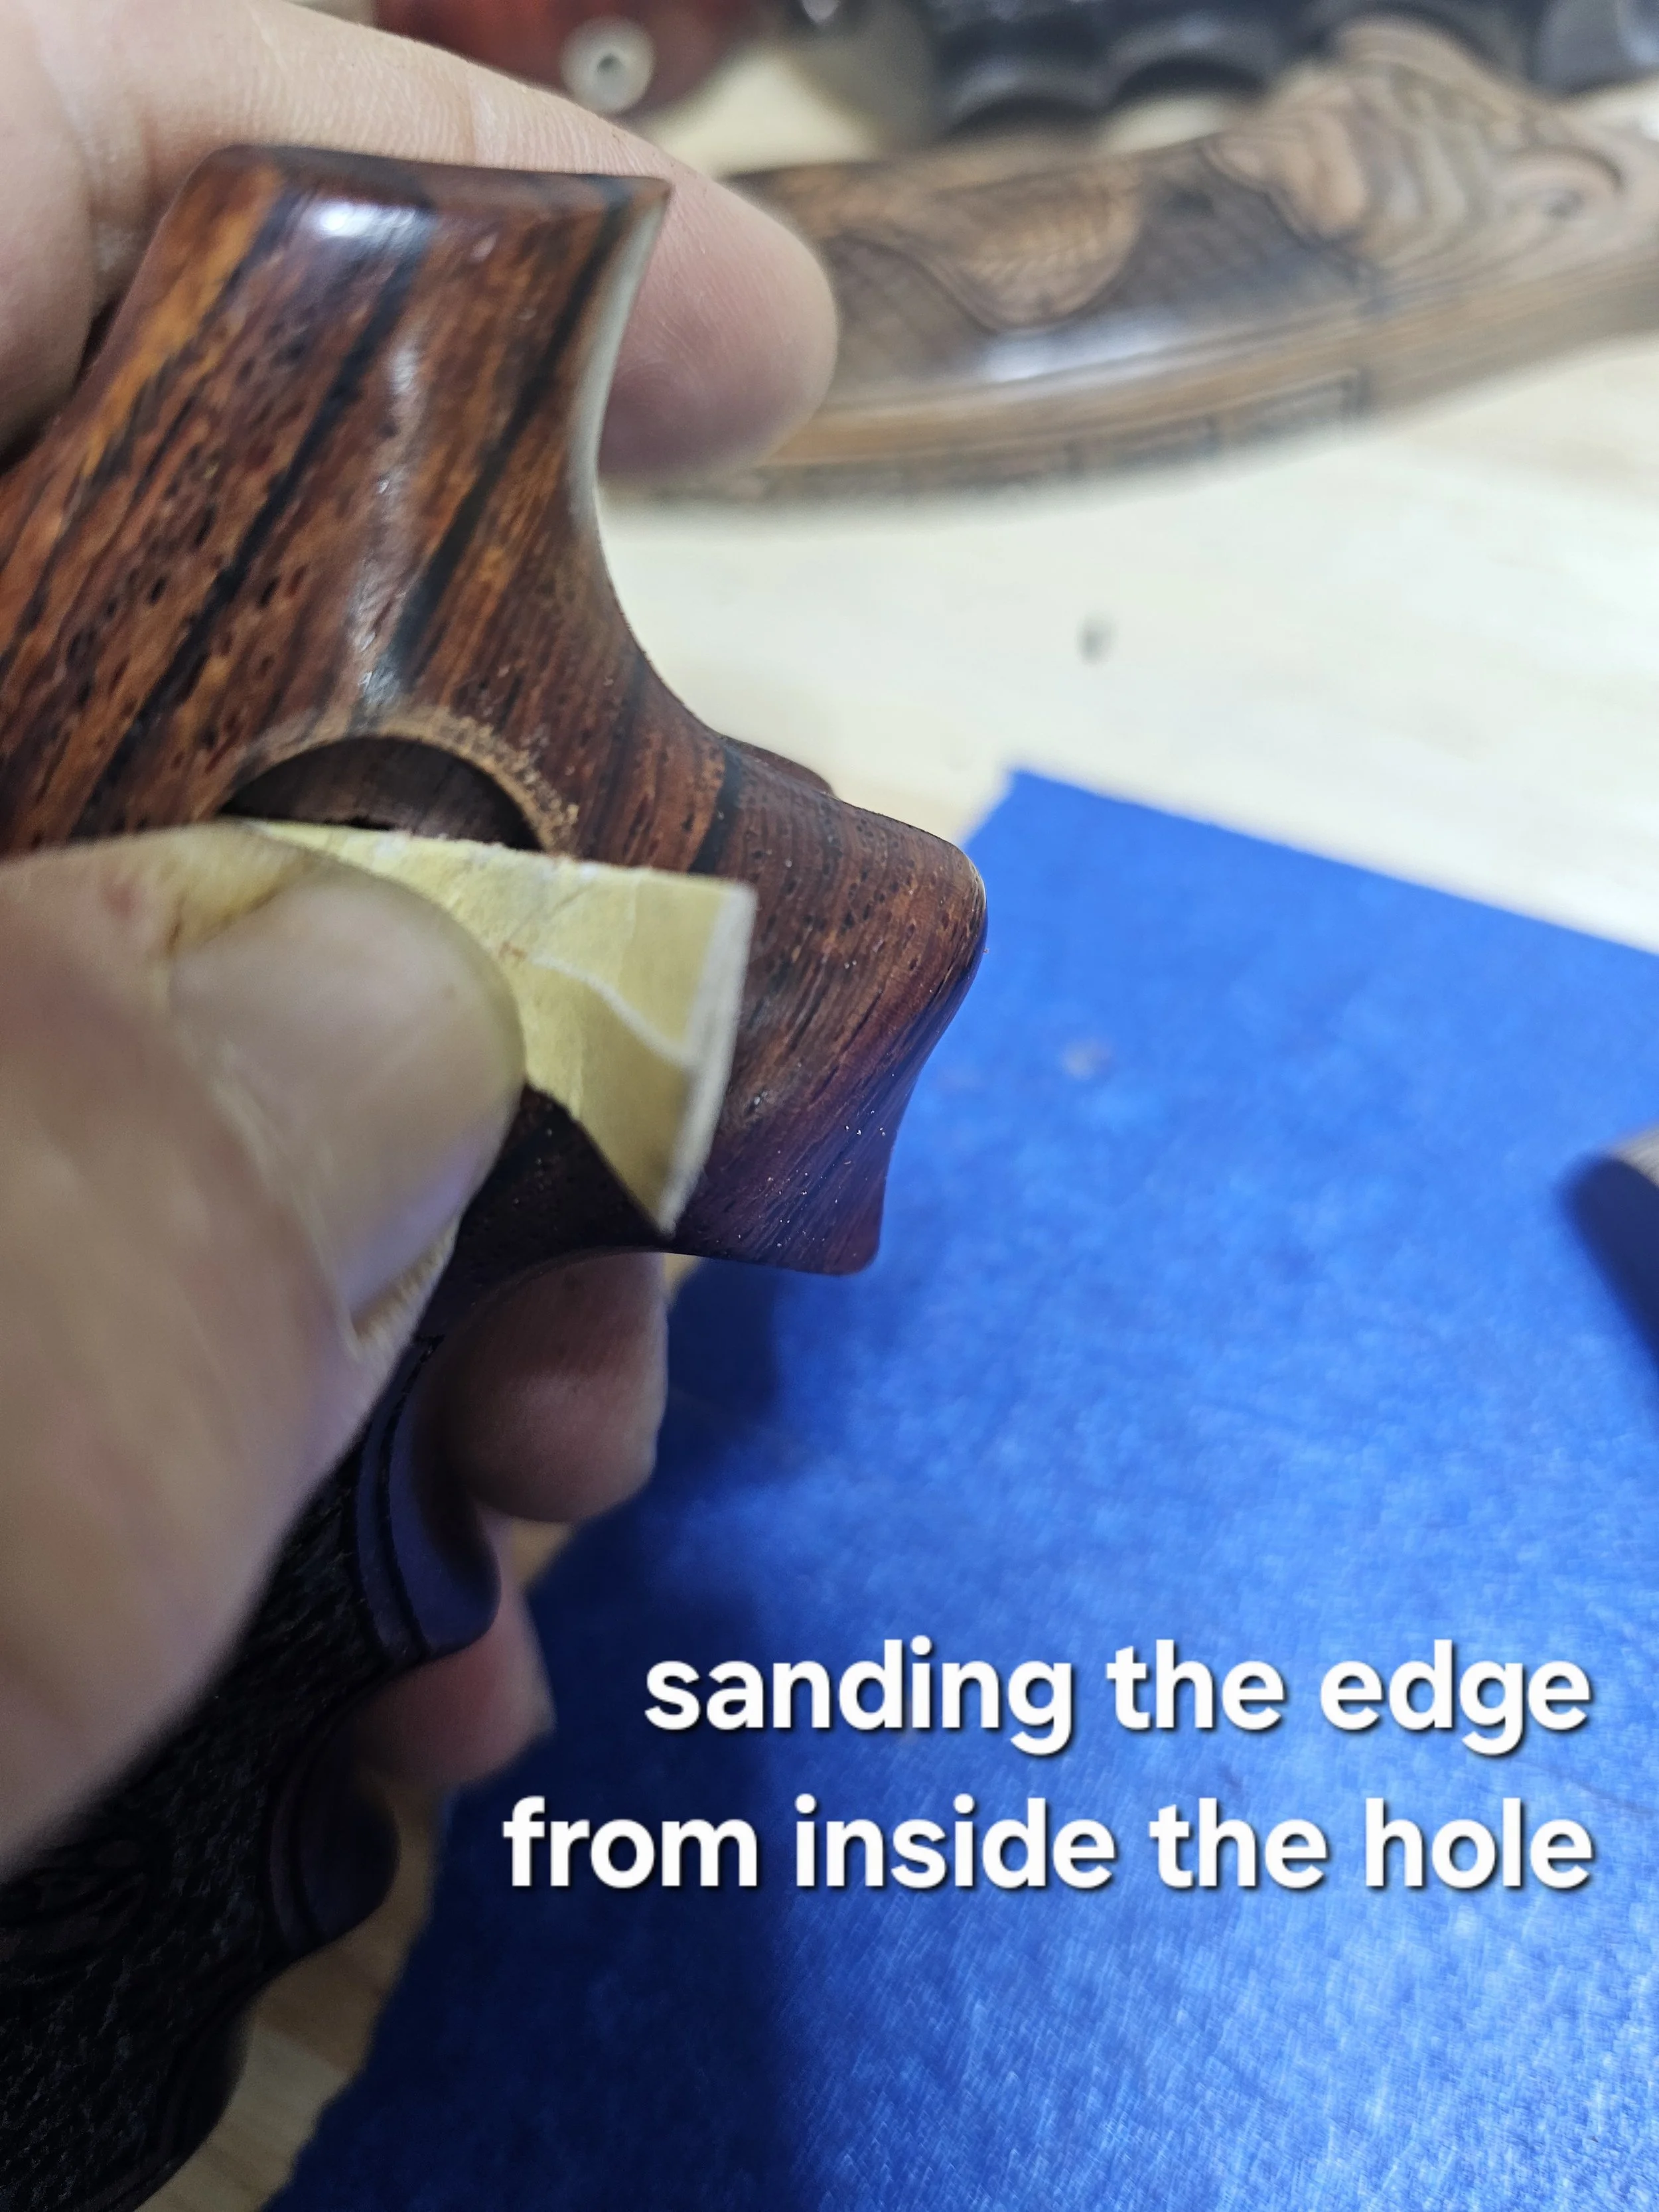
Inspect the hole edge — if there’s a raised ridge, lightly sand it using fine-grit (400-600) sandpaper. Be careful not to scratch the grip surface or widen the hole.
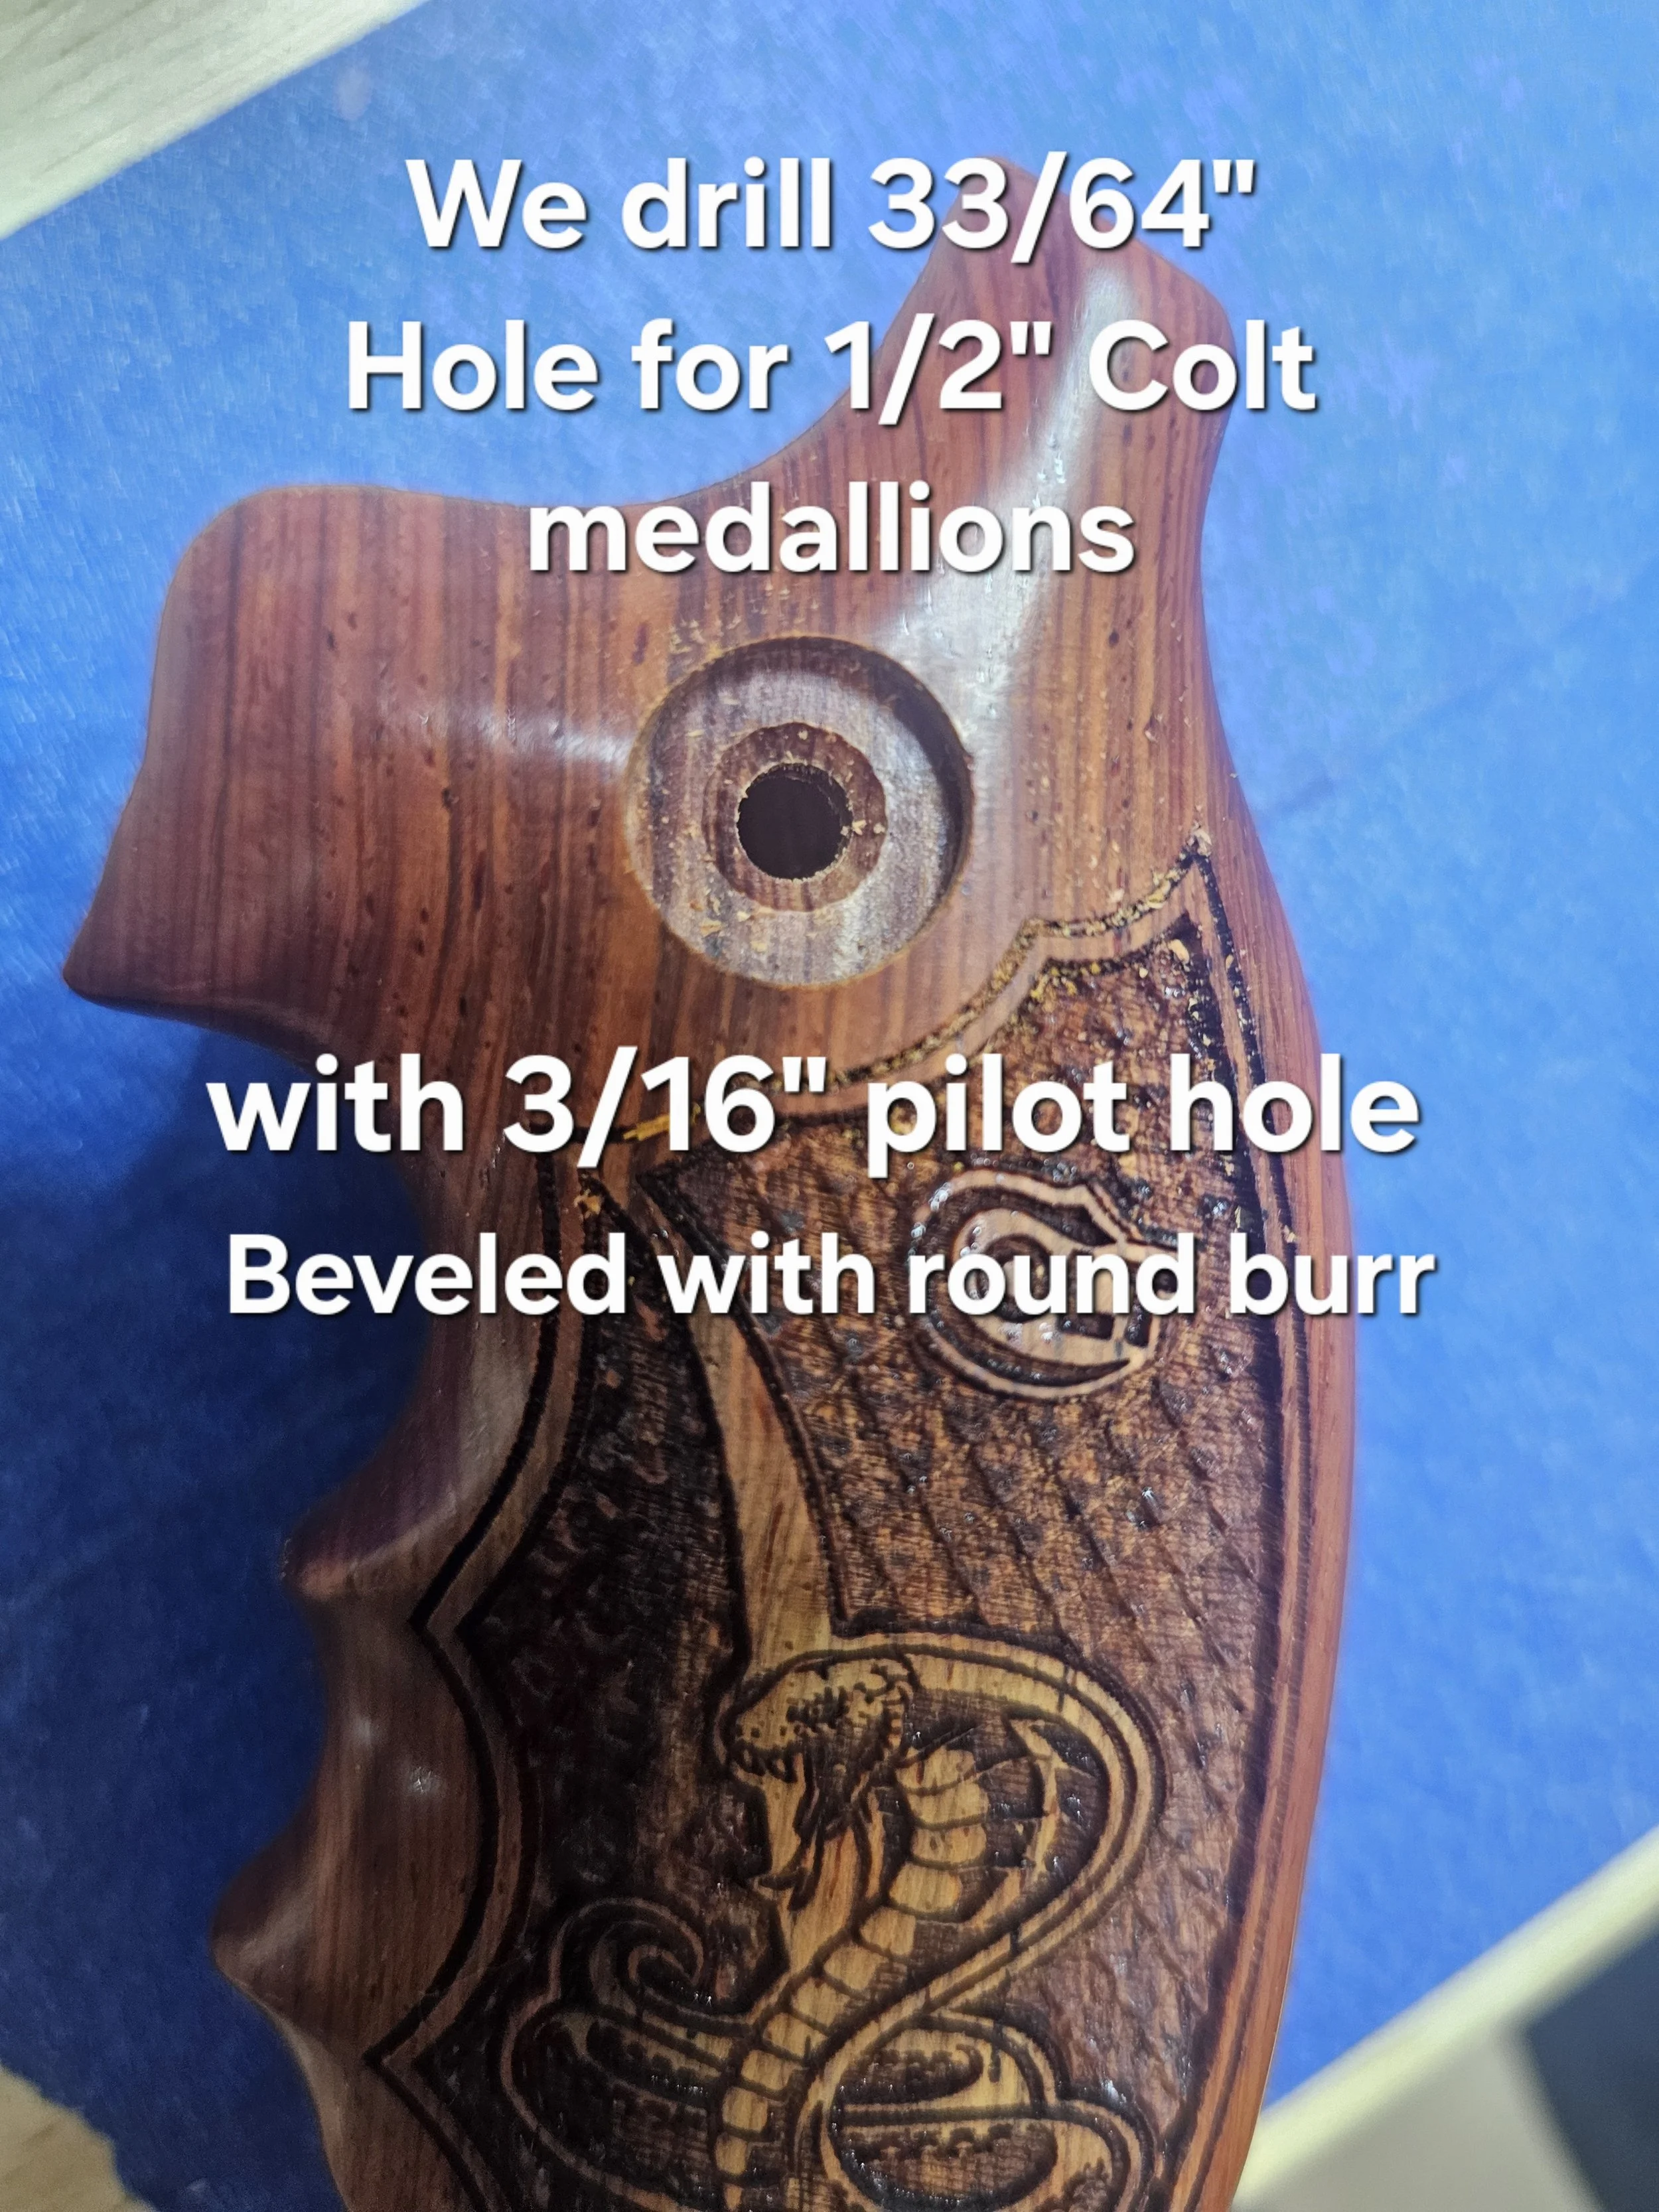
Drill a 3/16" pilot hole directly through the center of the medallion hole. This should always be done after drilling the main hole.
Drill all the way through the grip — unless you're working on a one-piece grip like a Hogue®, in which case drill only through the outer panel you are working on, clean out any wood chips from inside of the grip.
This pilot hole allows excess adhesive to escape and ensures even seating during installation.
Tip: If you have a taper or countersink bit, bevel the inside edge of the pilot hole. This helps relieve adhesive pressure and improves the medallion’s fit — especially on curved grips.
Step 2.5: We Need Adhesive!
With everything prepped, it’s time to talk glue.
We strongly recommend:
Permatex® Automotive Clear Silicone RTV #80050
This is the adhesive we use in our shop when needed. It’s reliable, flexible, easy to work with, and available at most auto parts, hardware, and home improvement stores. This is our go-to adhesive and is excellent for medallion adhesive!
Avoid super glue, epoxies, or fast-setting adhesives. These cure too quickly, offer no working time, and dry too rigid — which may cause cracking over time and lead to the medallion popping out. Flexibility is key.
Step Three: Installing Your Medallions!
You’ll need a few wooden coffee stirrers — they’re perfect for spreading silicone. (Plastic straws won’t work.) Also have paper towels, painter’s tape, and your adhesive ready.
Prepare 2–3 pieces of painter’s tape, about 3" long each, and stick them to your bench edge for easy access.
Filling the Hole
Double-check the medallion hole for any raised edge. Lightly sand if needed.
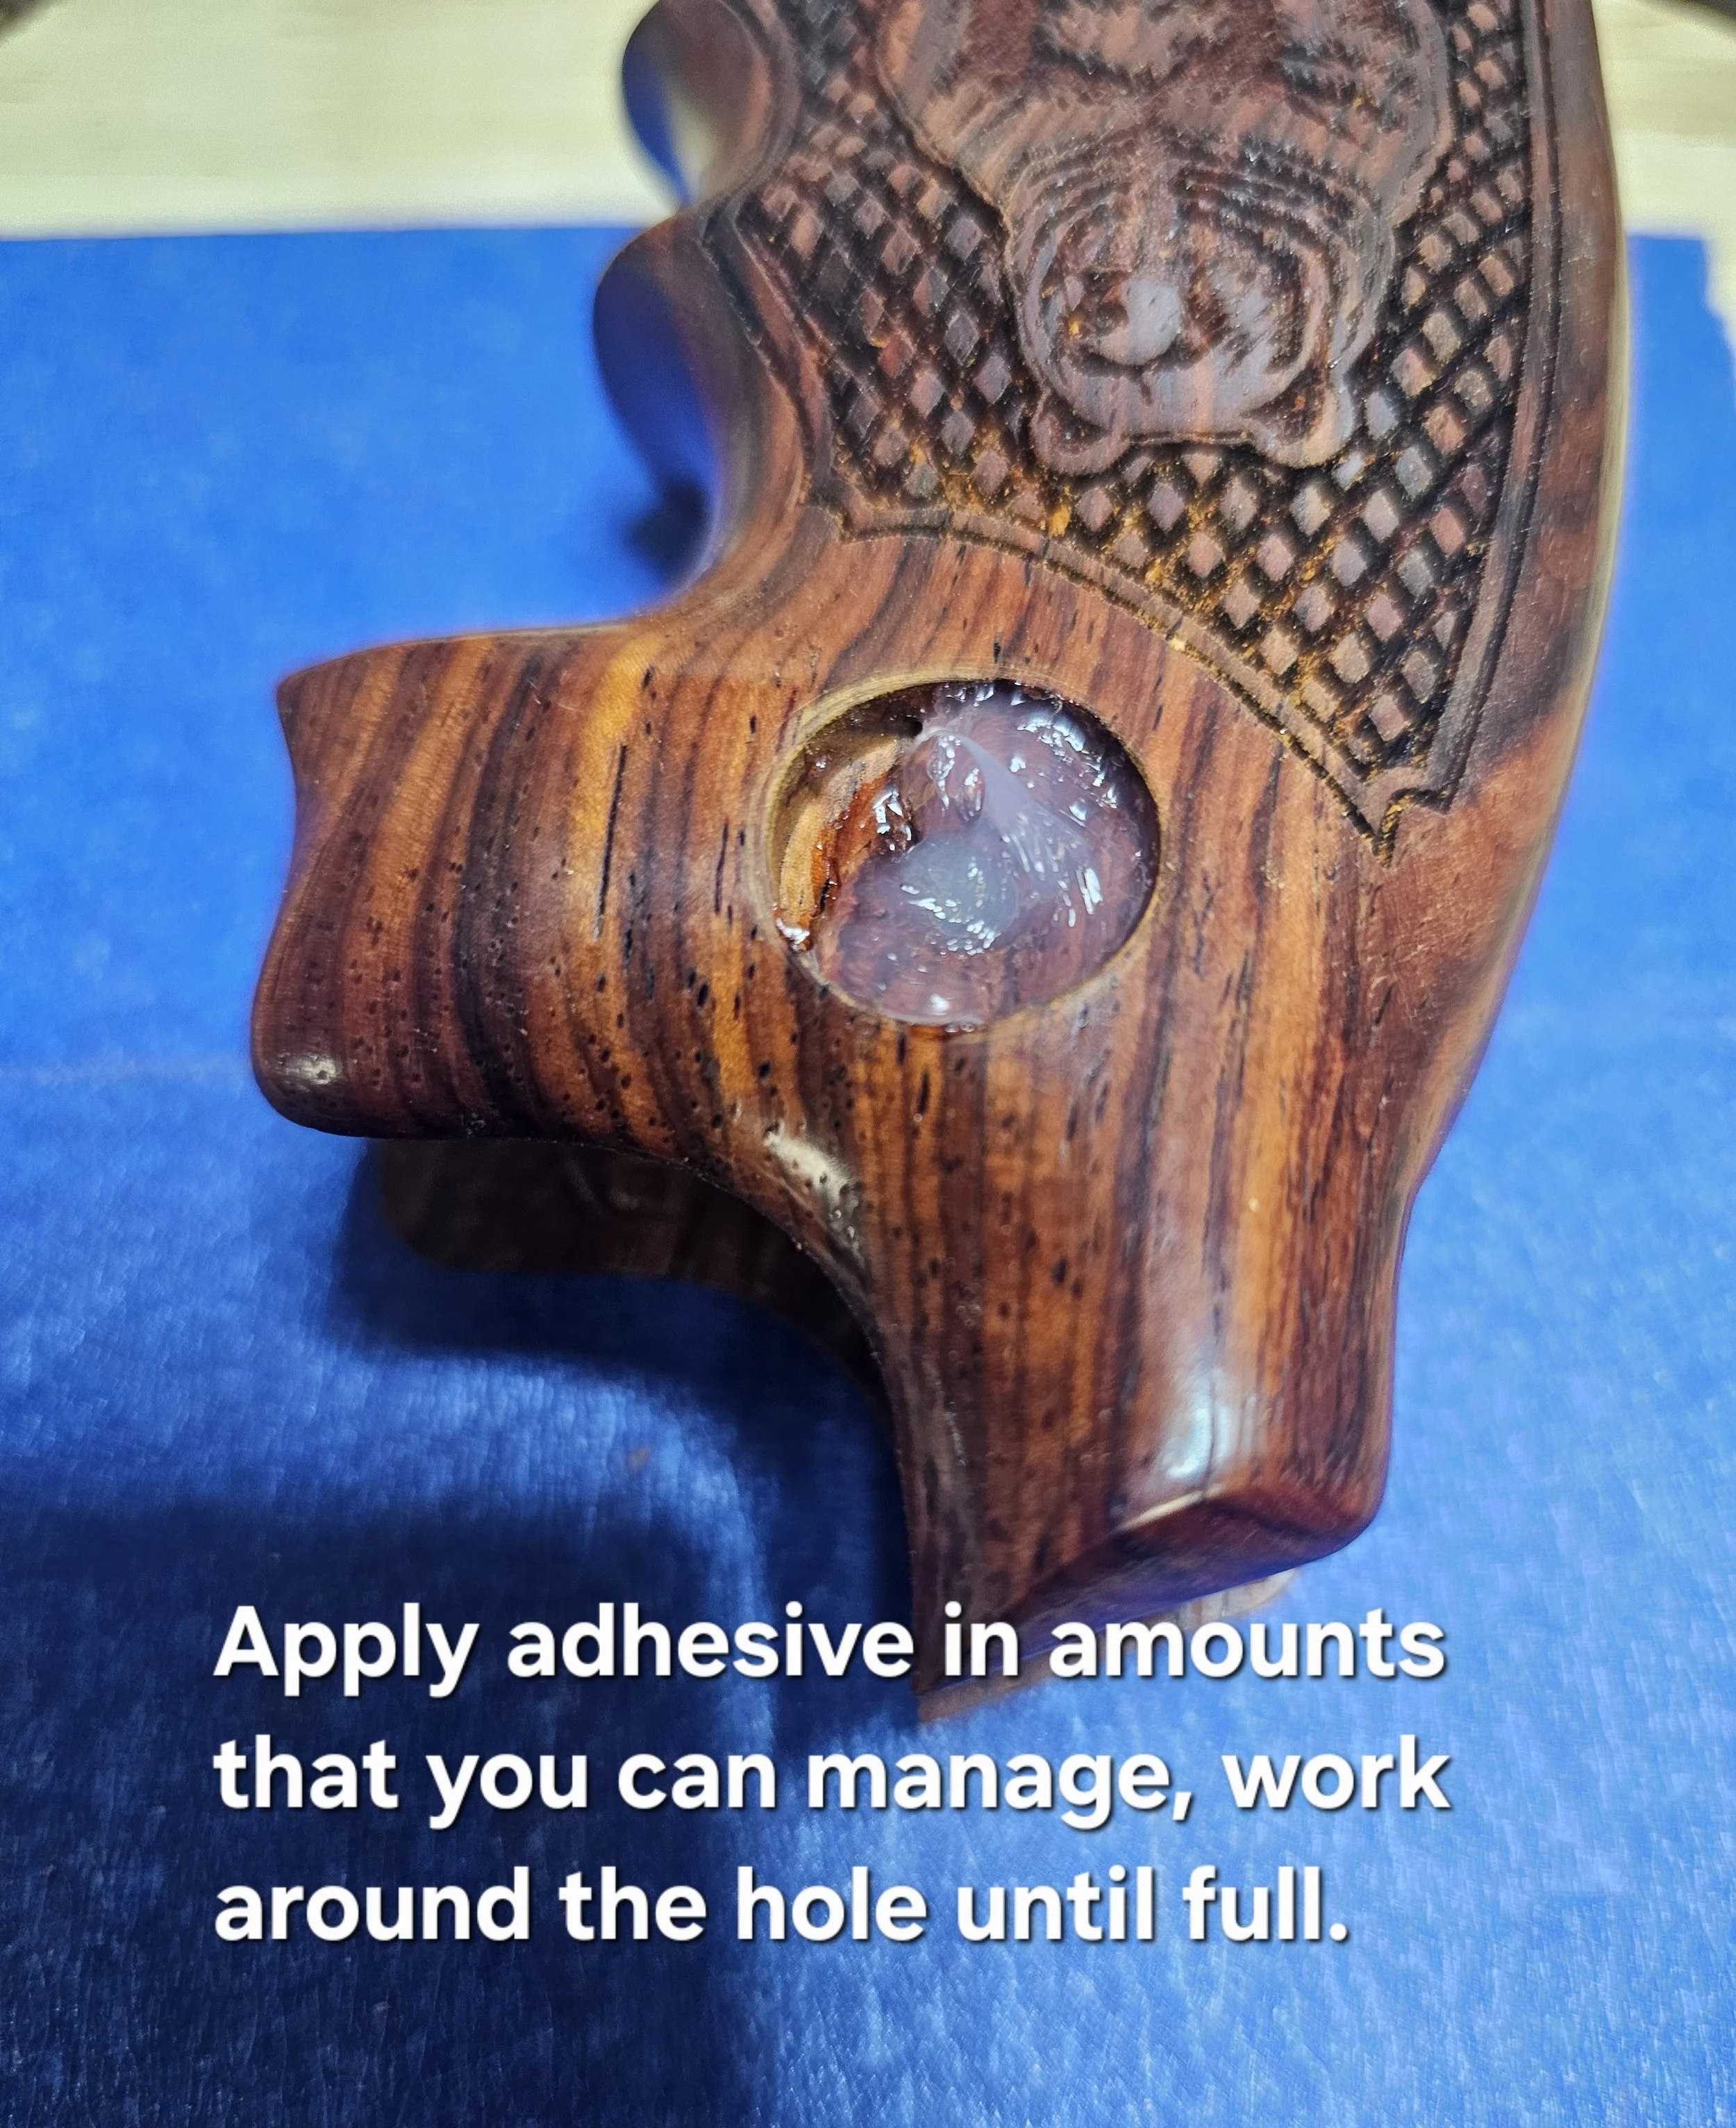
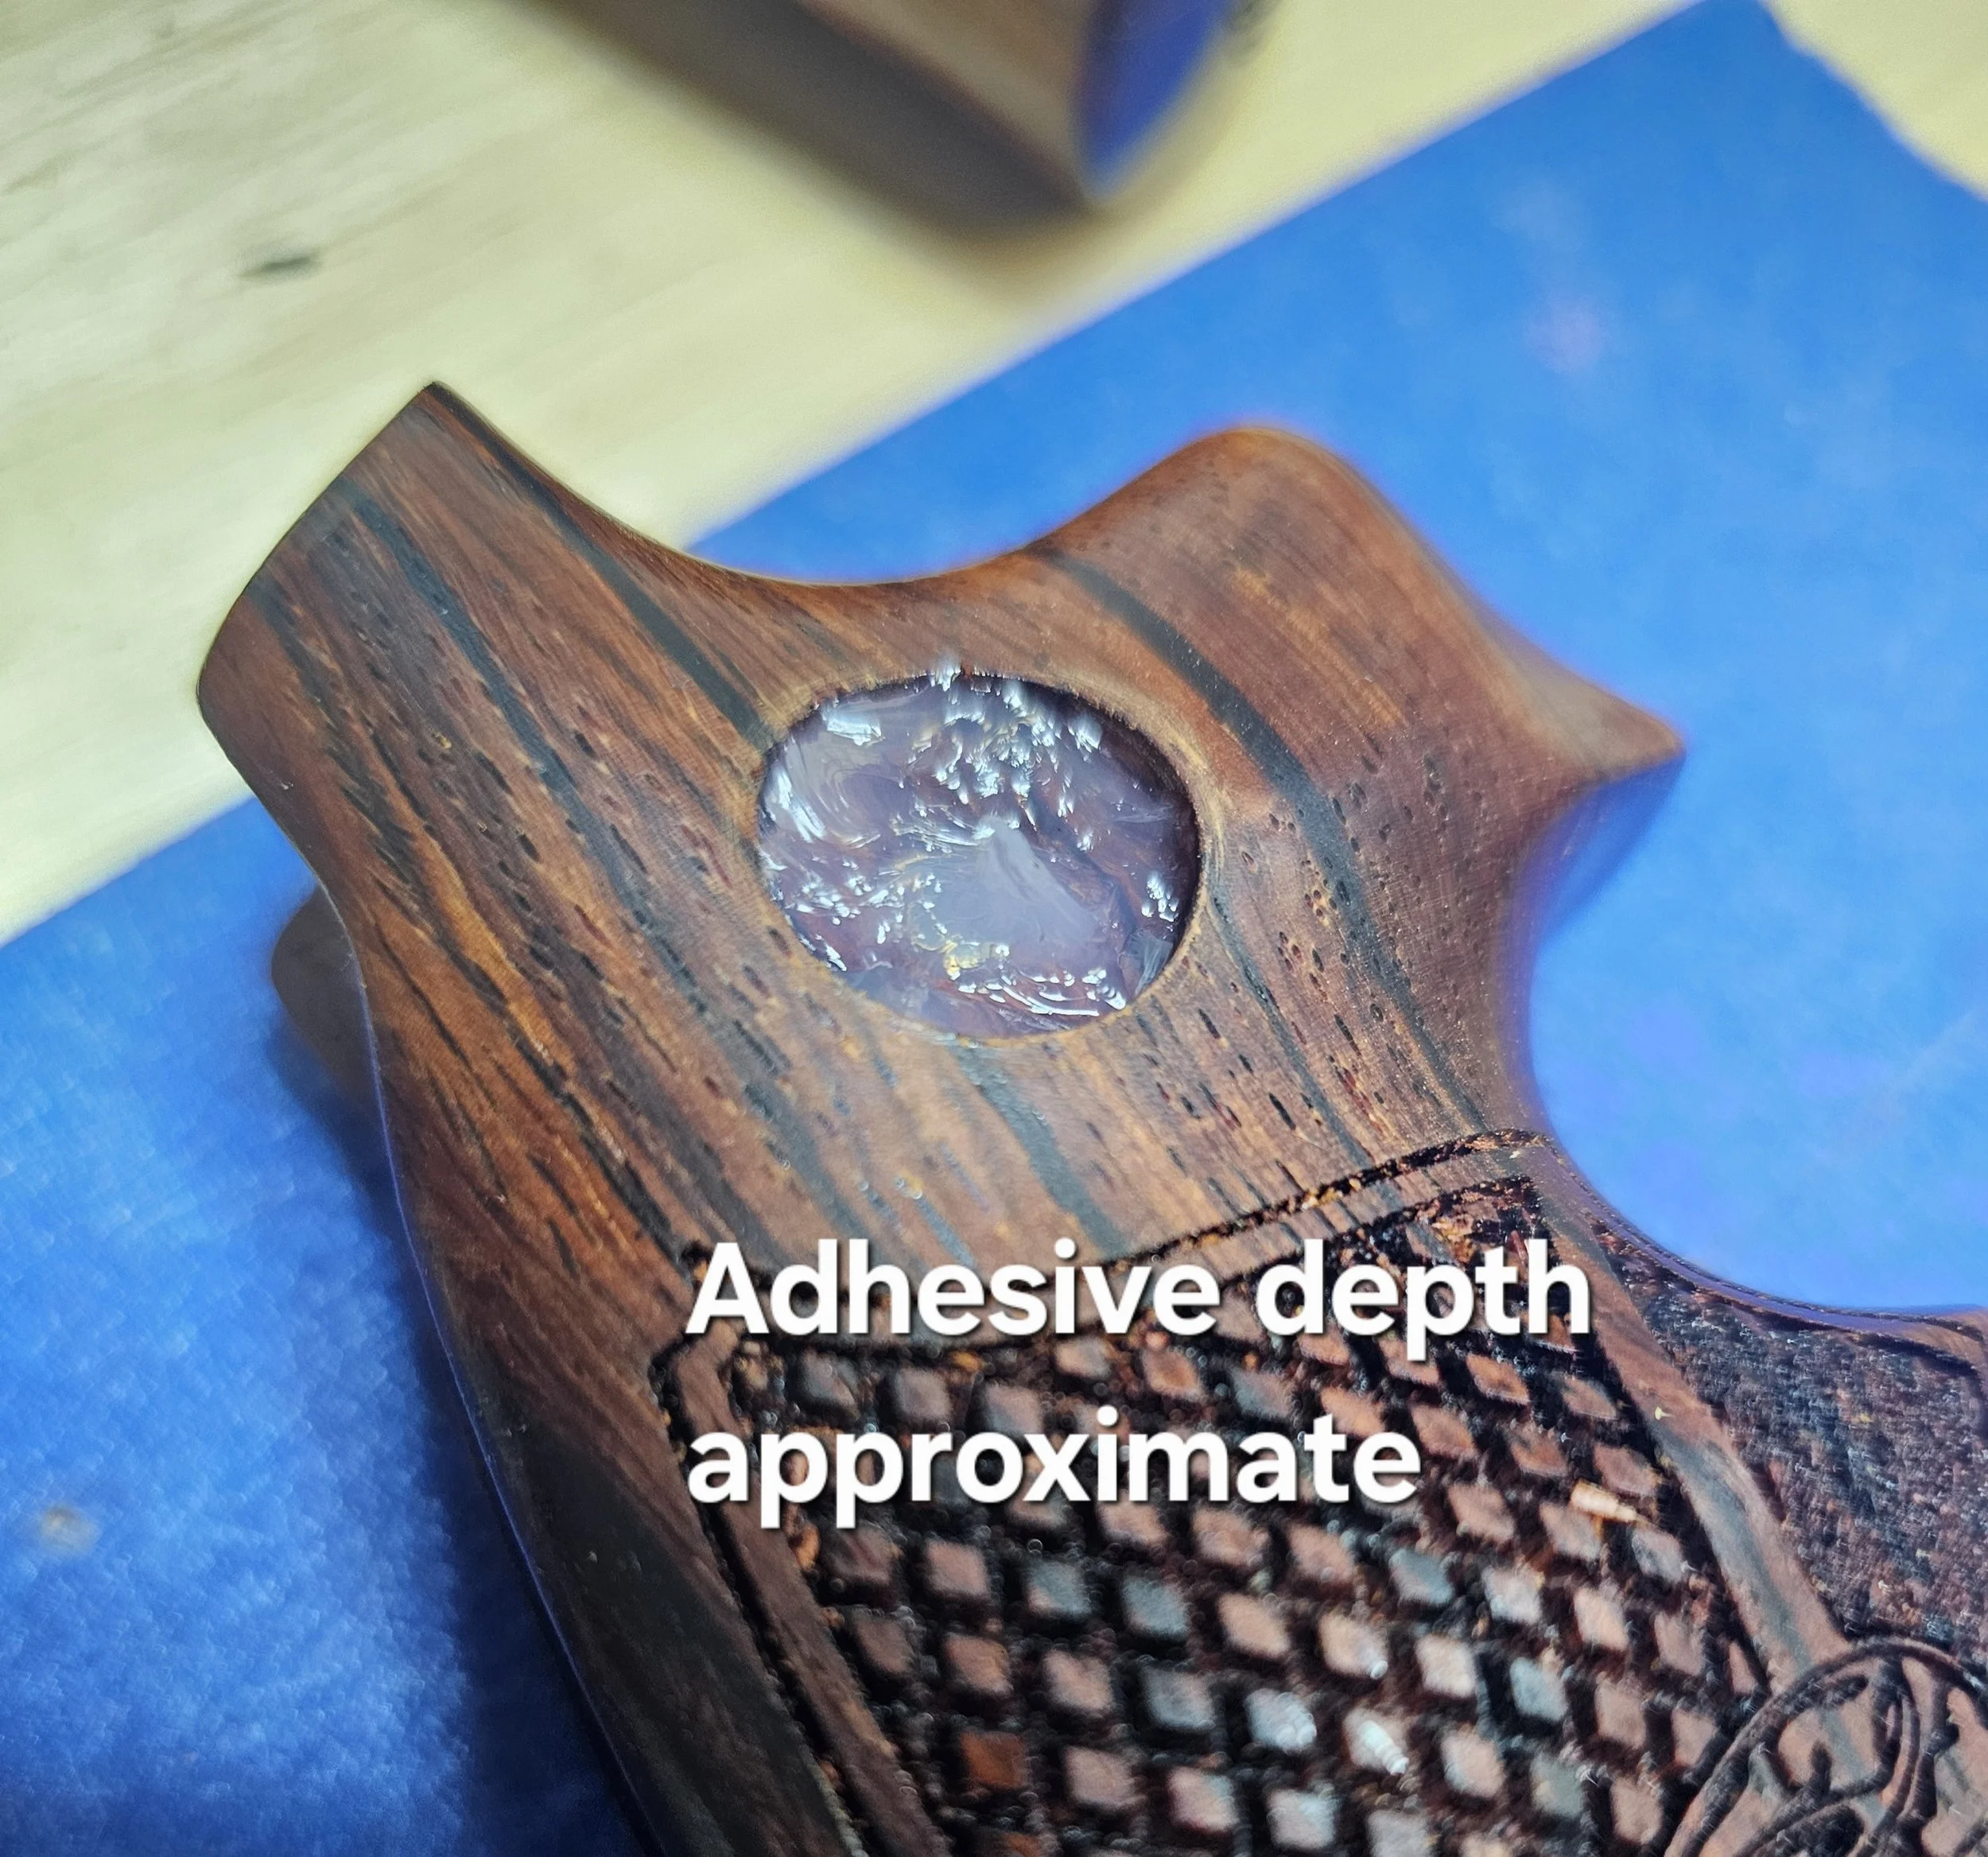
Squeeze out a small bead of silicone onto the end of a coffee stirrer.
Push the adhesive into the medallion hole, pressing it toward the edges.
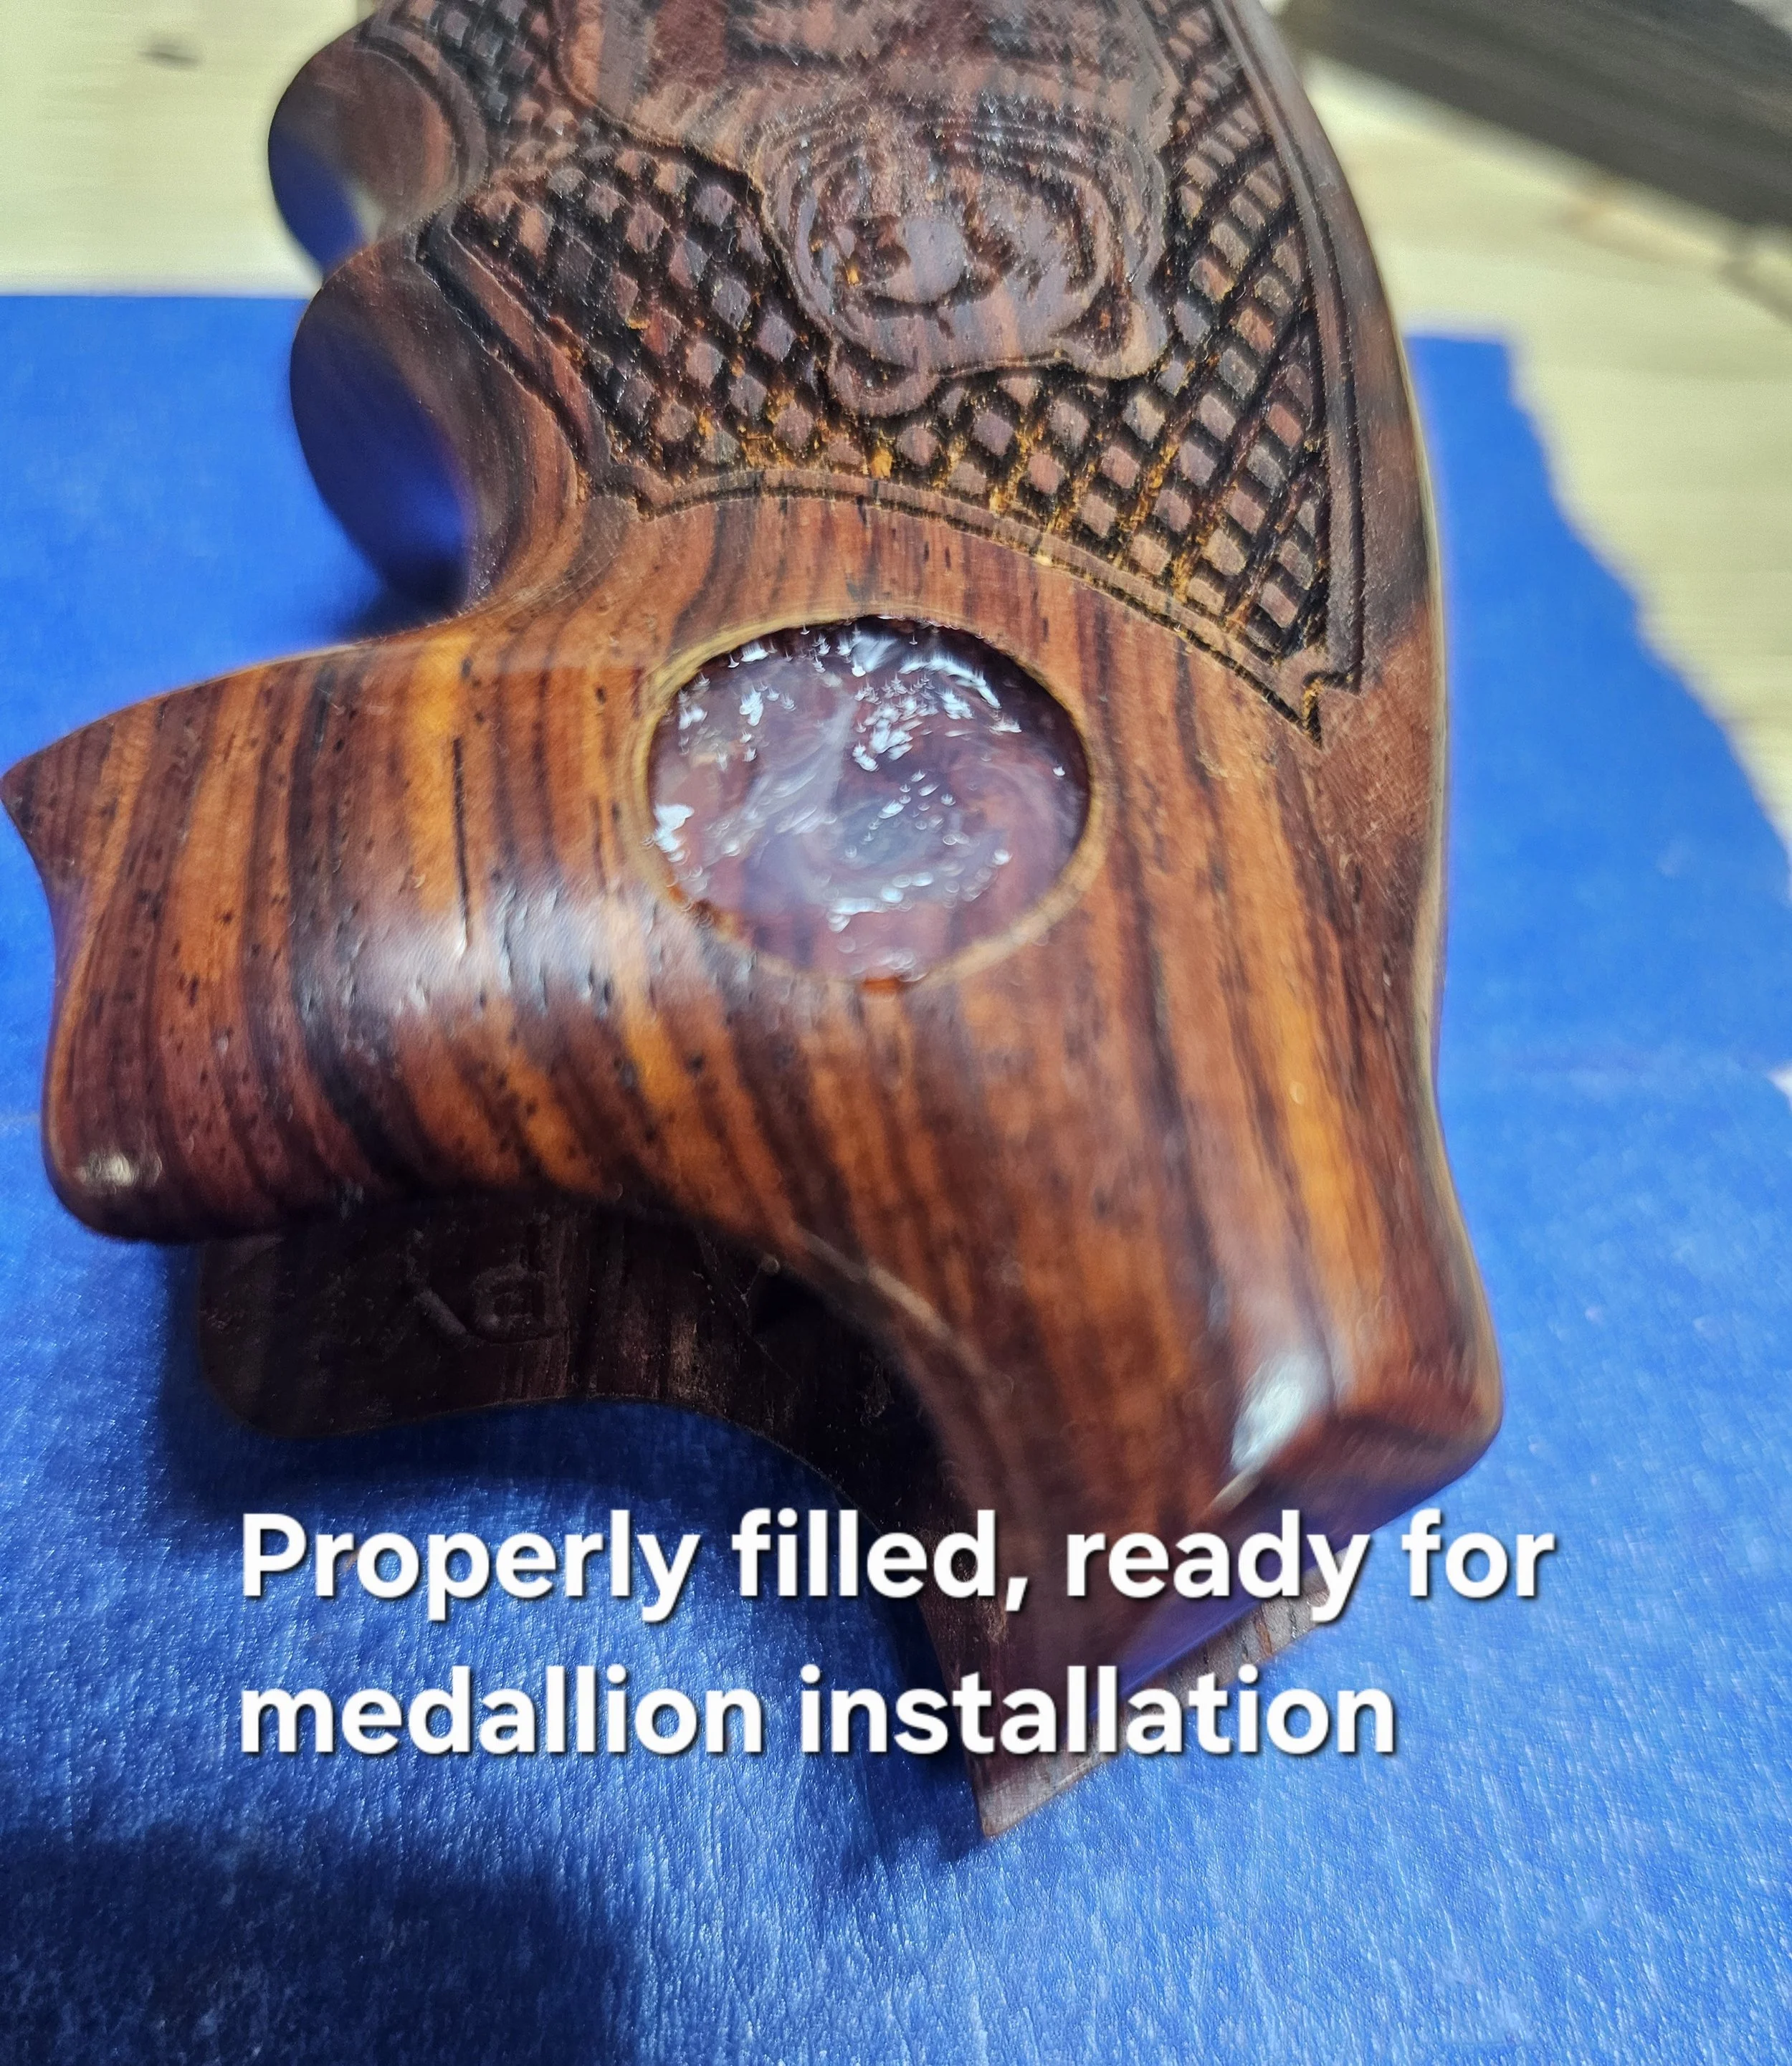
Fill the hole slightly below flush — about halfway up the medallion’s thickness.
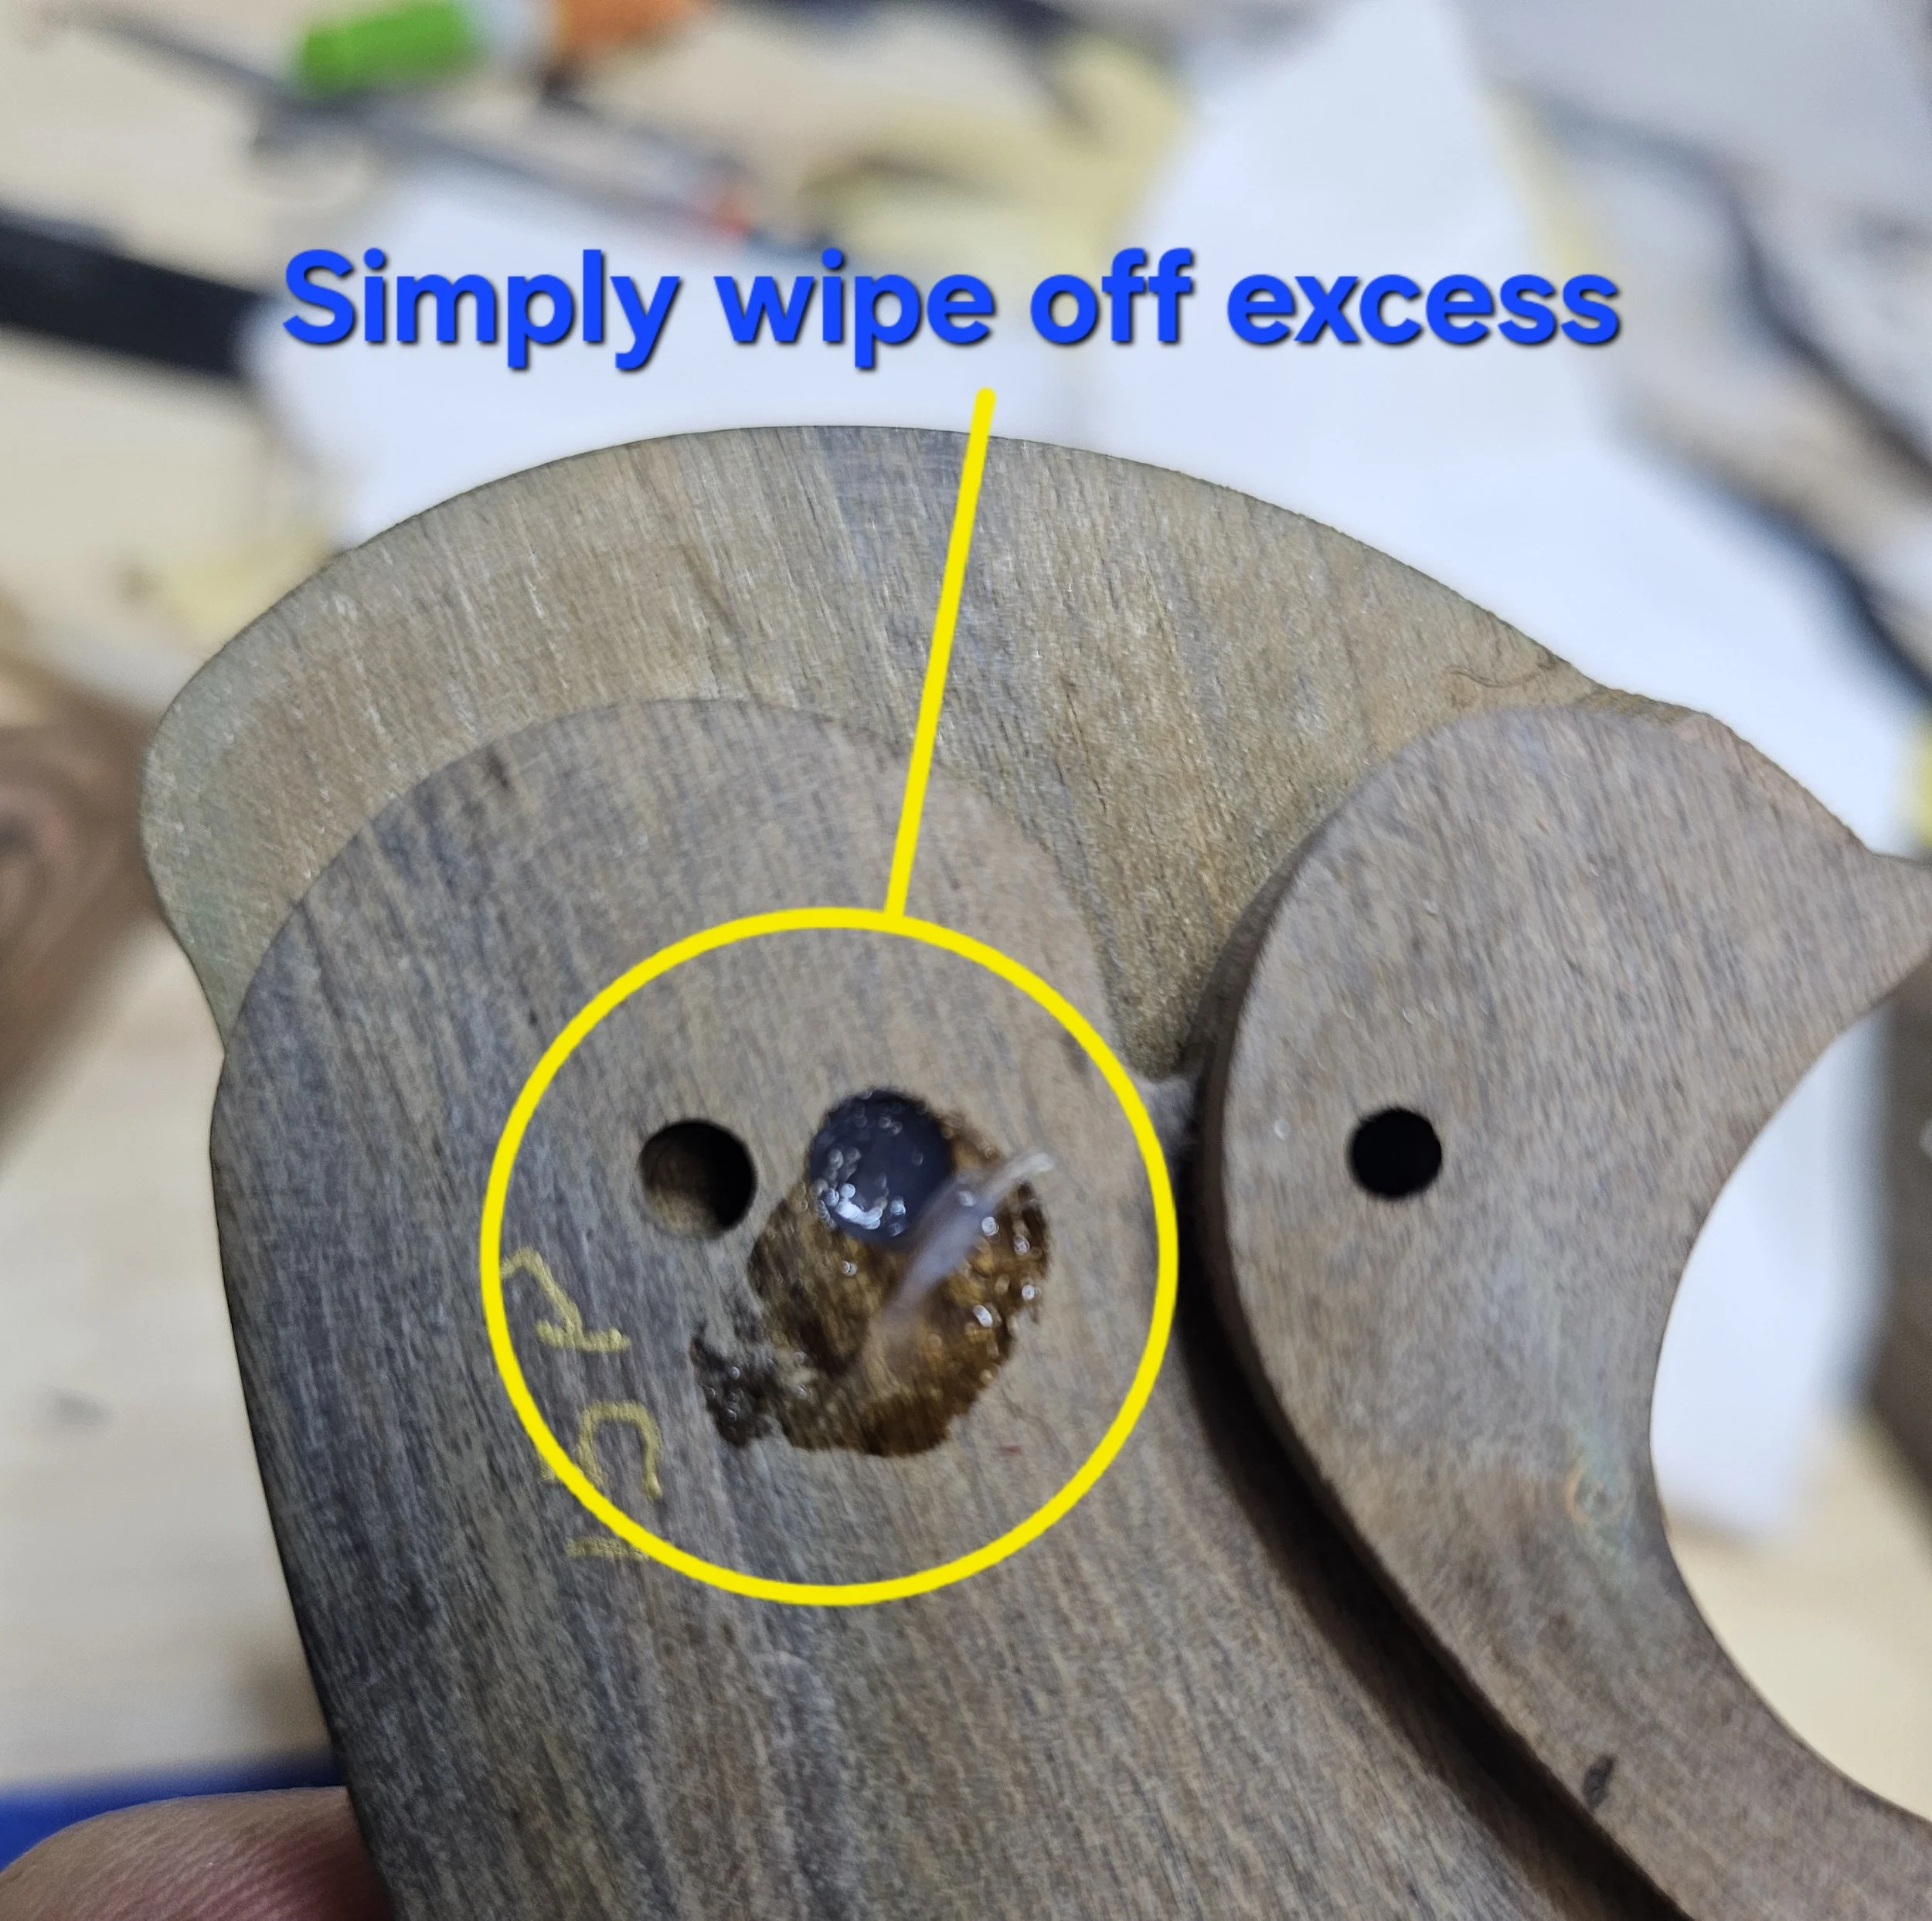
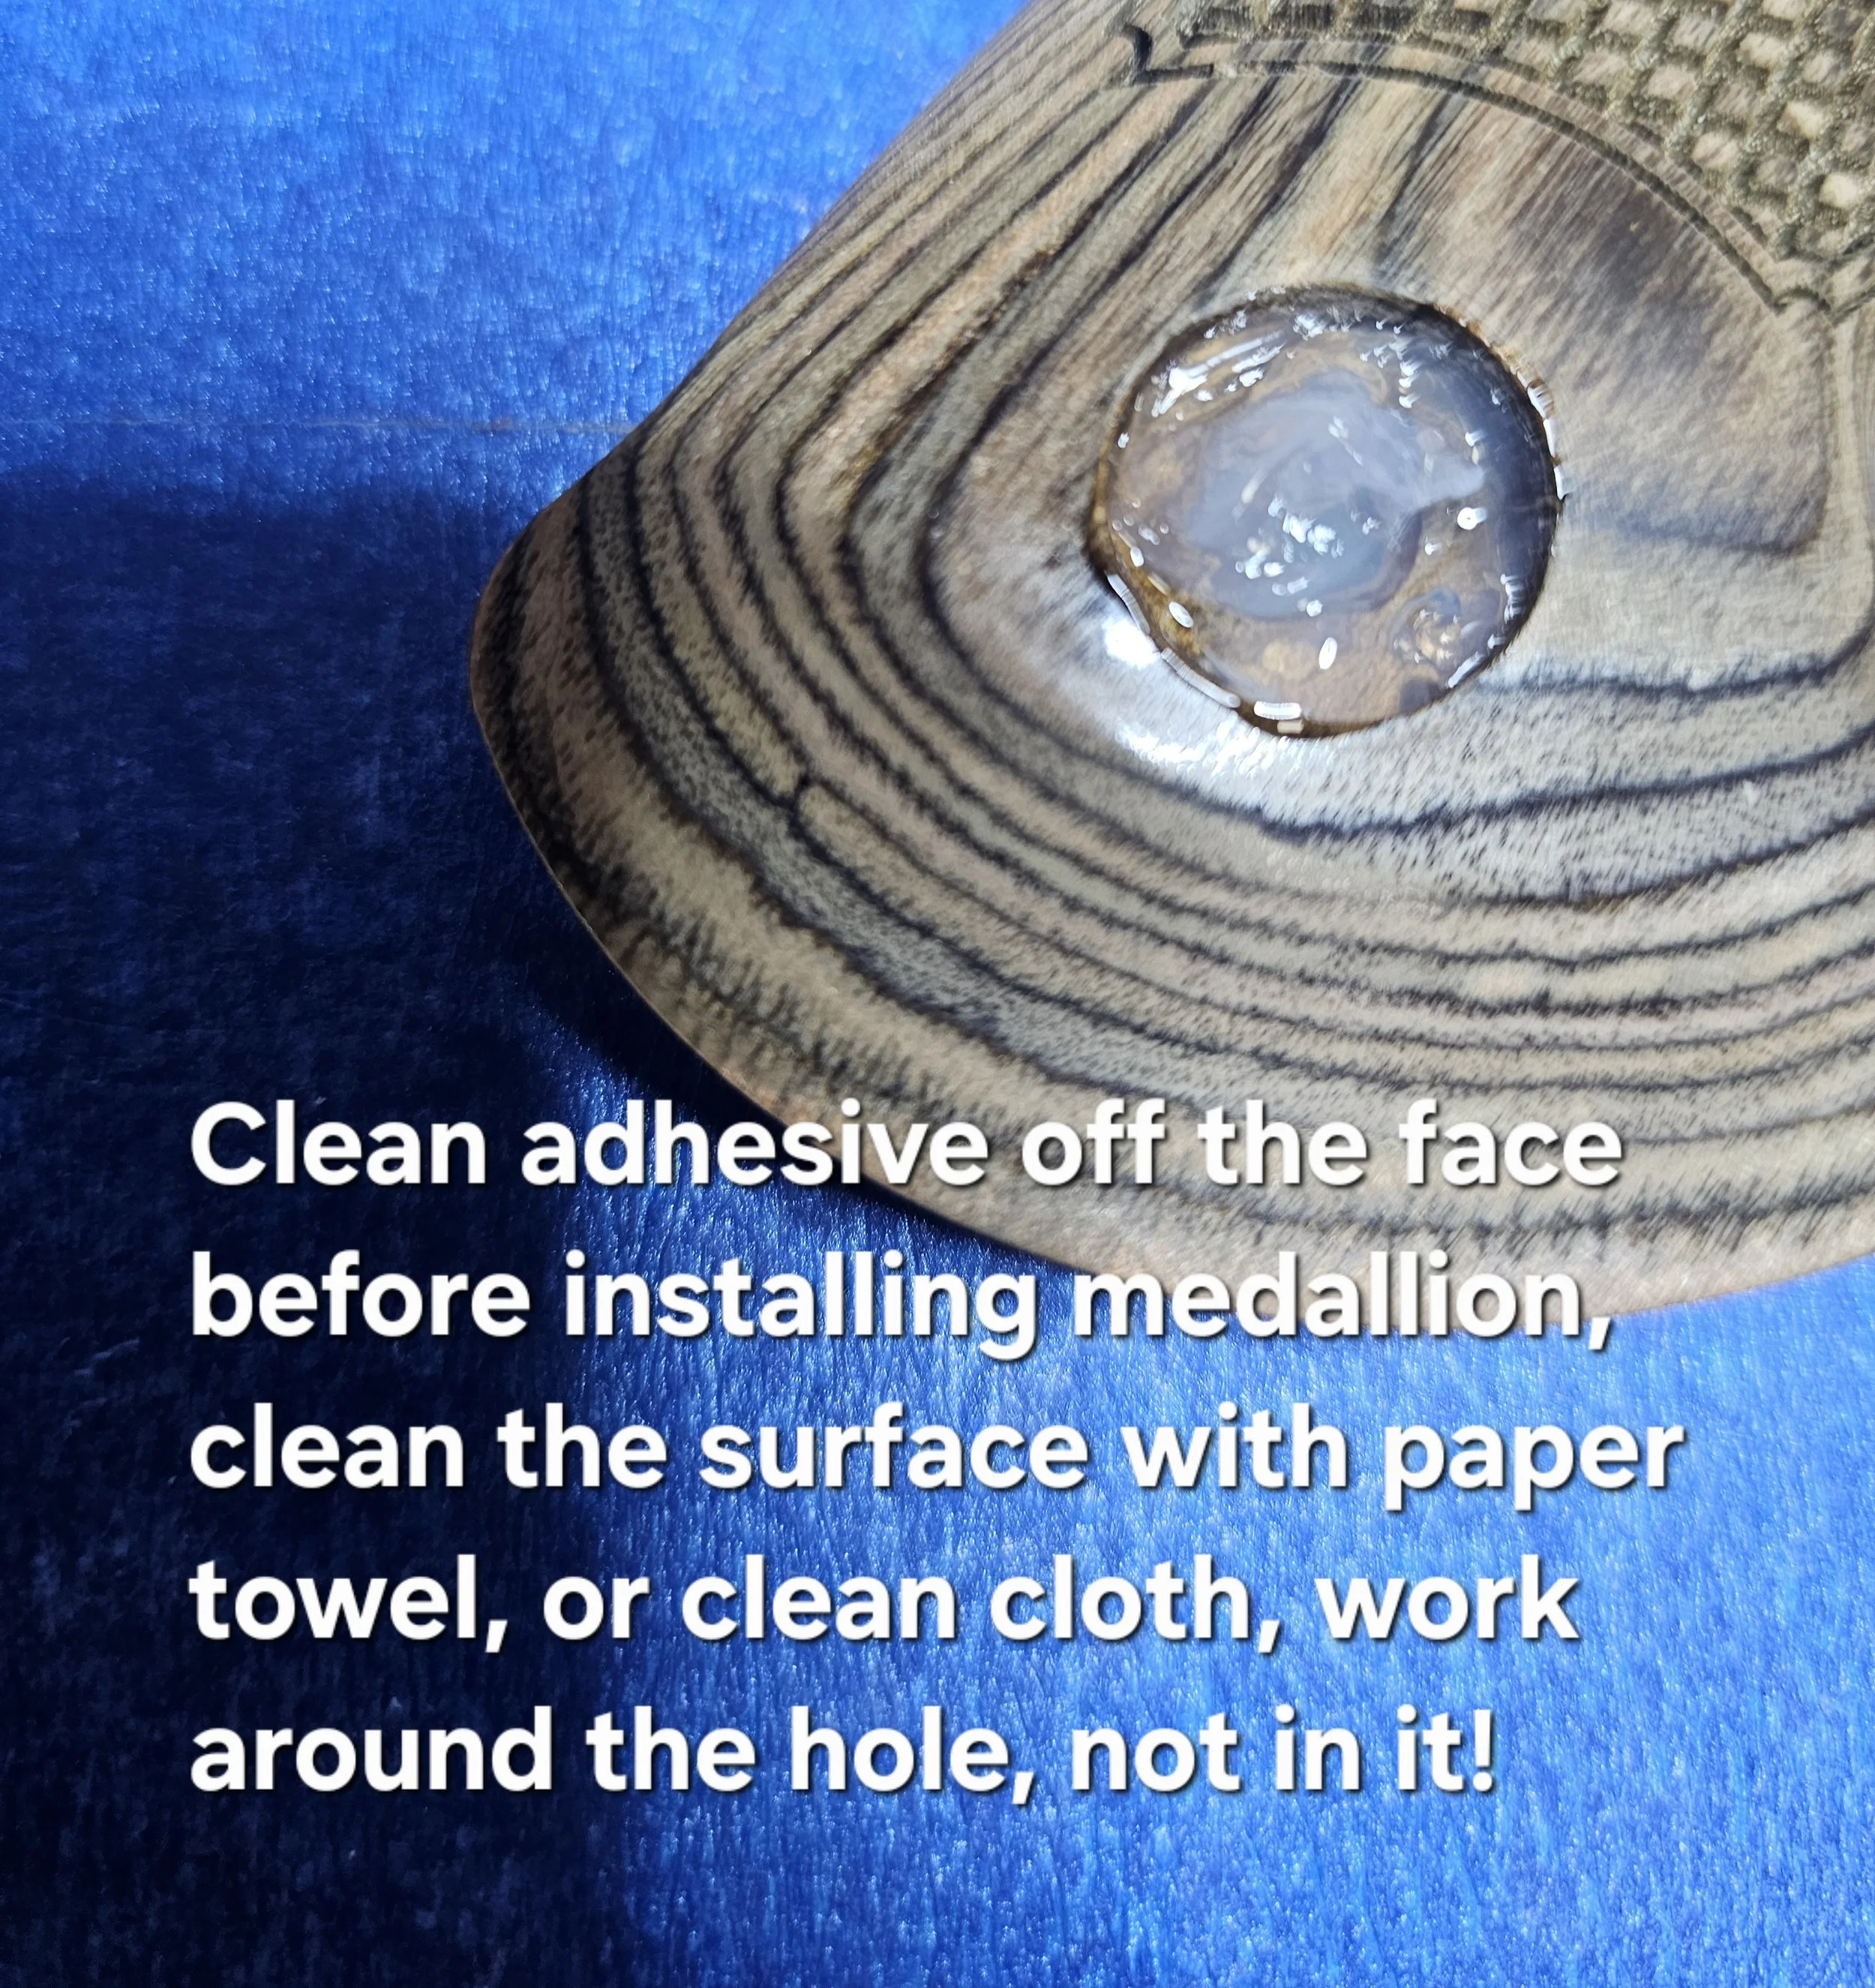
Wipe away any silicone that gets on the grip face.
Placing the Medallion
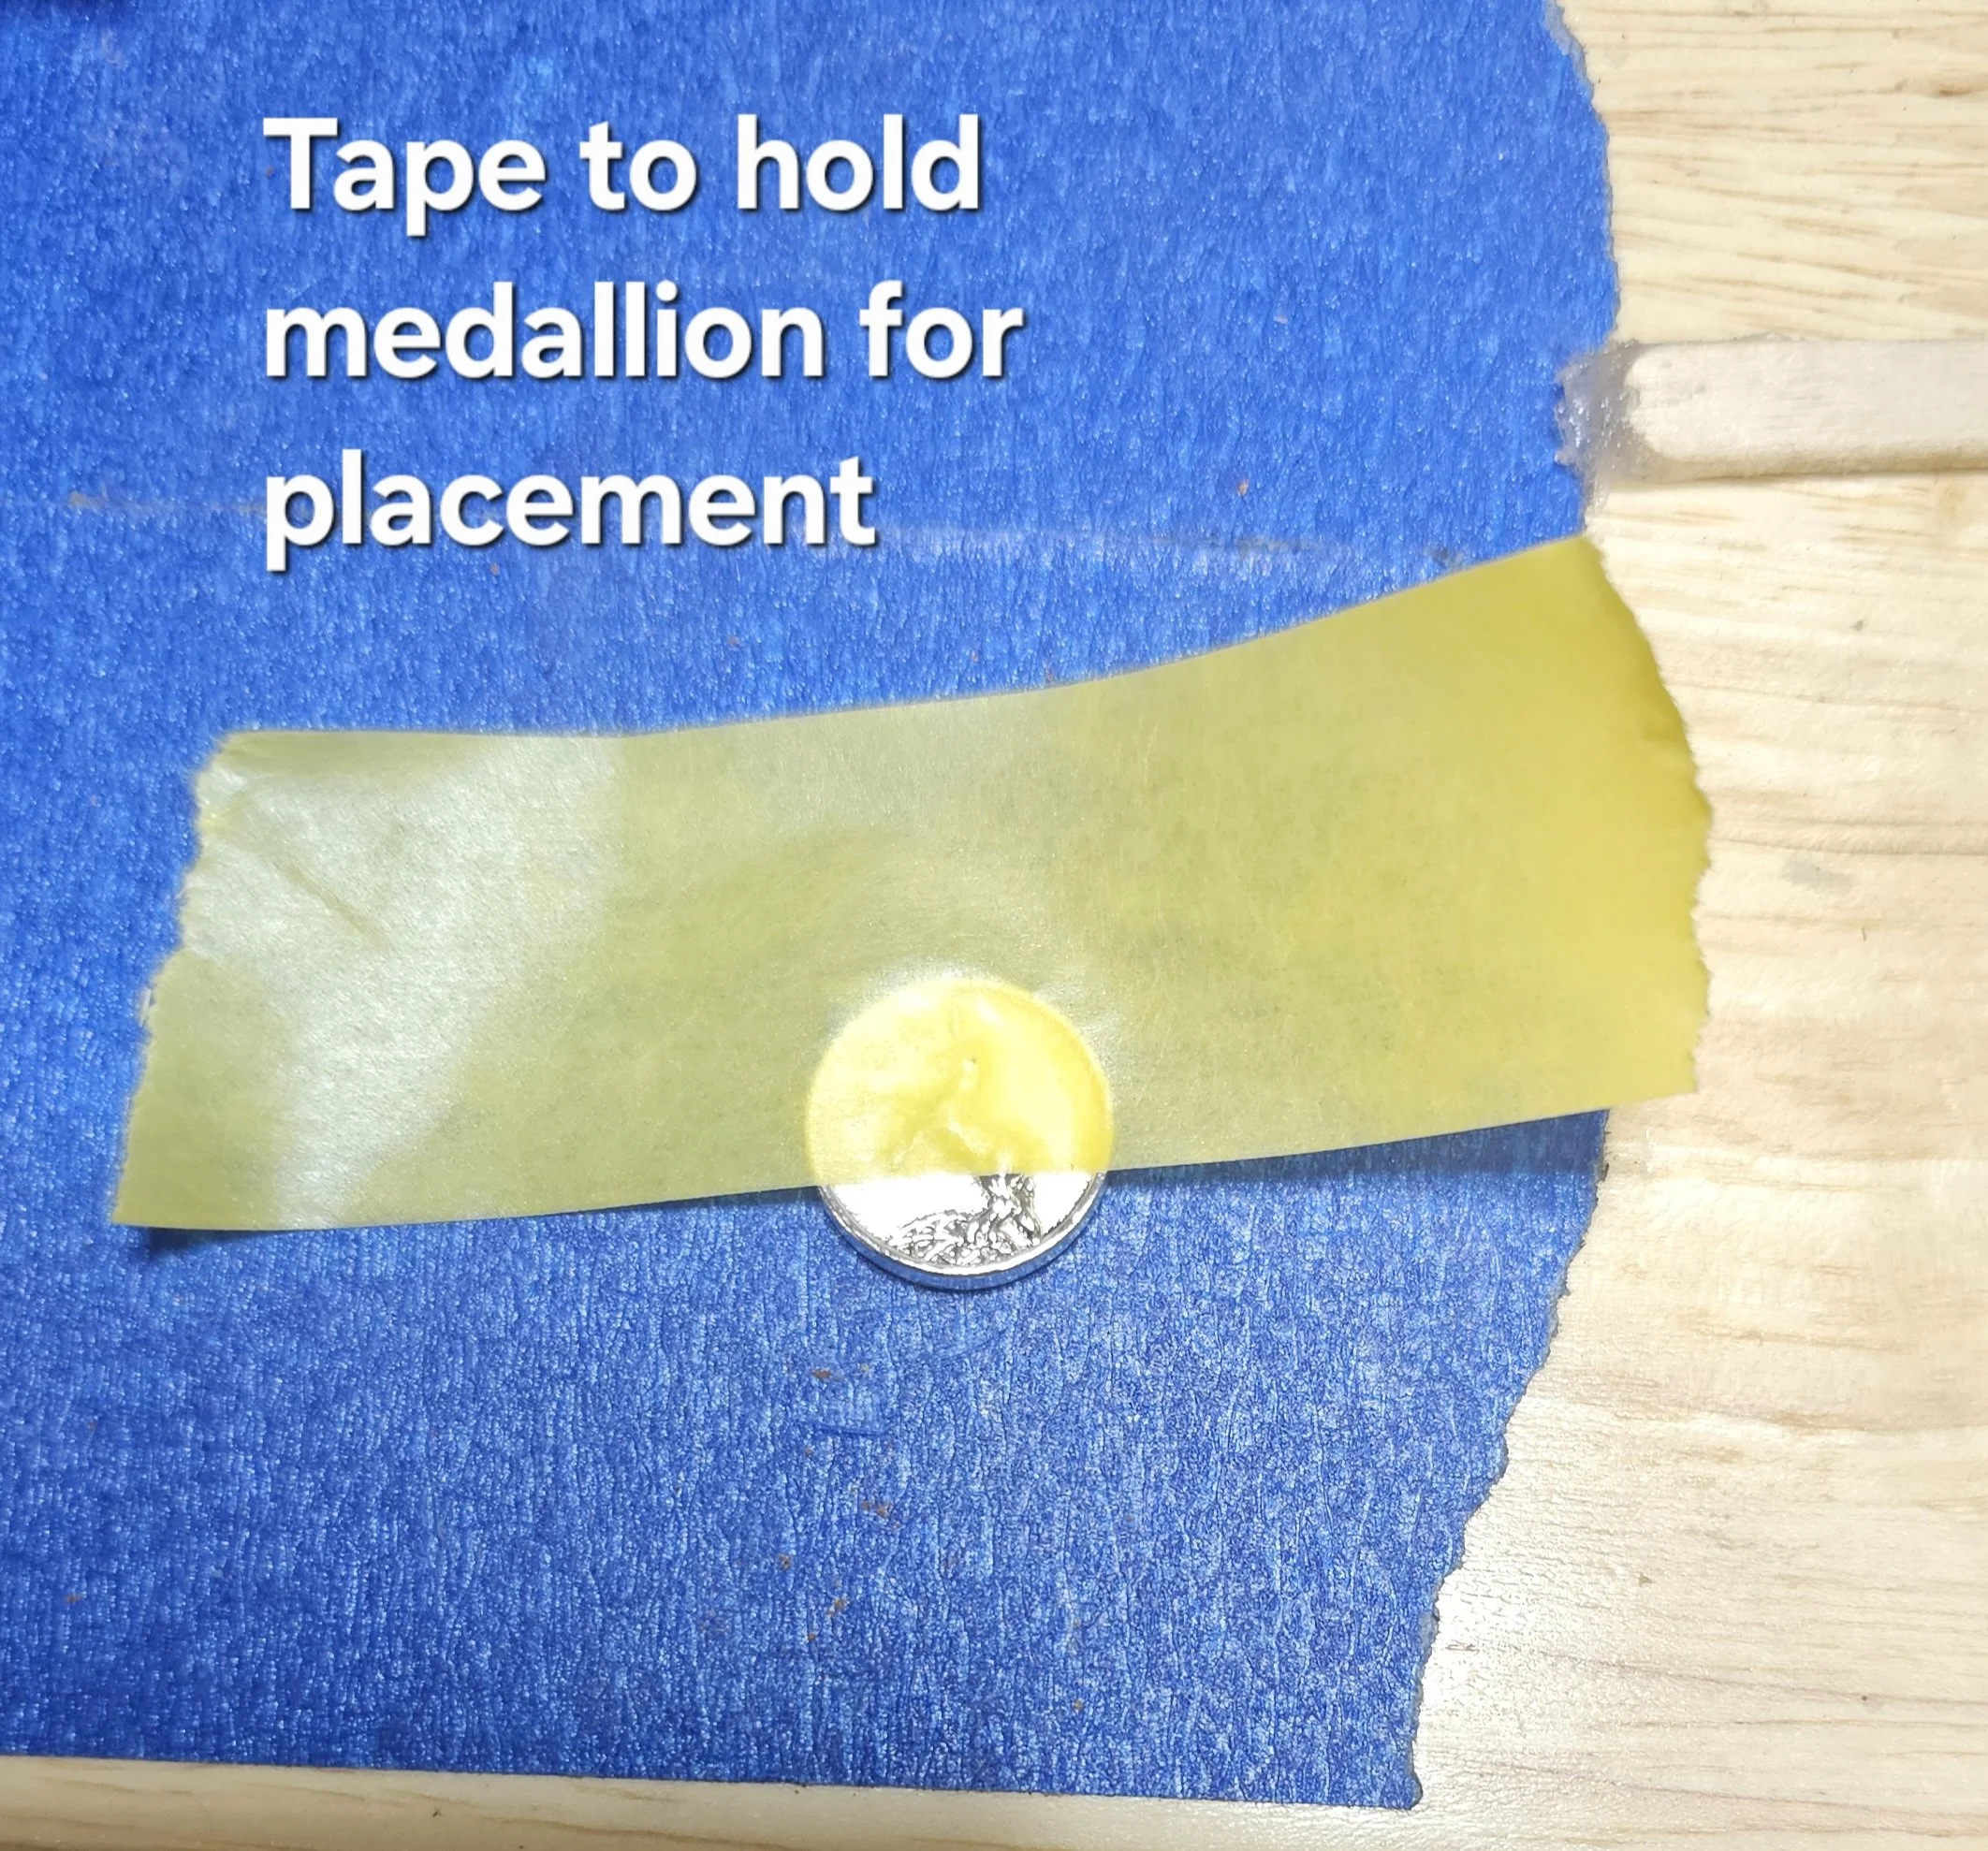
Place the medallion face-up on a flat surface, oriented how you want it installed.
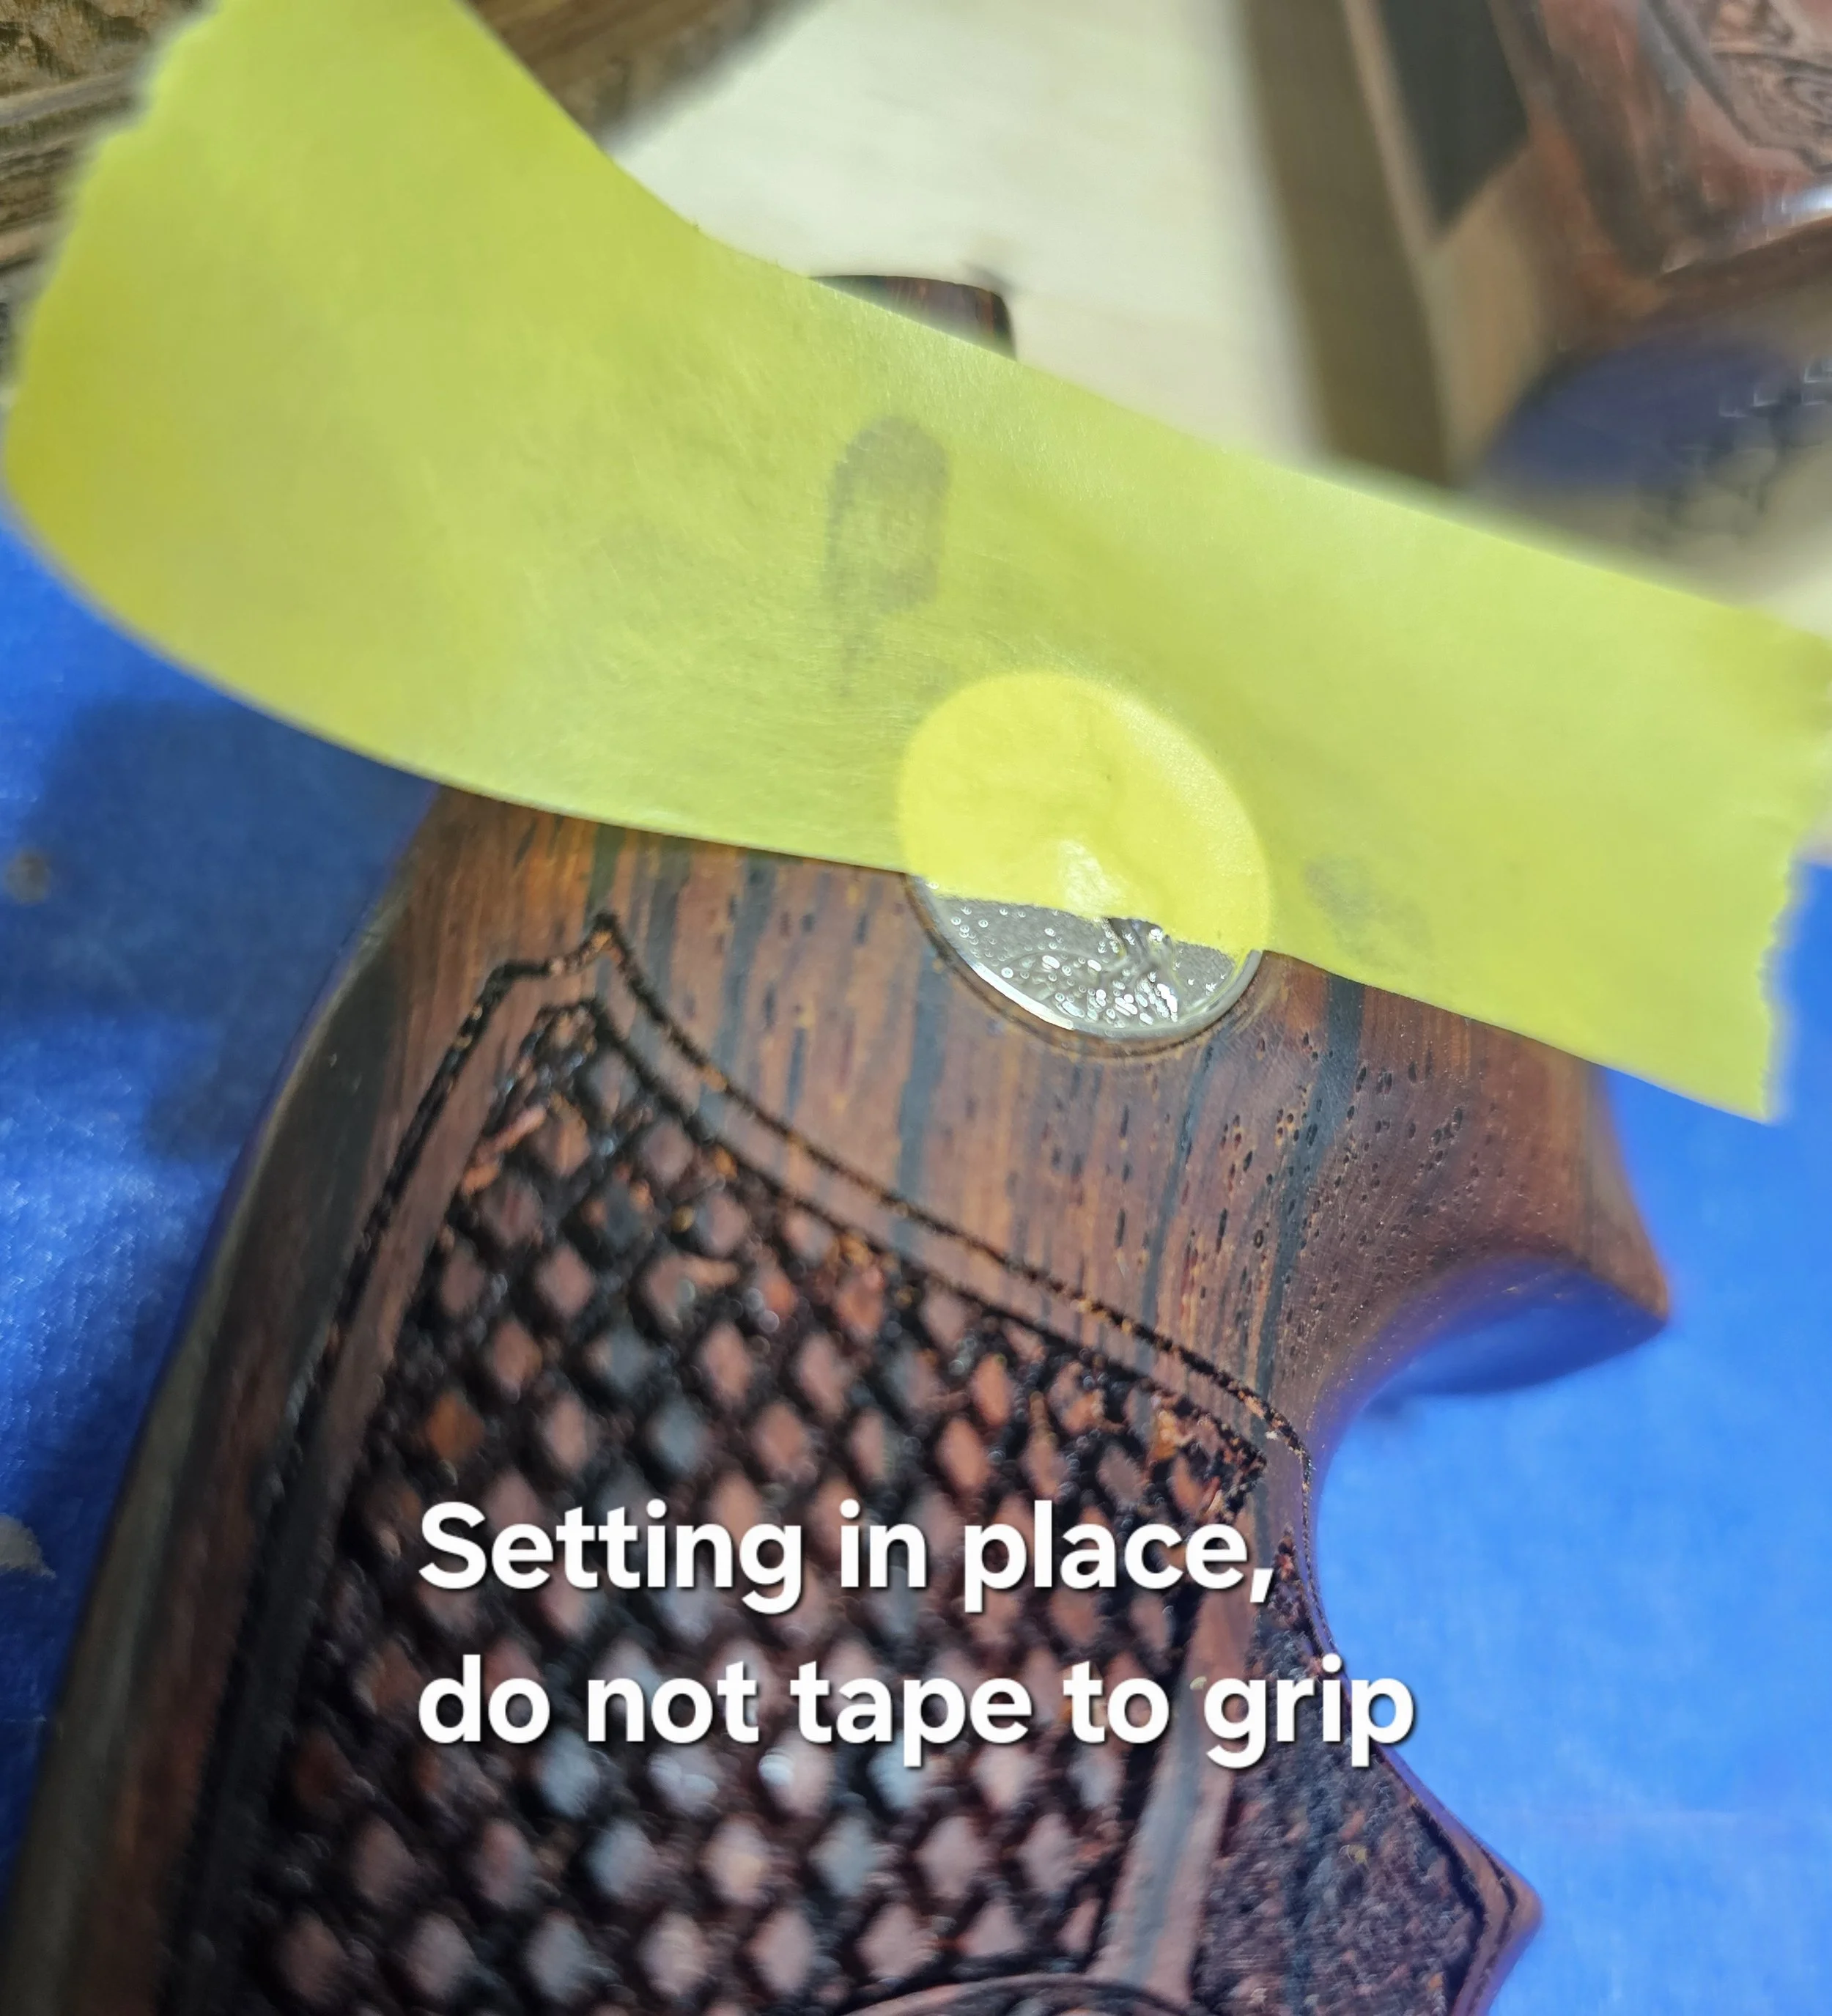
Stick a strip of tape onto the top half only of the medallion.
Holding the bottom, lower the medallion into the hole, using the tape as a handle. Avoid sticking the tape to the grip.
Press the medallion into the hole.
While holding the medallion bottom in place, pull the tape upward and away, removing it cleanly. Press and align the medallion, don’t push it all the way into the hole yet, just 3/4 of the way in, so the medallion is sticking out slightly.
Final Cleanup
Wipe away any adhesive from the face if needed — but don’t worry about perfection yet.
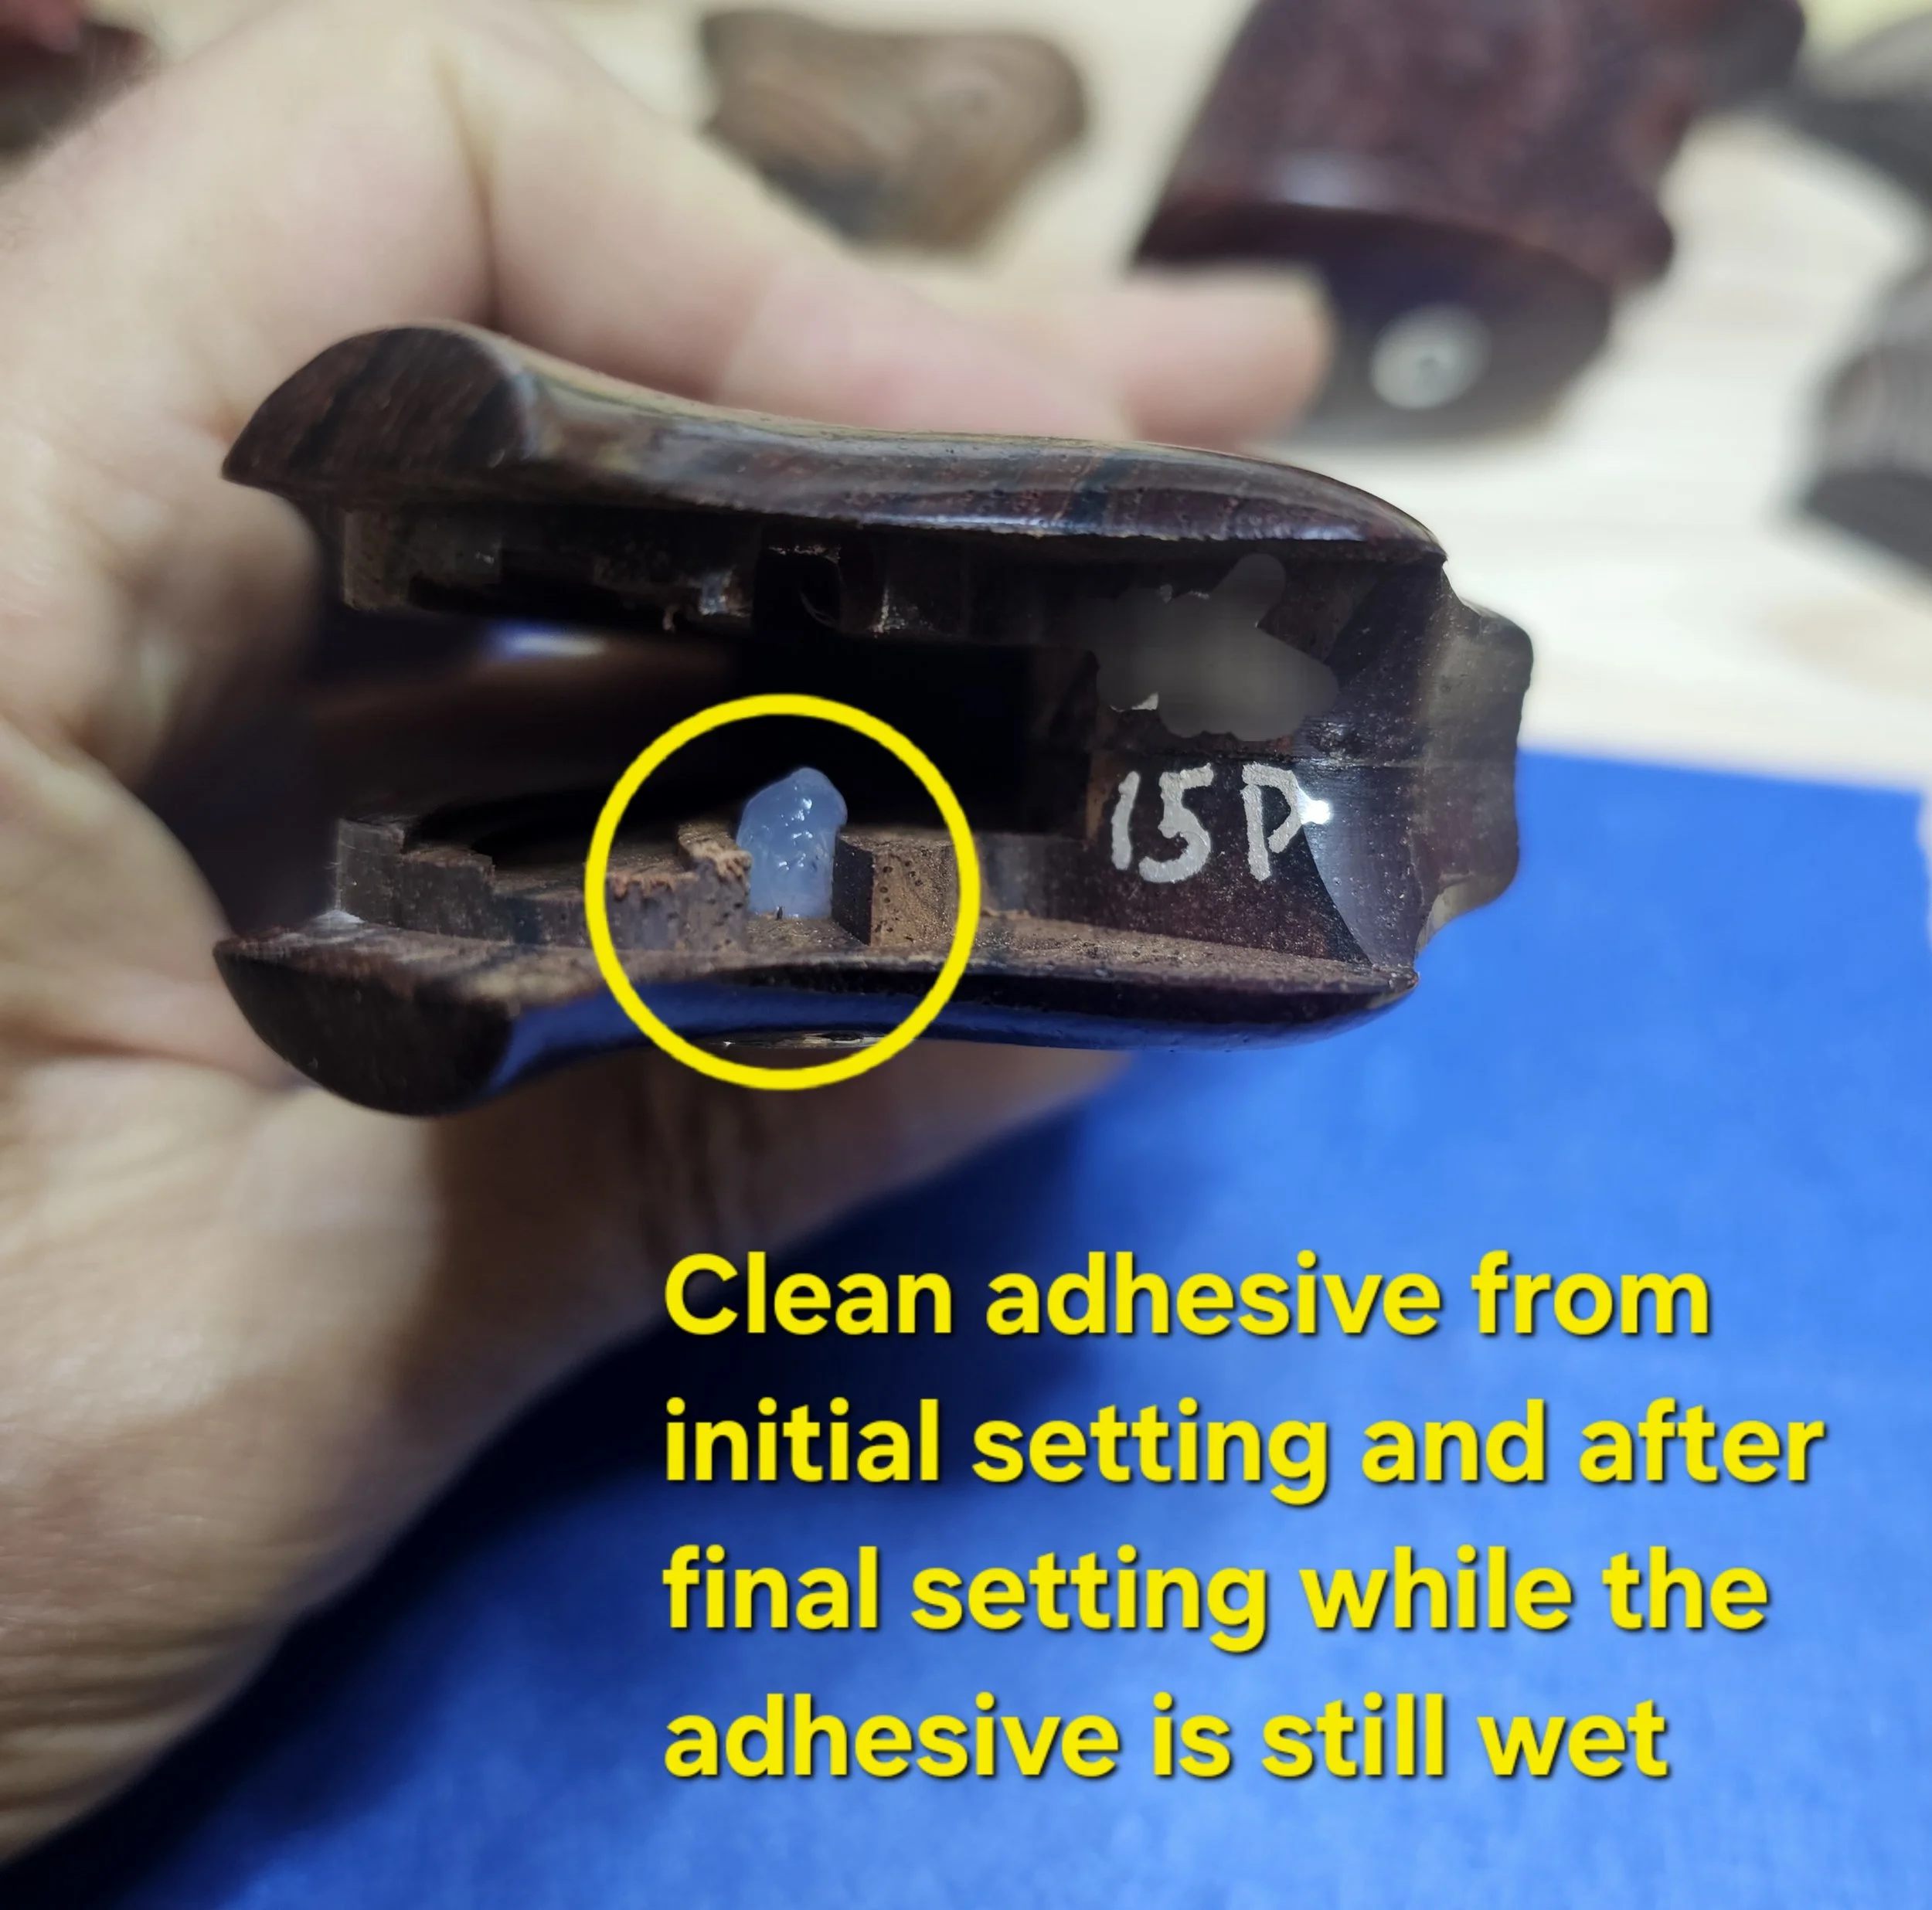
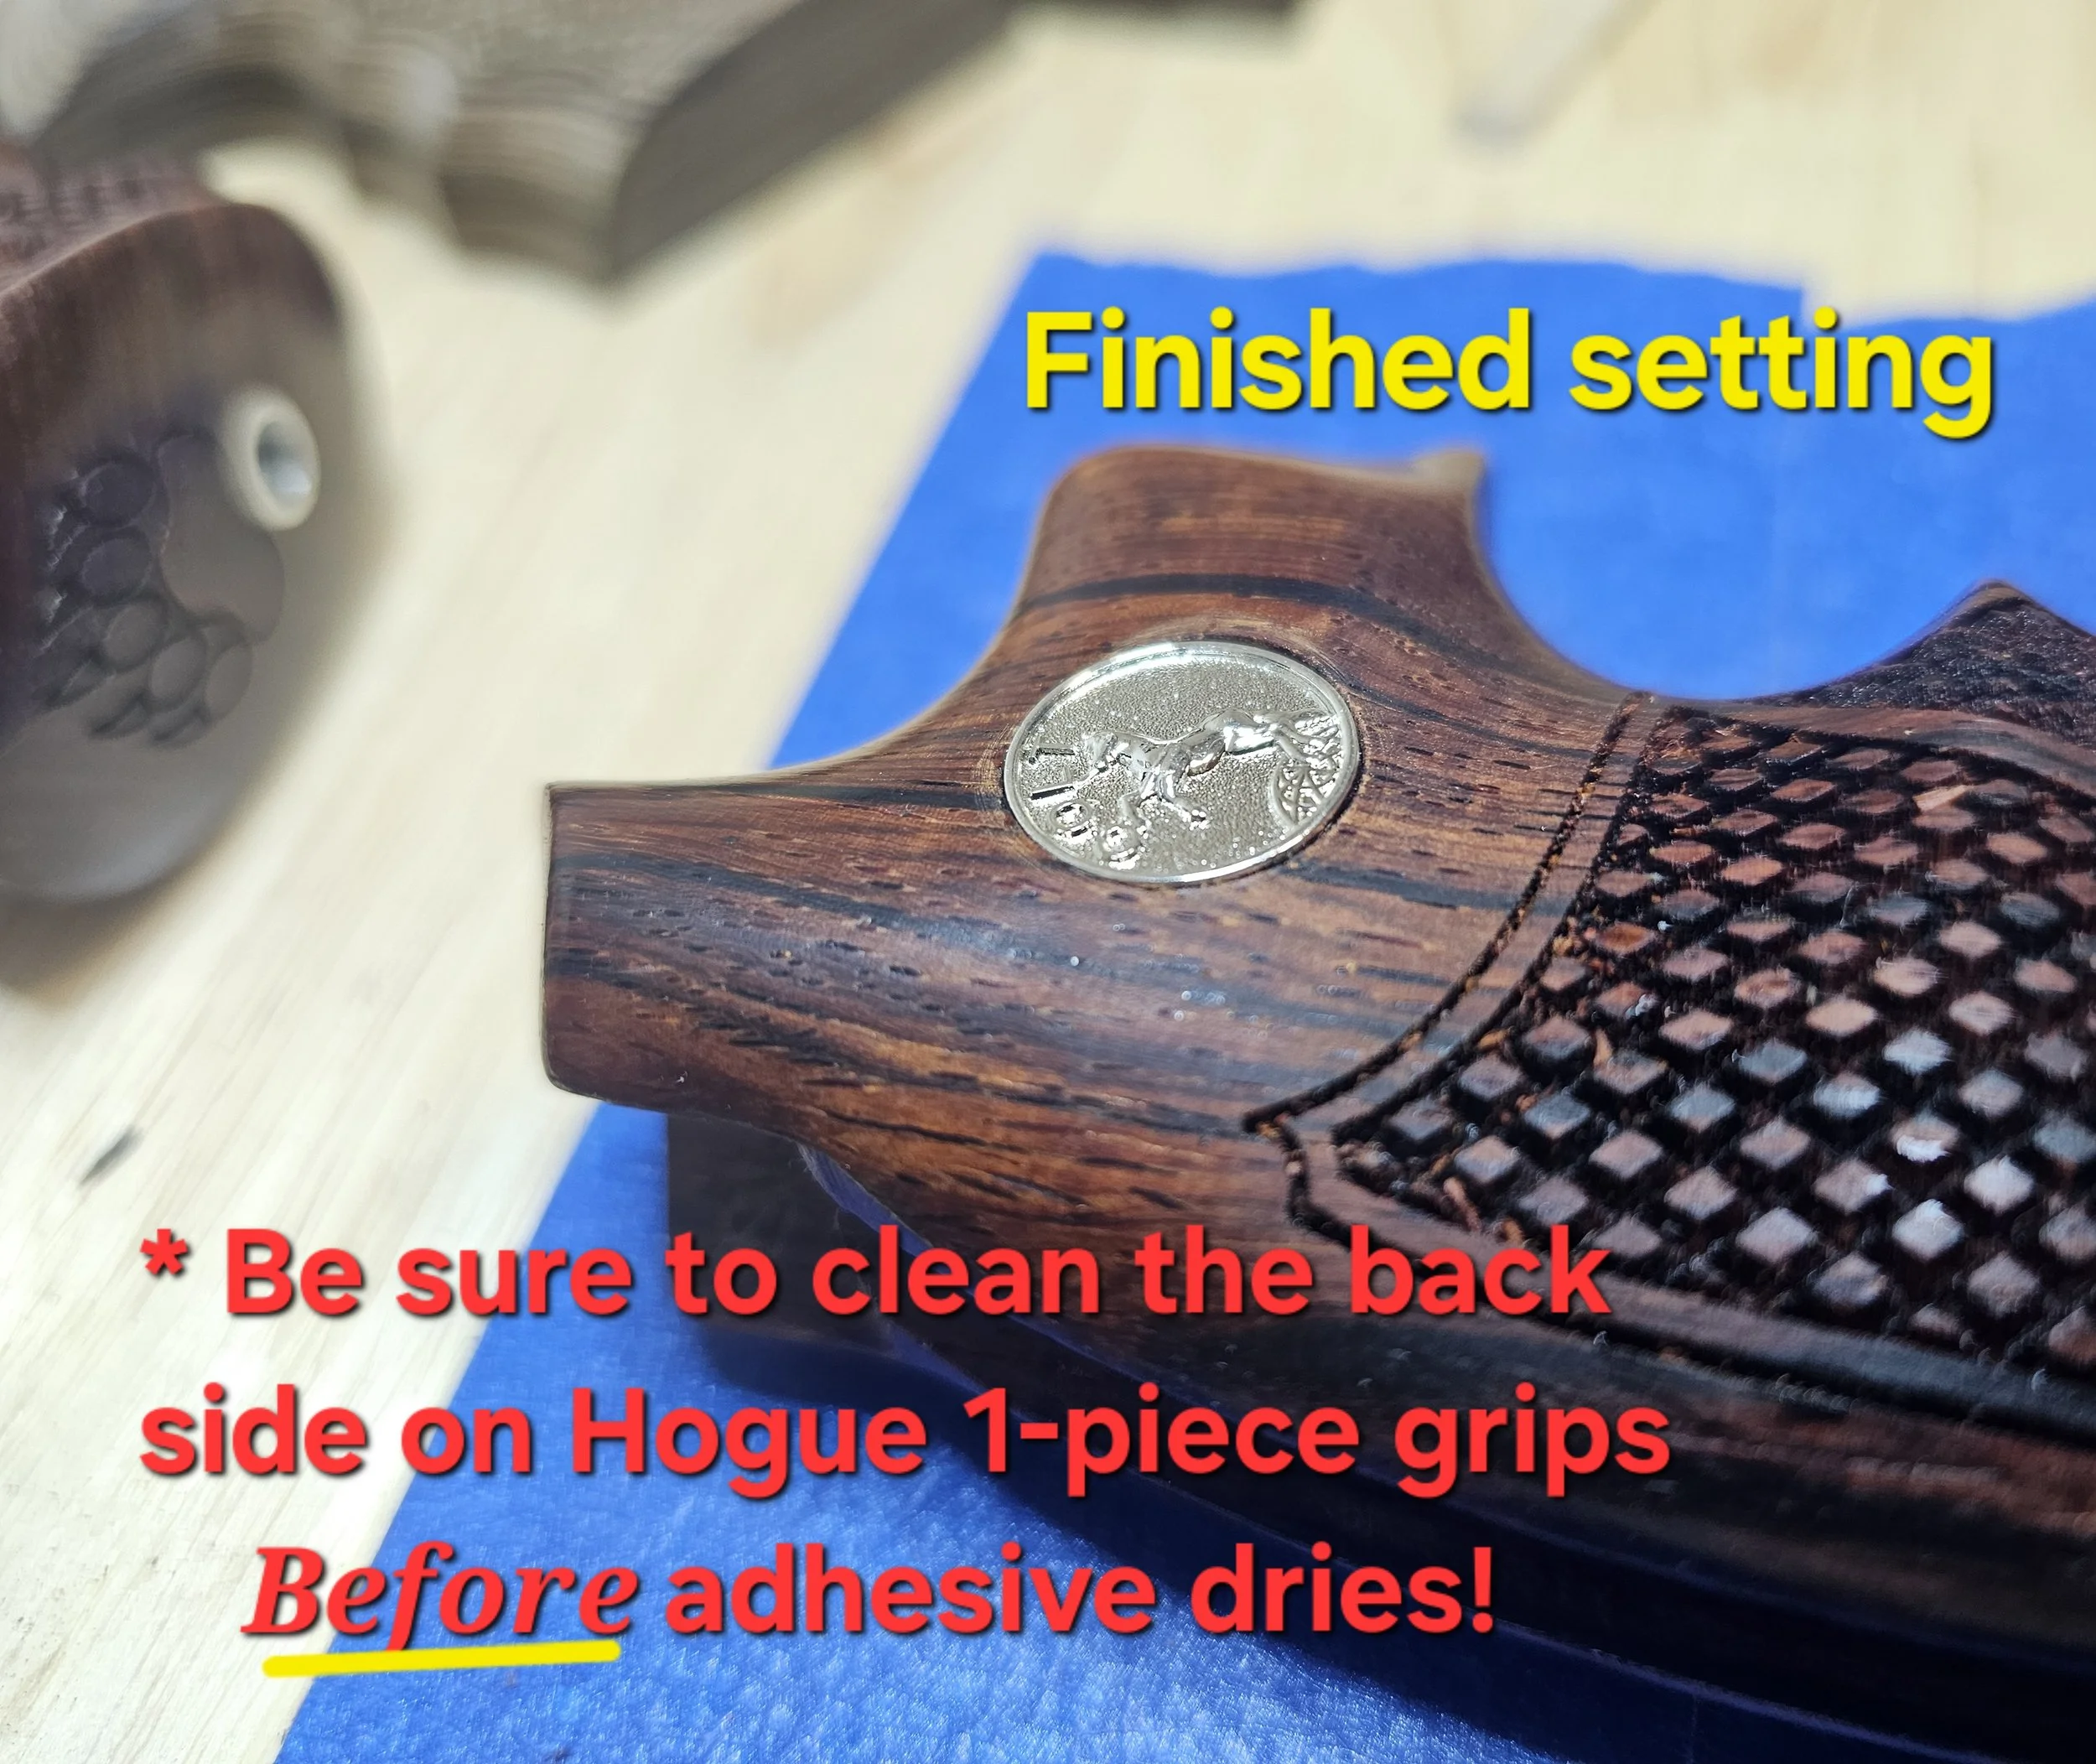
Flip the grip and clean any adhesive coming through the pilot hole. It’s okay if there is a lot of silicone that came out, on smaller thin grips this is normal, on thick grips, like Colt Python for instance there may be nothing at all. Just clean it all up for now and turn it back over.
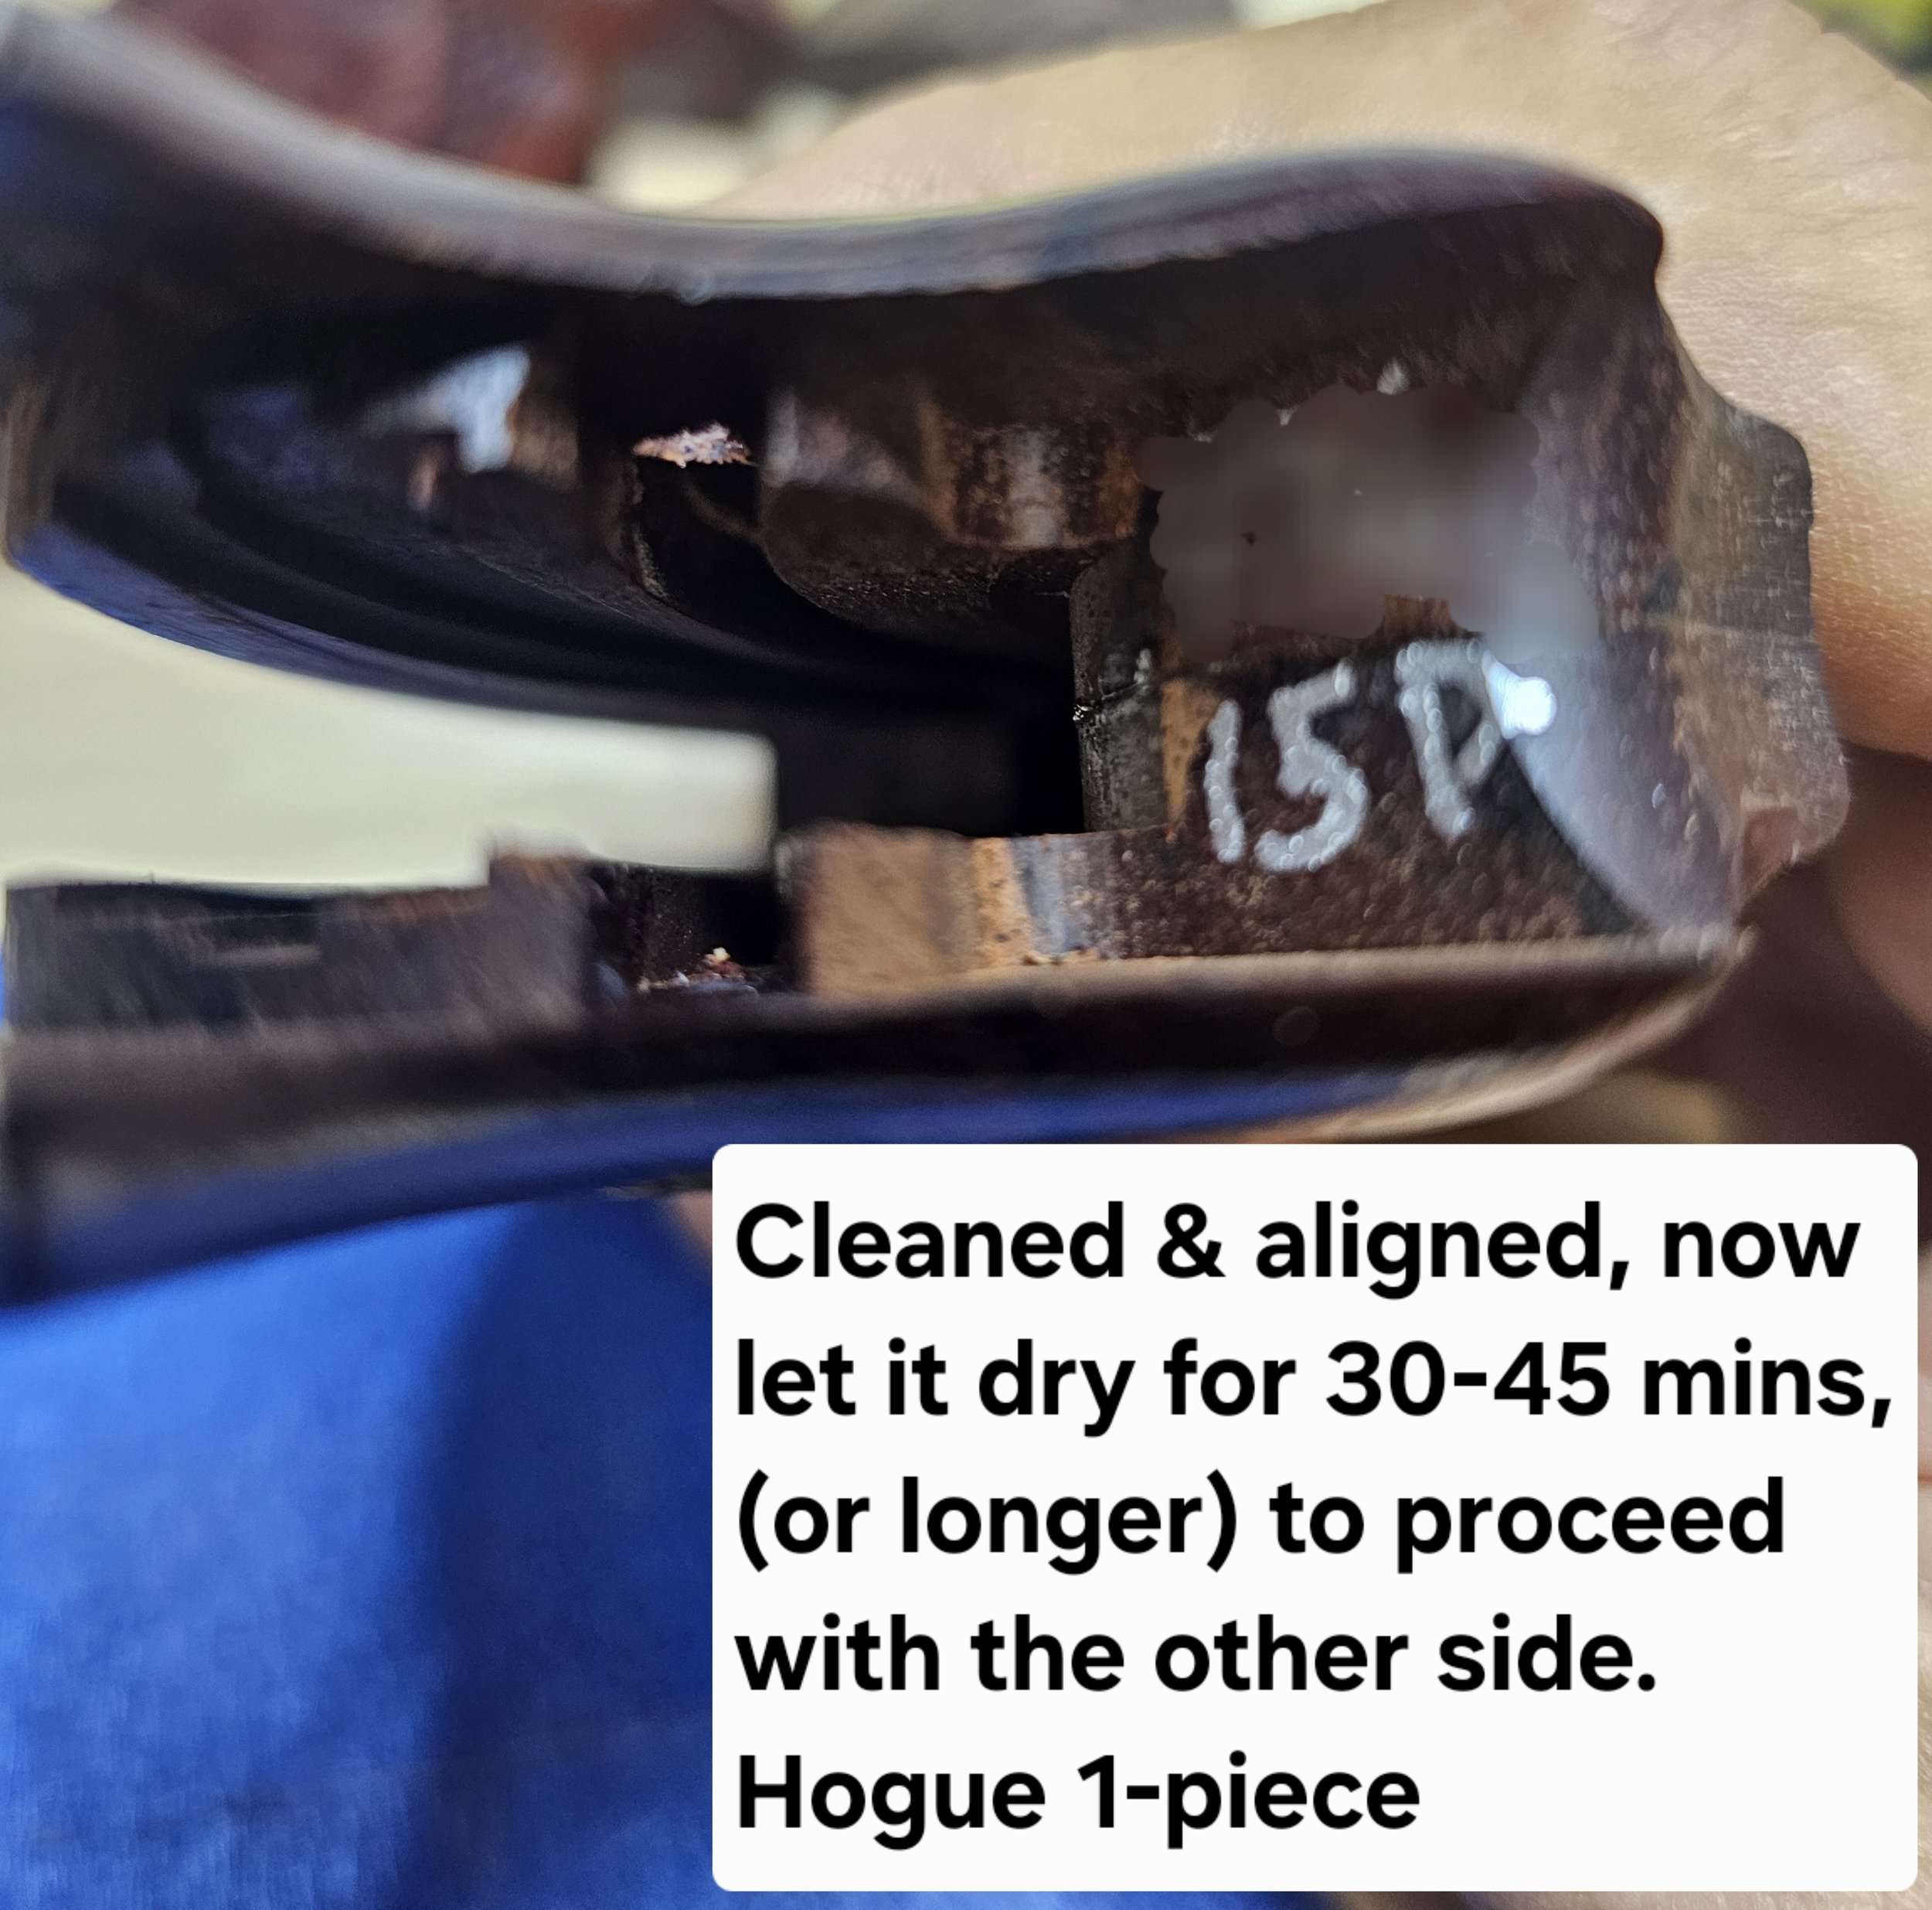
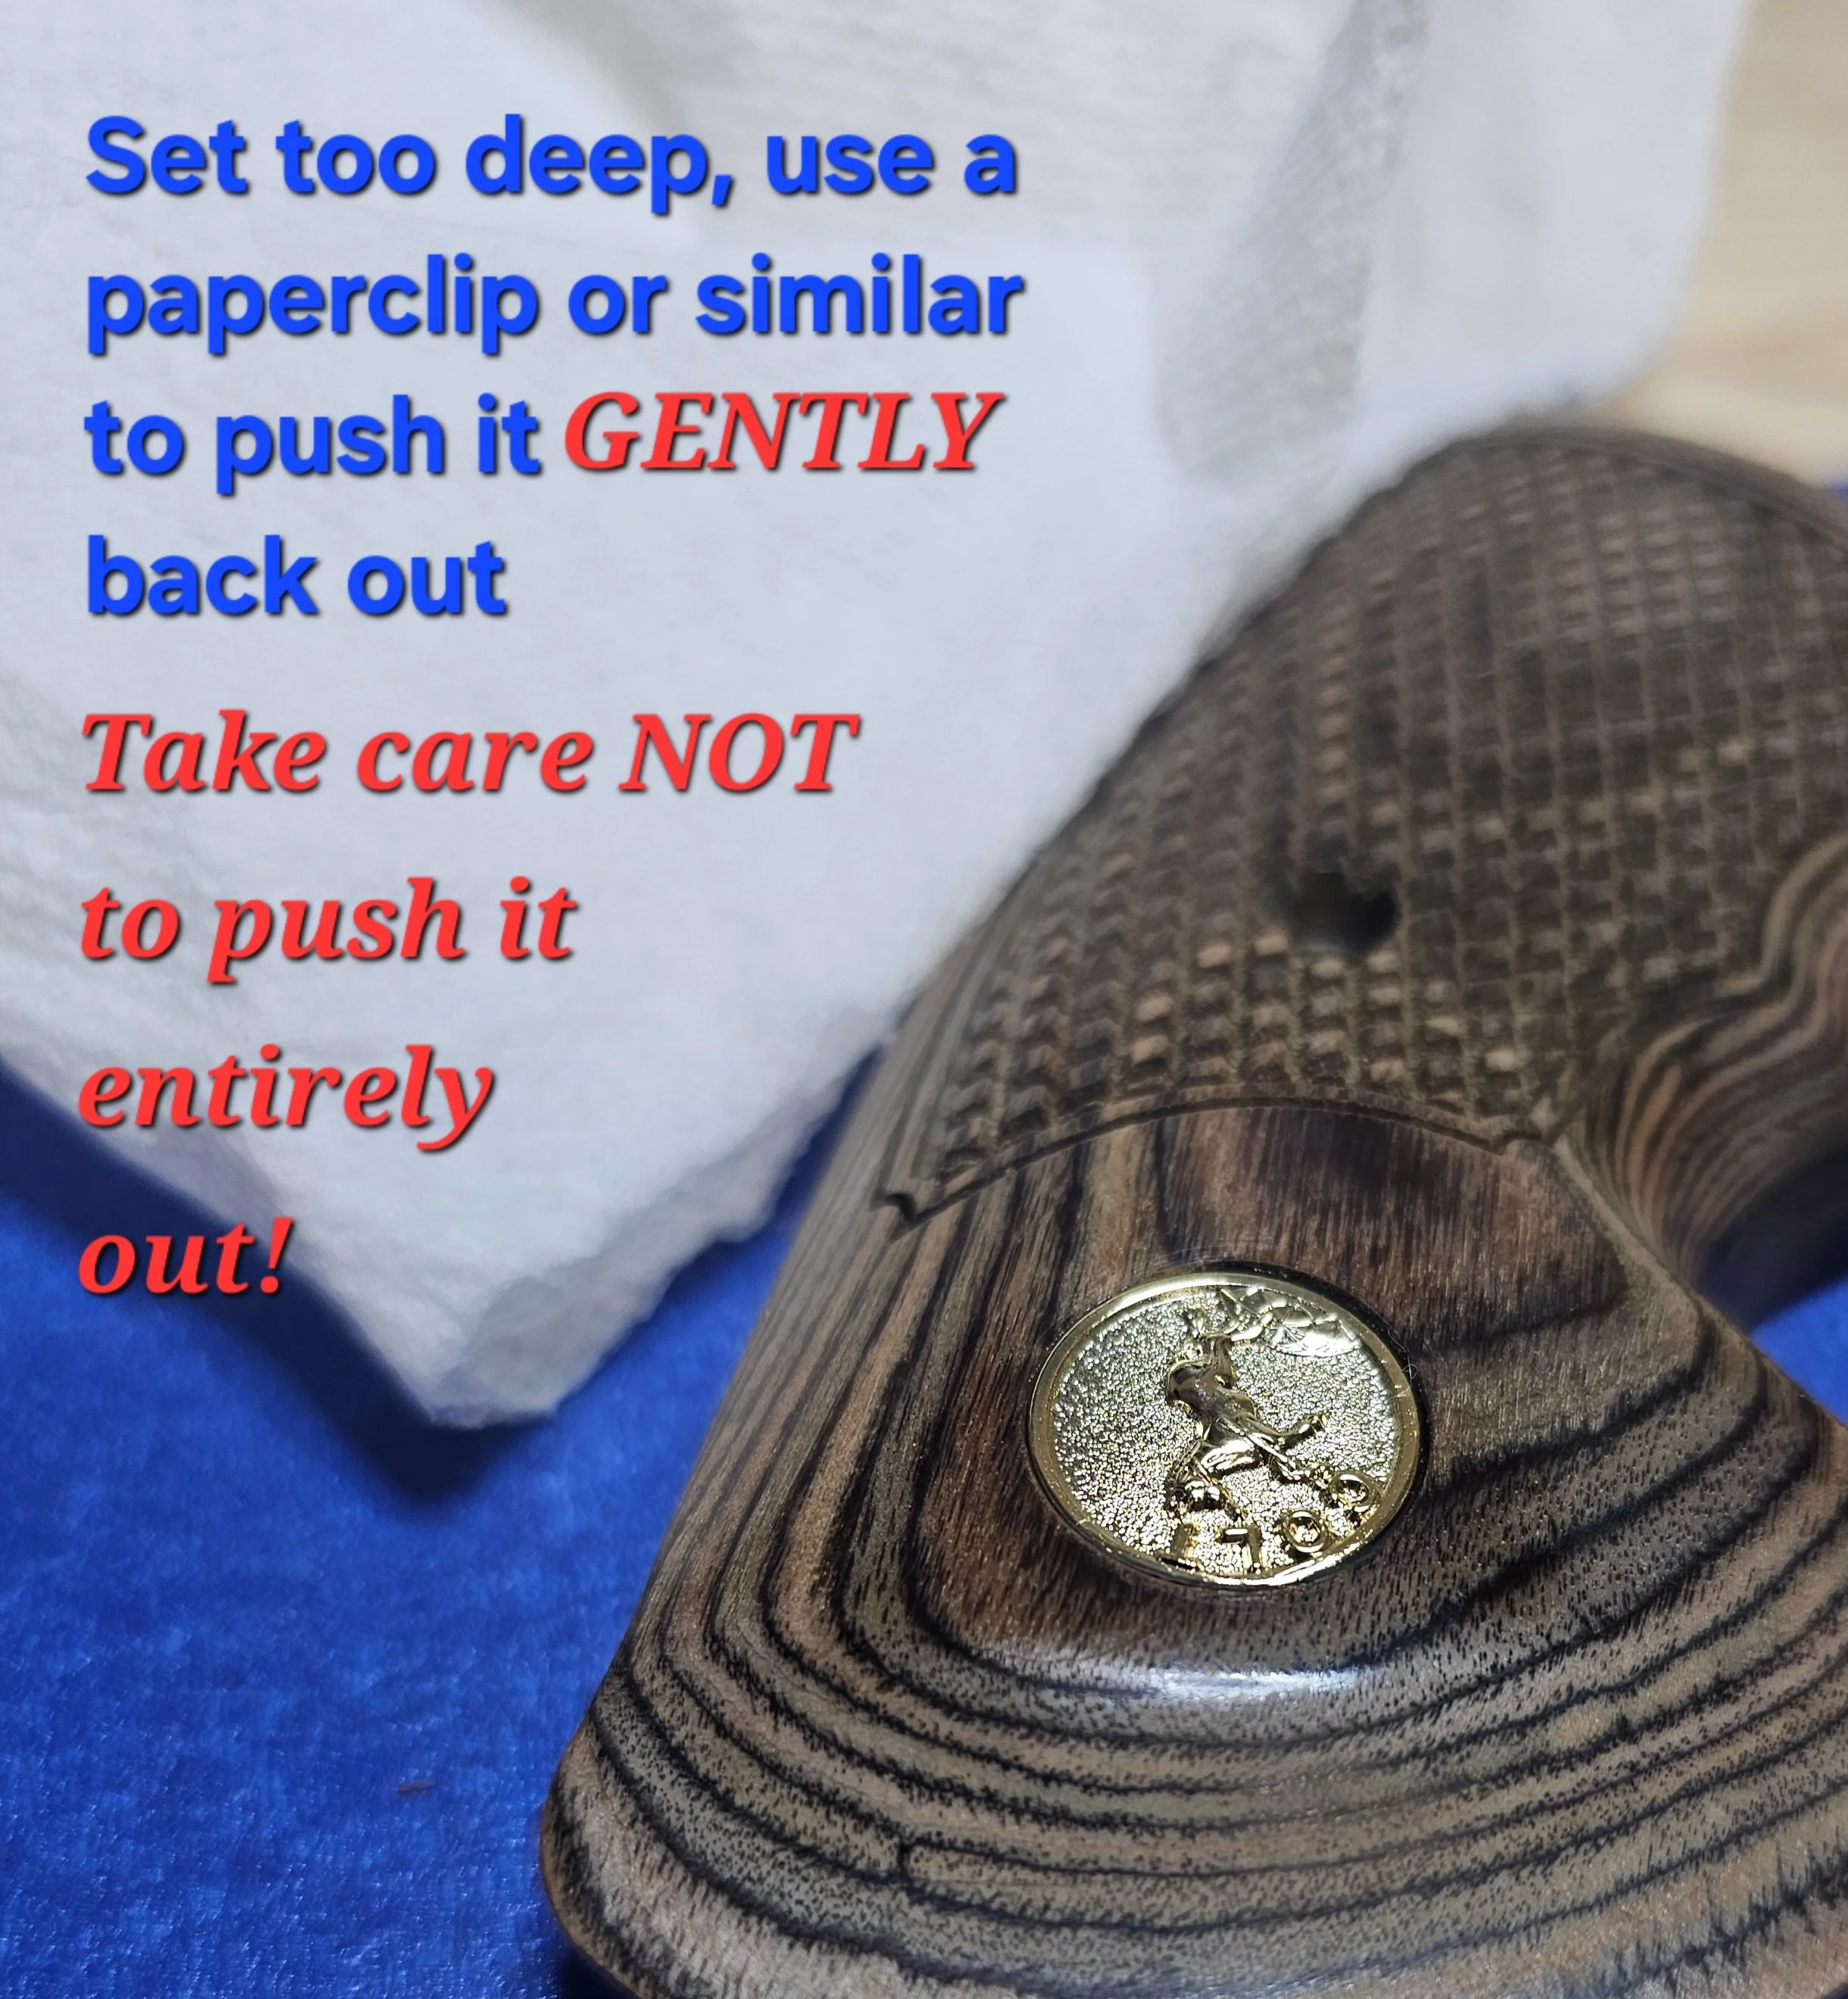
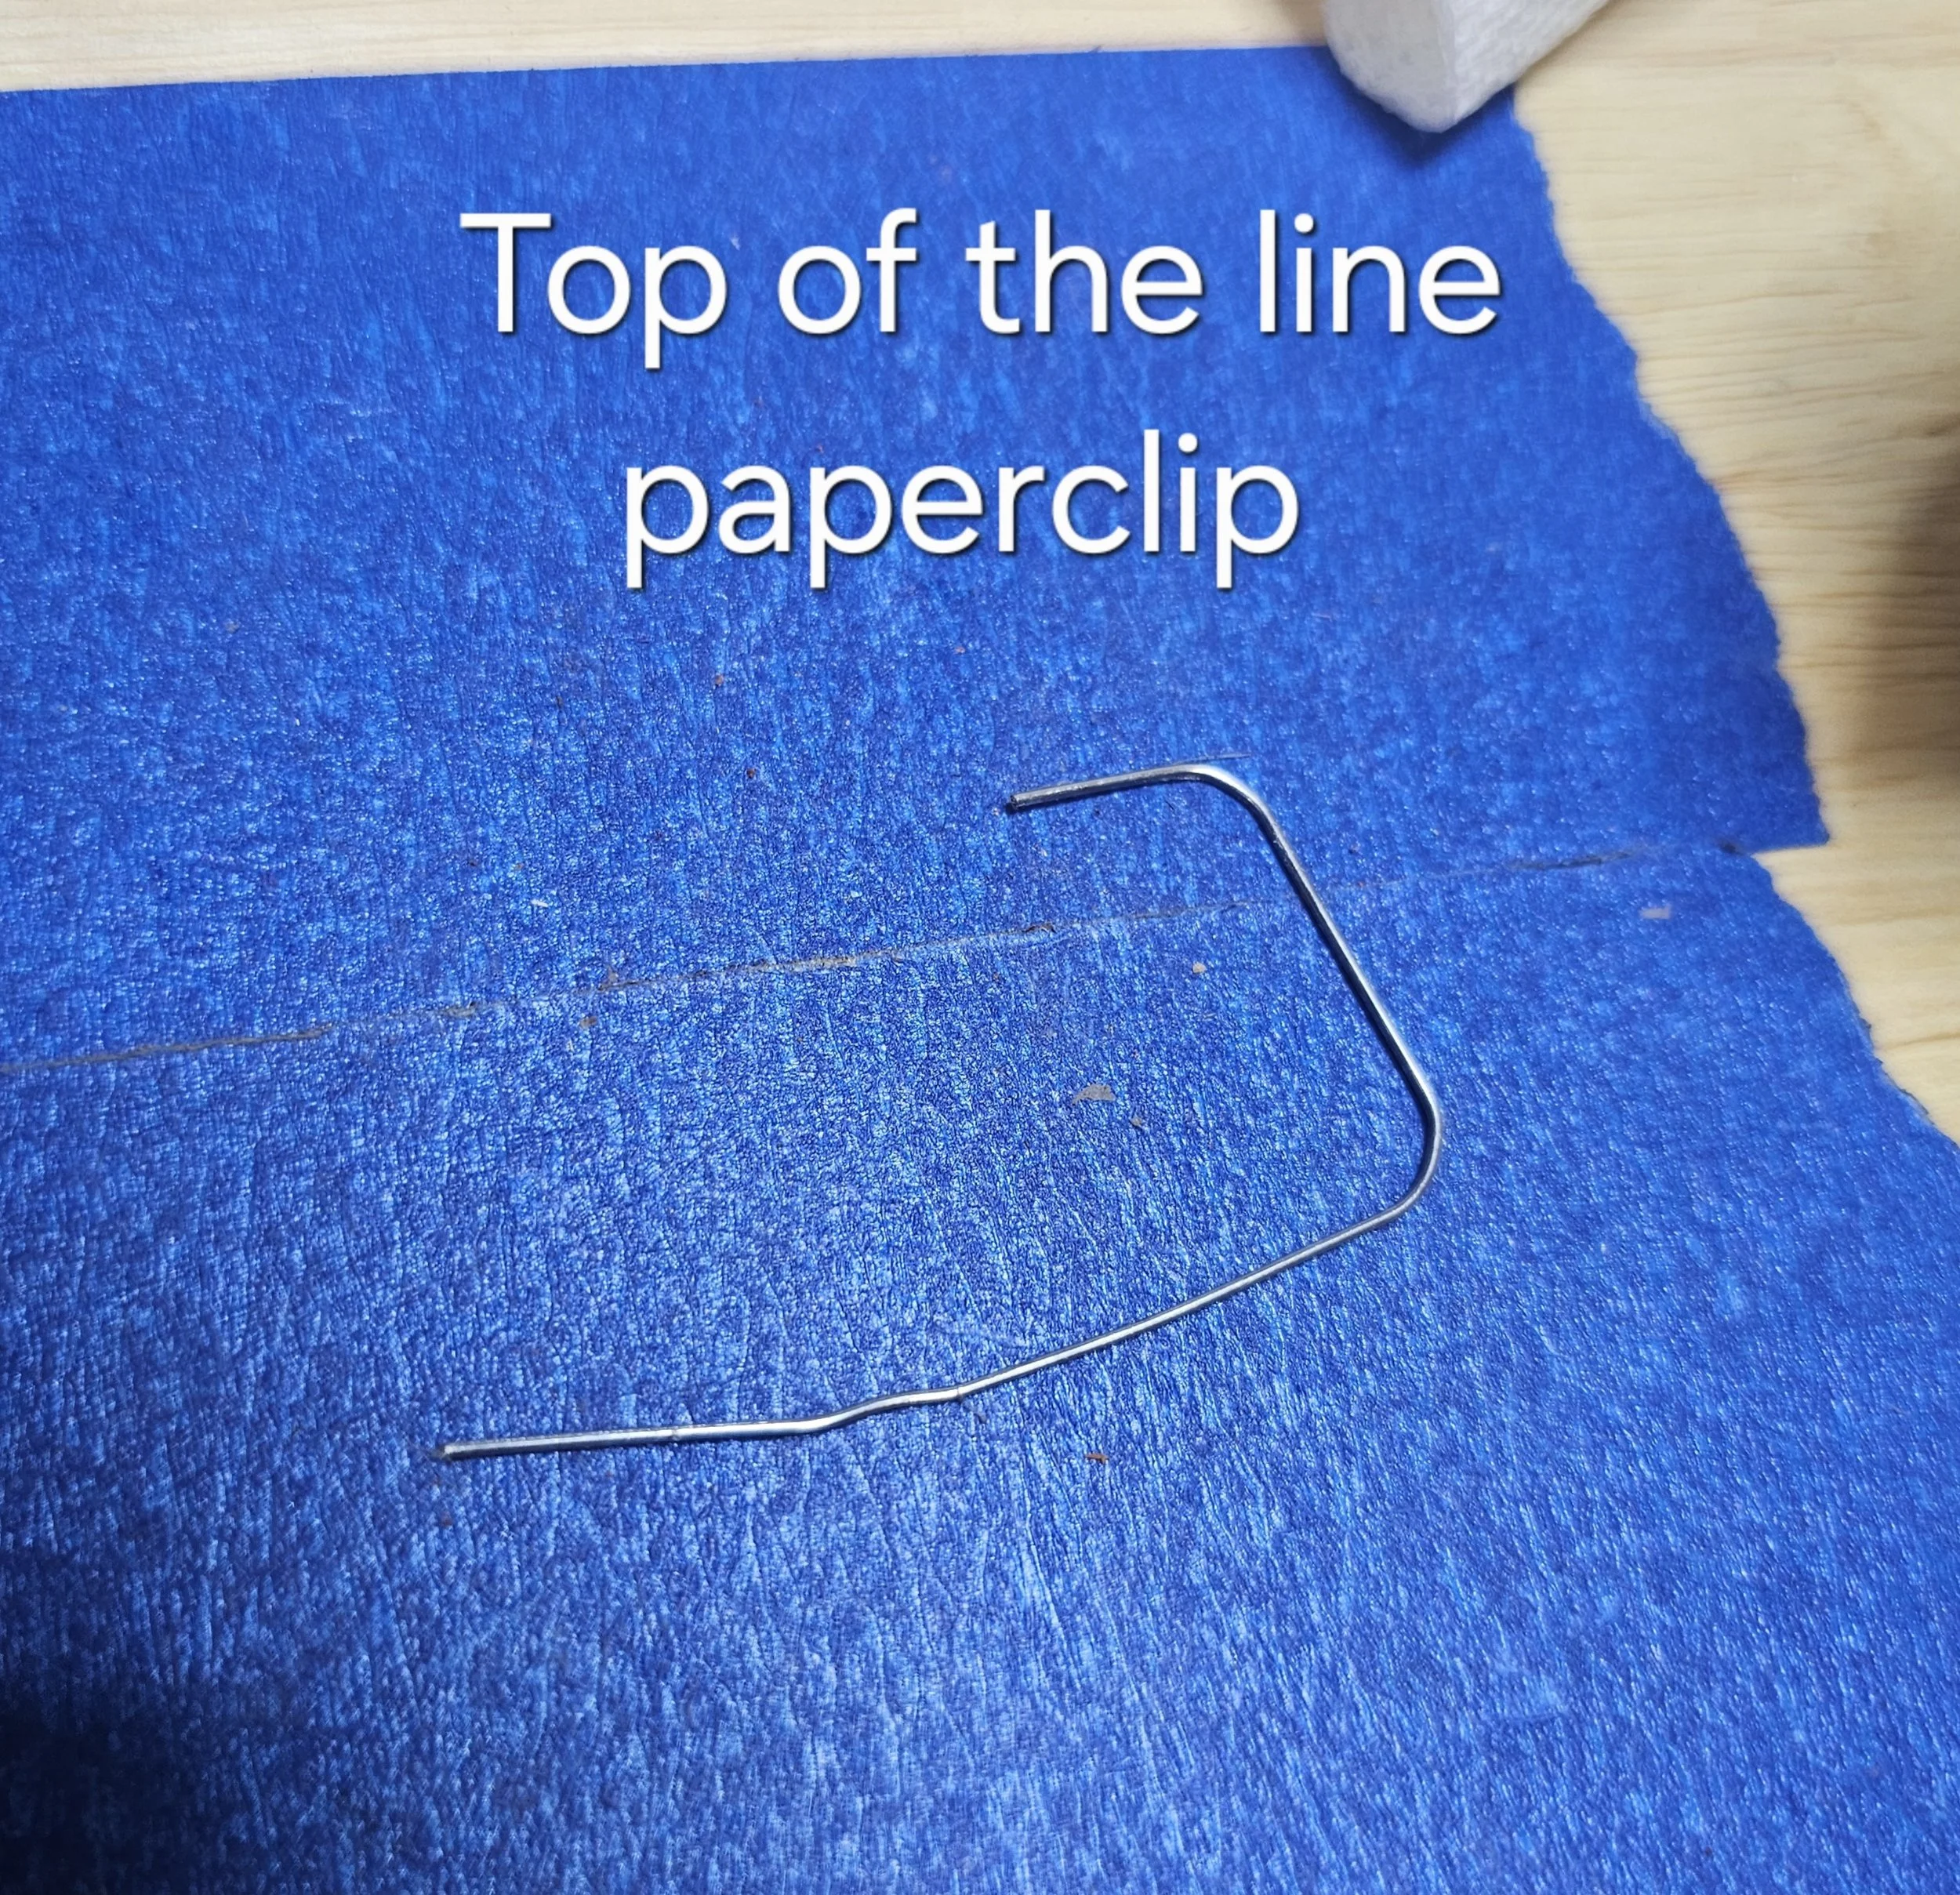
Press the medallion fully into place and align as needed, if you push too far don’t worry, just use a small object (paper clip, needle, small screwdriver, etc.) to push it gently back from the other side, GENTLY! or you will push it all the way out, you don’t want to do that, then push it back in and reset it in place. You do not need to add anymore adhesive, just clean up the back again. Now wipe the face again after a few minutes. If wiping causes it to move, realign it and wait 10–15 minutes before cleaning again.
Let the grip sit undisturbed. Then repeat the process for the other grip.
Important for Hogue® 1-Piece Grips:
Drill and prep both sides before starting.
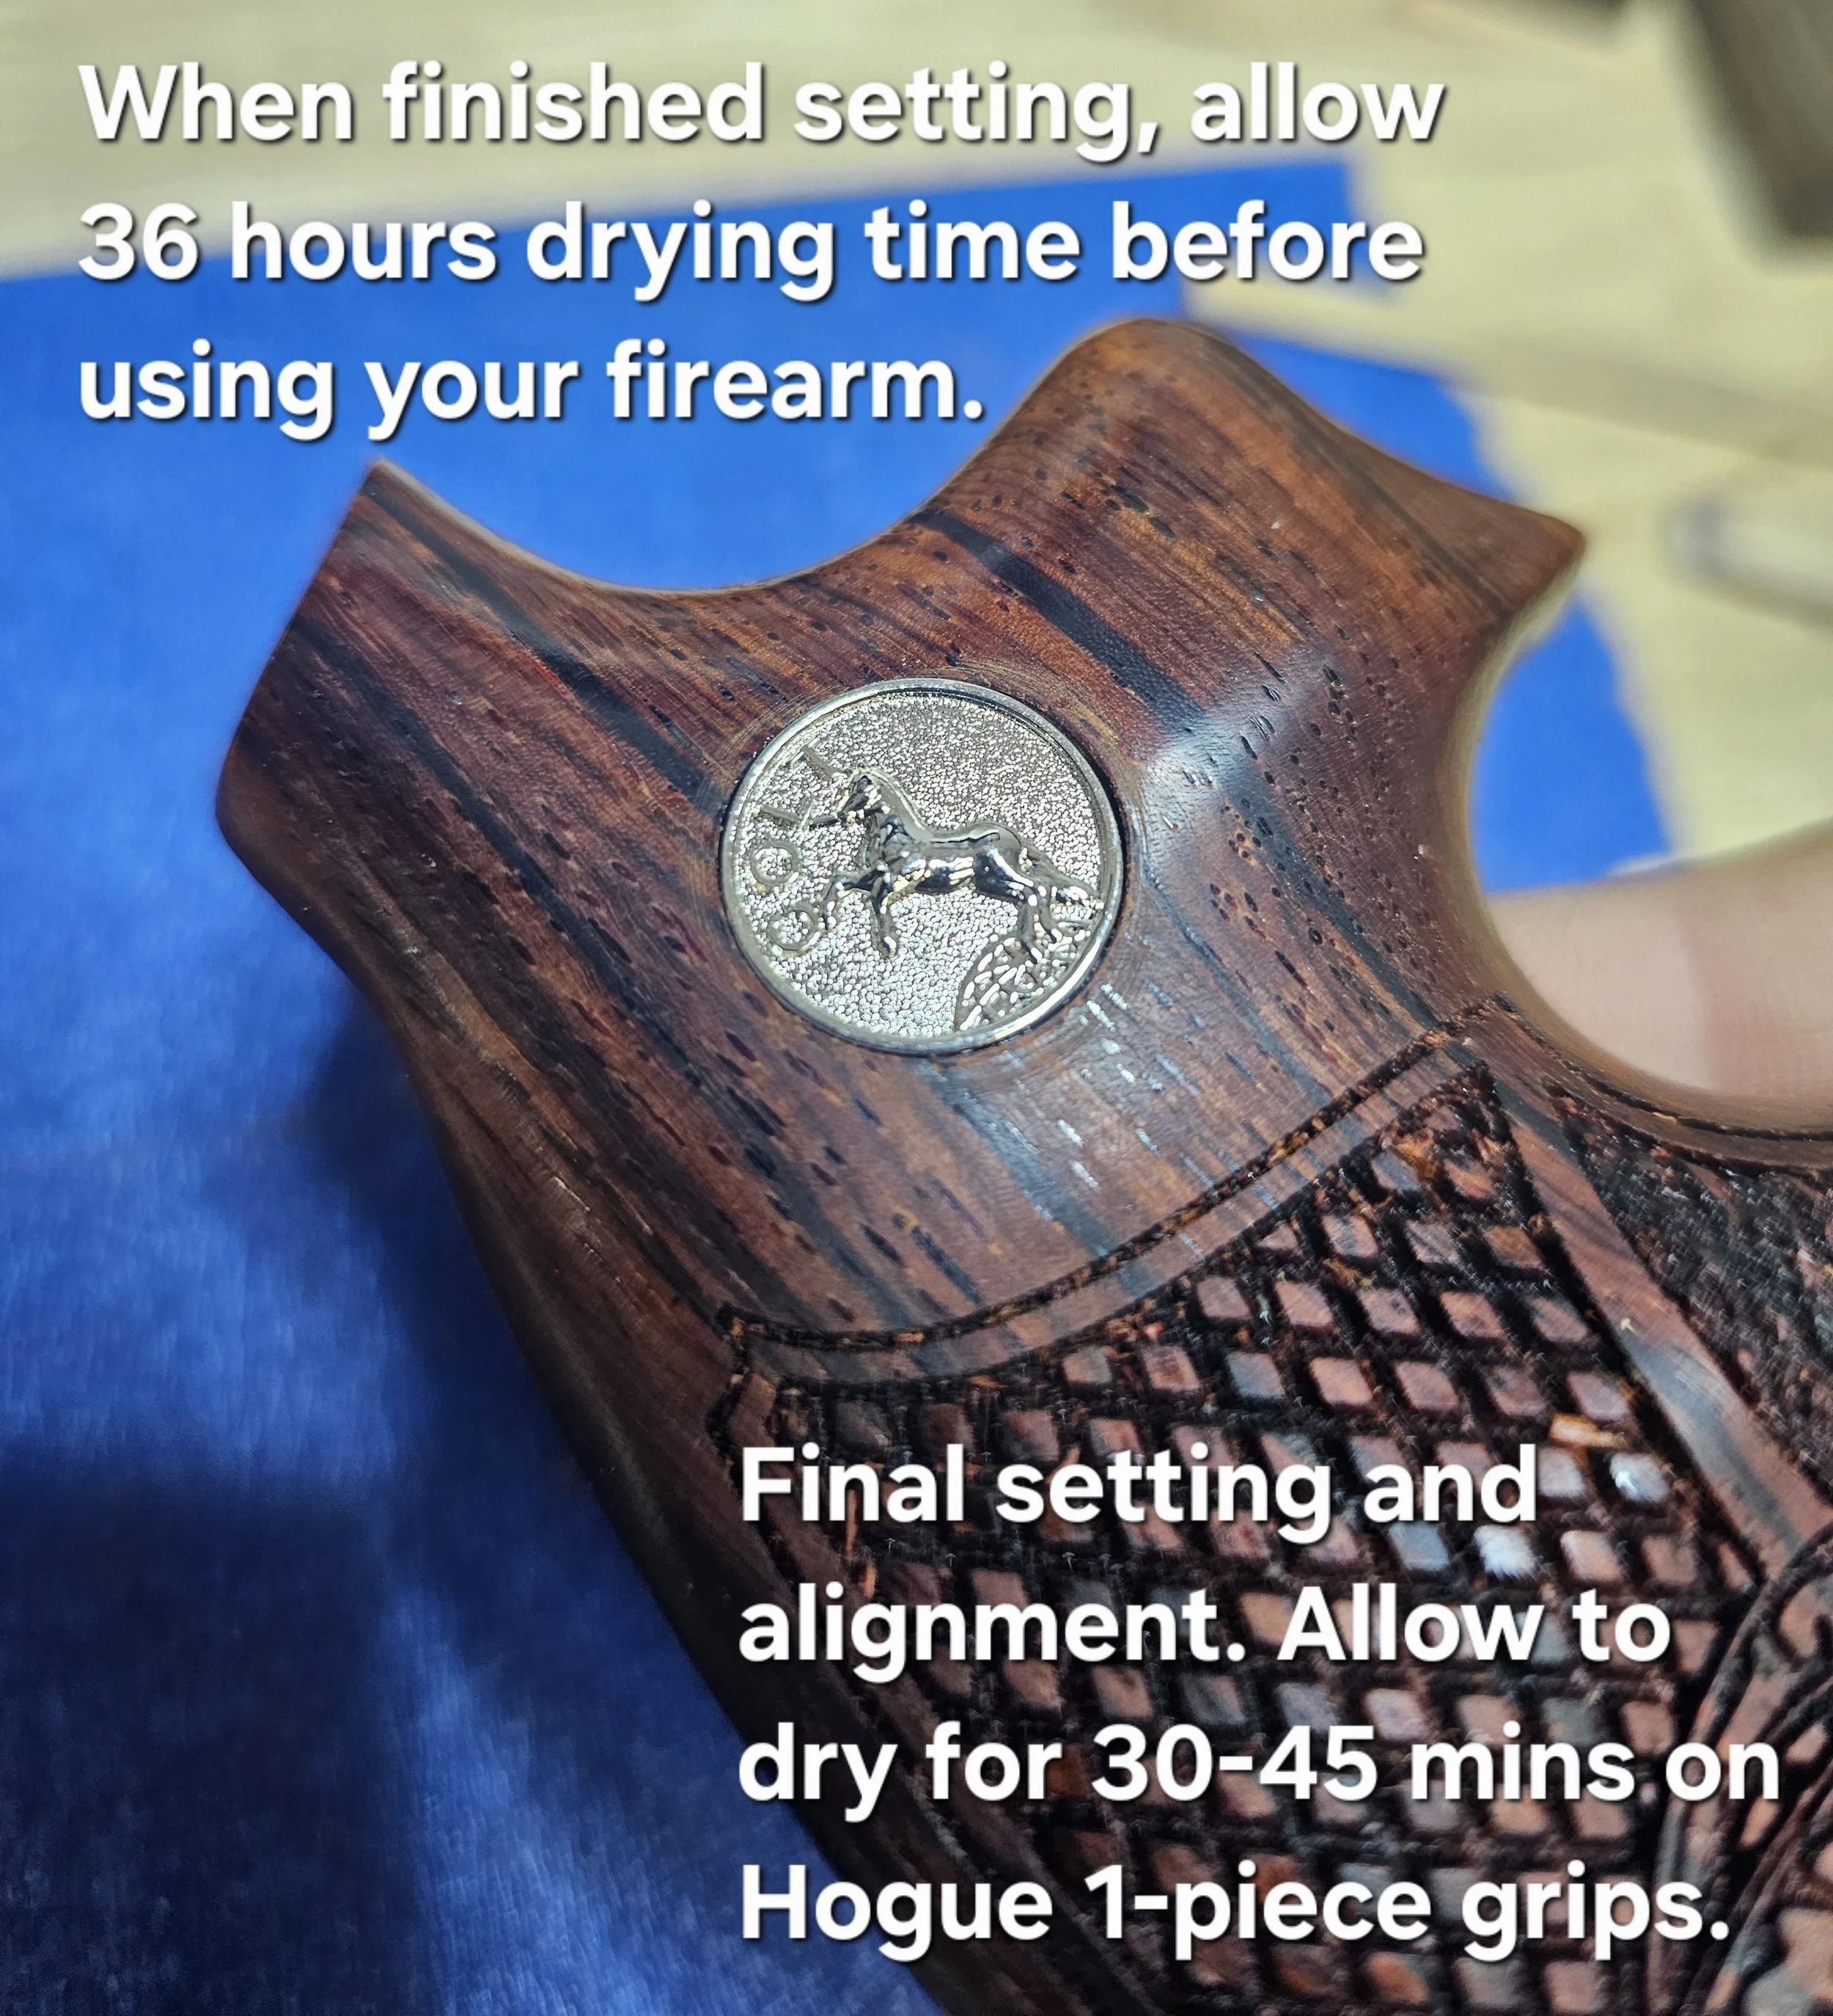
Install one medallion at a time, with at least 30-45 minutes dry time before flipping the grip and working on the second side.
Step Four: You’re Finished!
Let the grips cure undisturbed for 36 to 48 hours. This bond will be extremely tough, fully tested on medallions in a S&W 500 and 460!
This gives the adhesive time to fully bond and ensures a long-lasting lifetime installation.
Enjoy your new medallion-equipped grips — done the right way.
Final Note
When your medallions have been installed and dry time is complete you will need to clean and protect the holes, as this always leaves some bare wood from drilling and sanding, we highly recommend our Two towel combo, a great value for a pre soaked towel with Clenzoil®, the only product approved for HRV Grips®. However a good CLP will do the job, and its important to protect your grips and present your new medallions properly.
We hope you found this installation guide helpful. It takes significant time and effort to create resources like this, and we’re proud to share our expert knowledge with our customers to help ensure the best possible results.
This page is password protected for a reason — to prevent outside sellers from directing their customers here to benefit from the hard work we put in. Unfortunately, that happens more often than you'd think. To protect the integrity of this content, we rotate the password every 2 to 4 weeks.
We kindly ask that you do not share this password outside of your own use. This page is here for you, our customer — and we’d like to keep it that way. Should you require the use of this help section again please contact us for the updated password with your order number from your purchase.
Thank you for your support,
Joy & Ron
Hudson River Valley Customs Corp
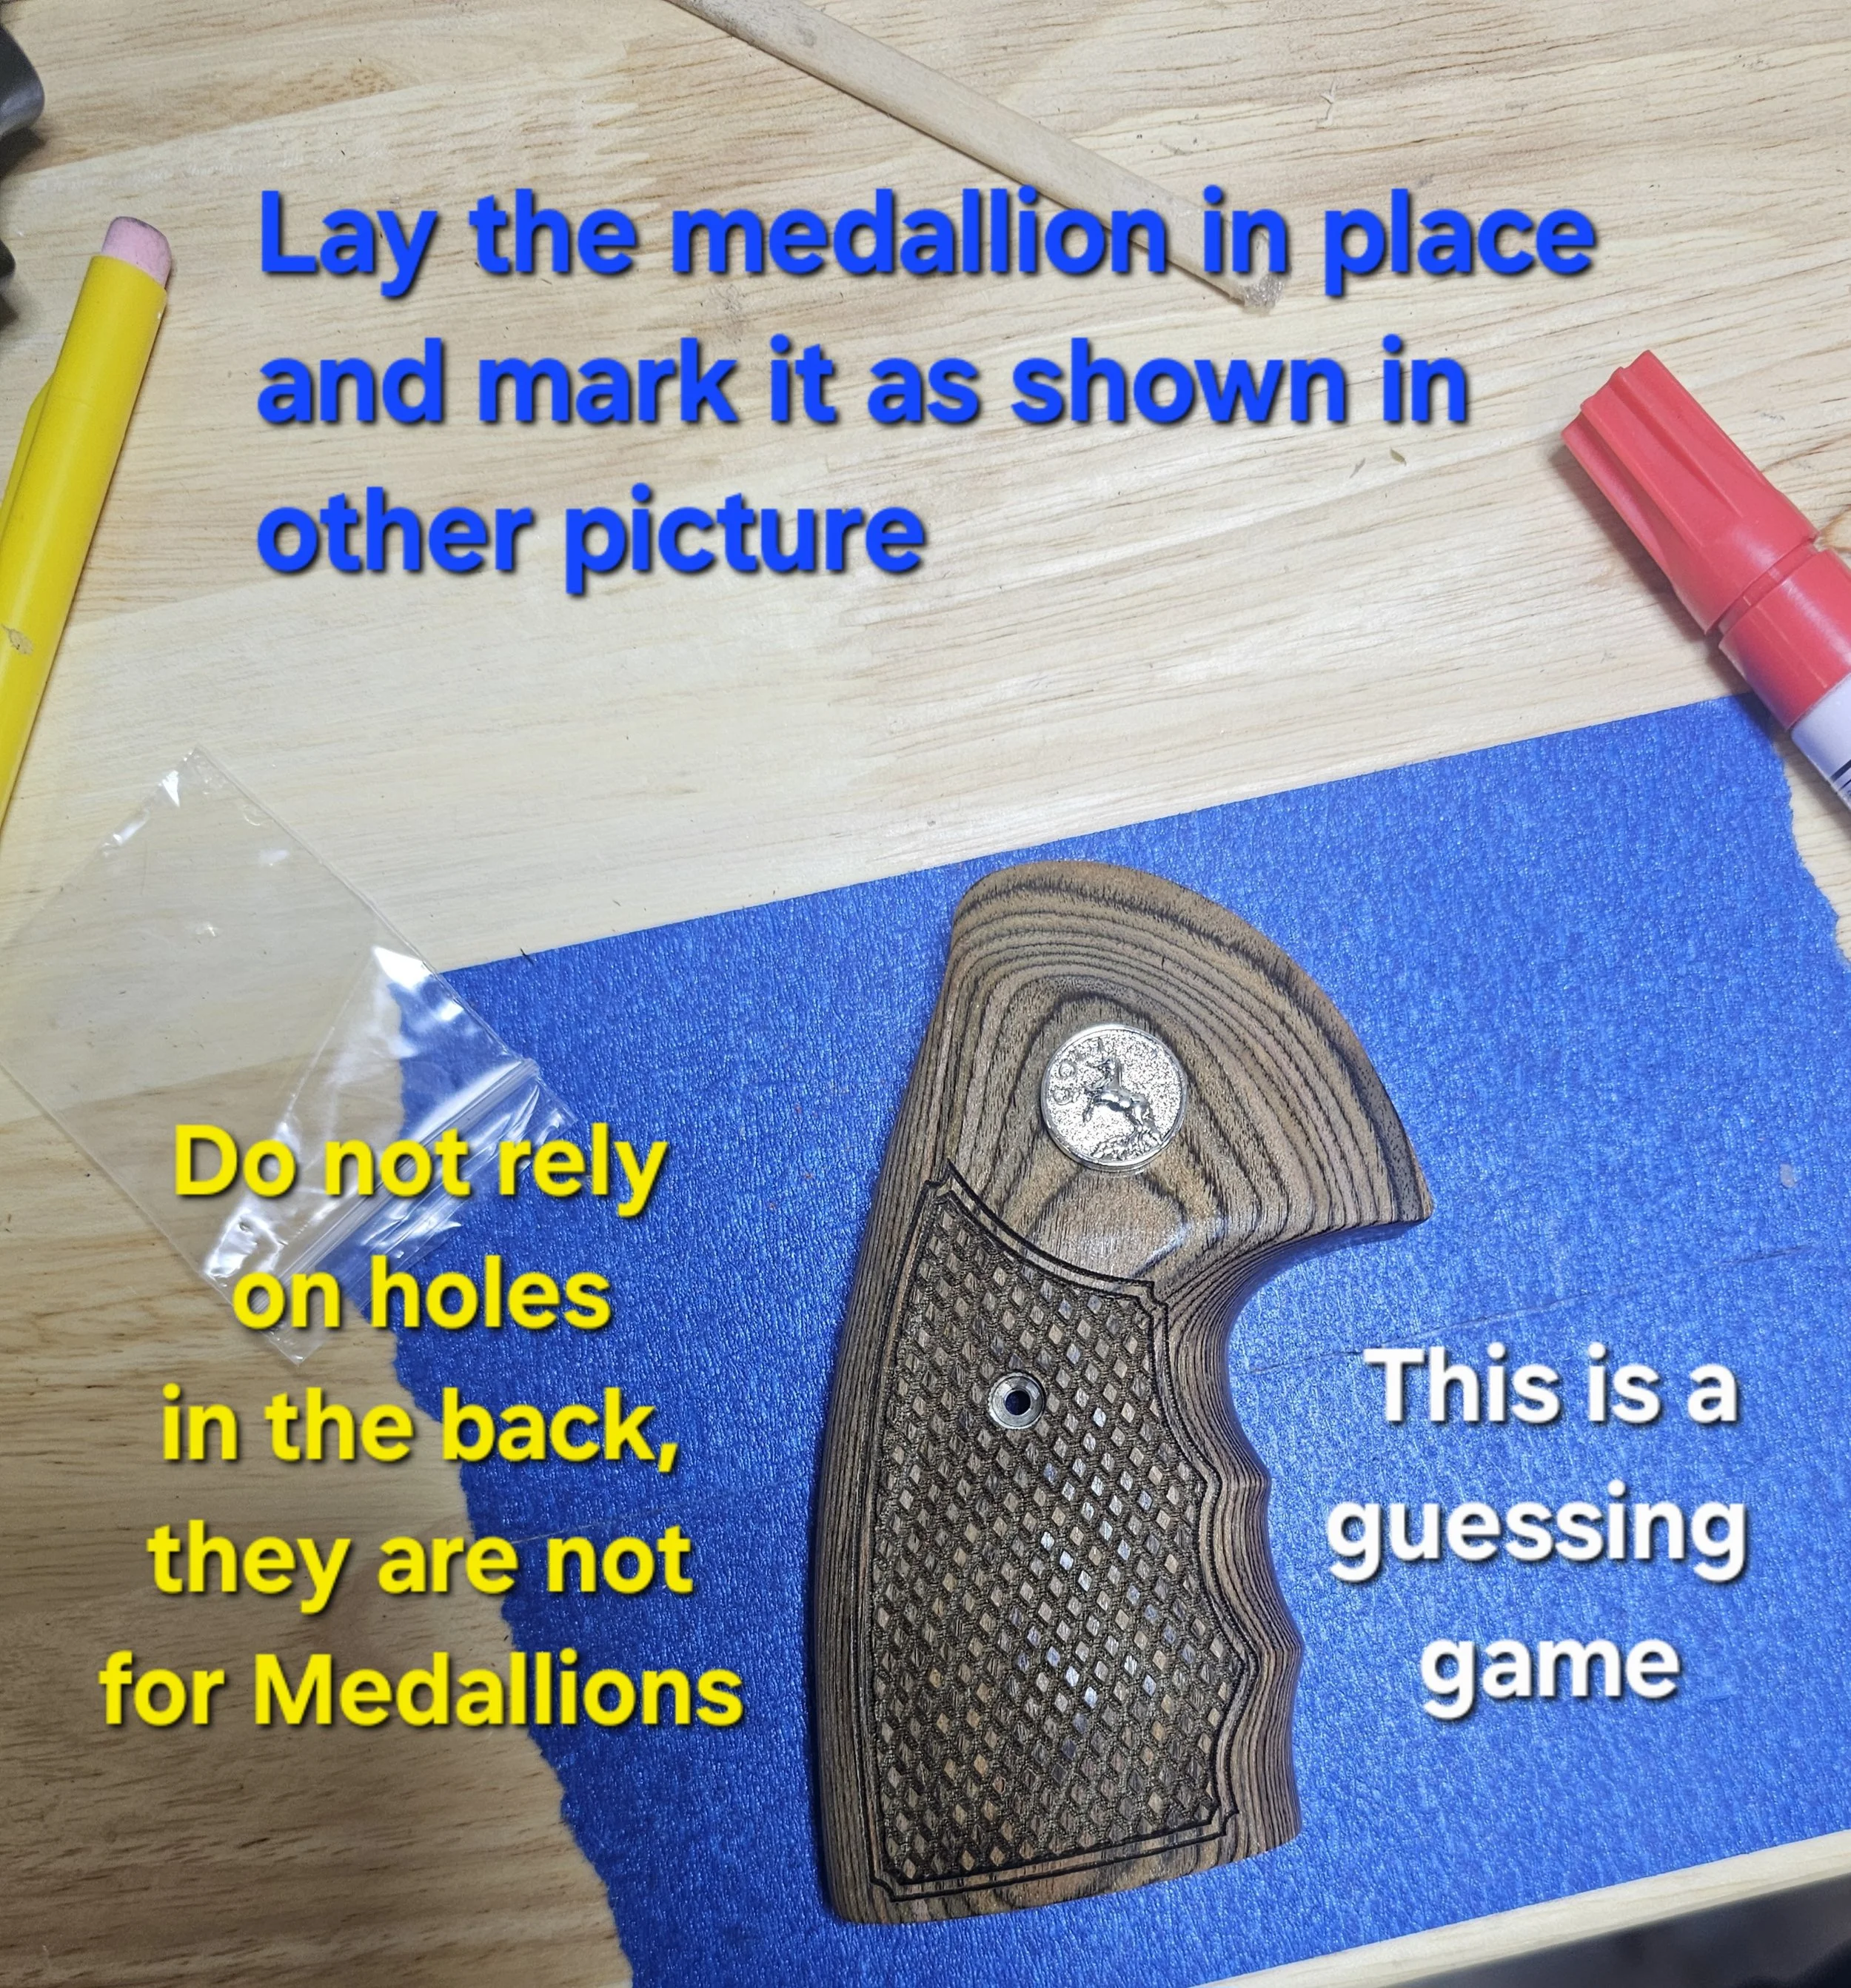
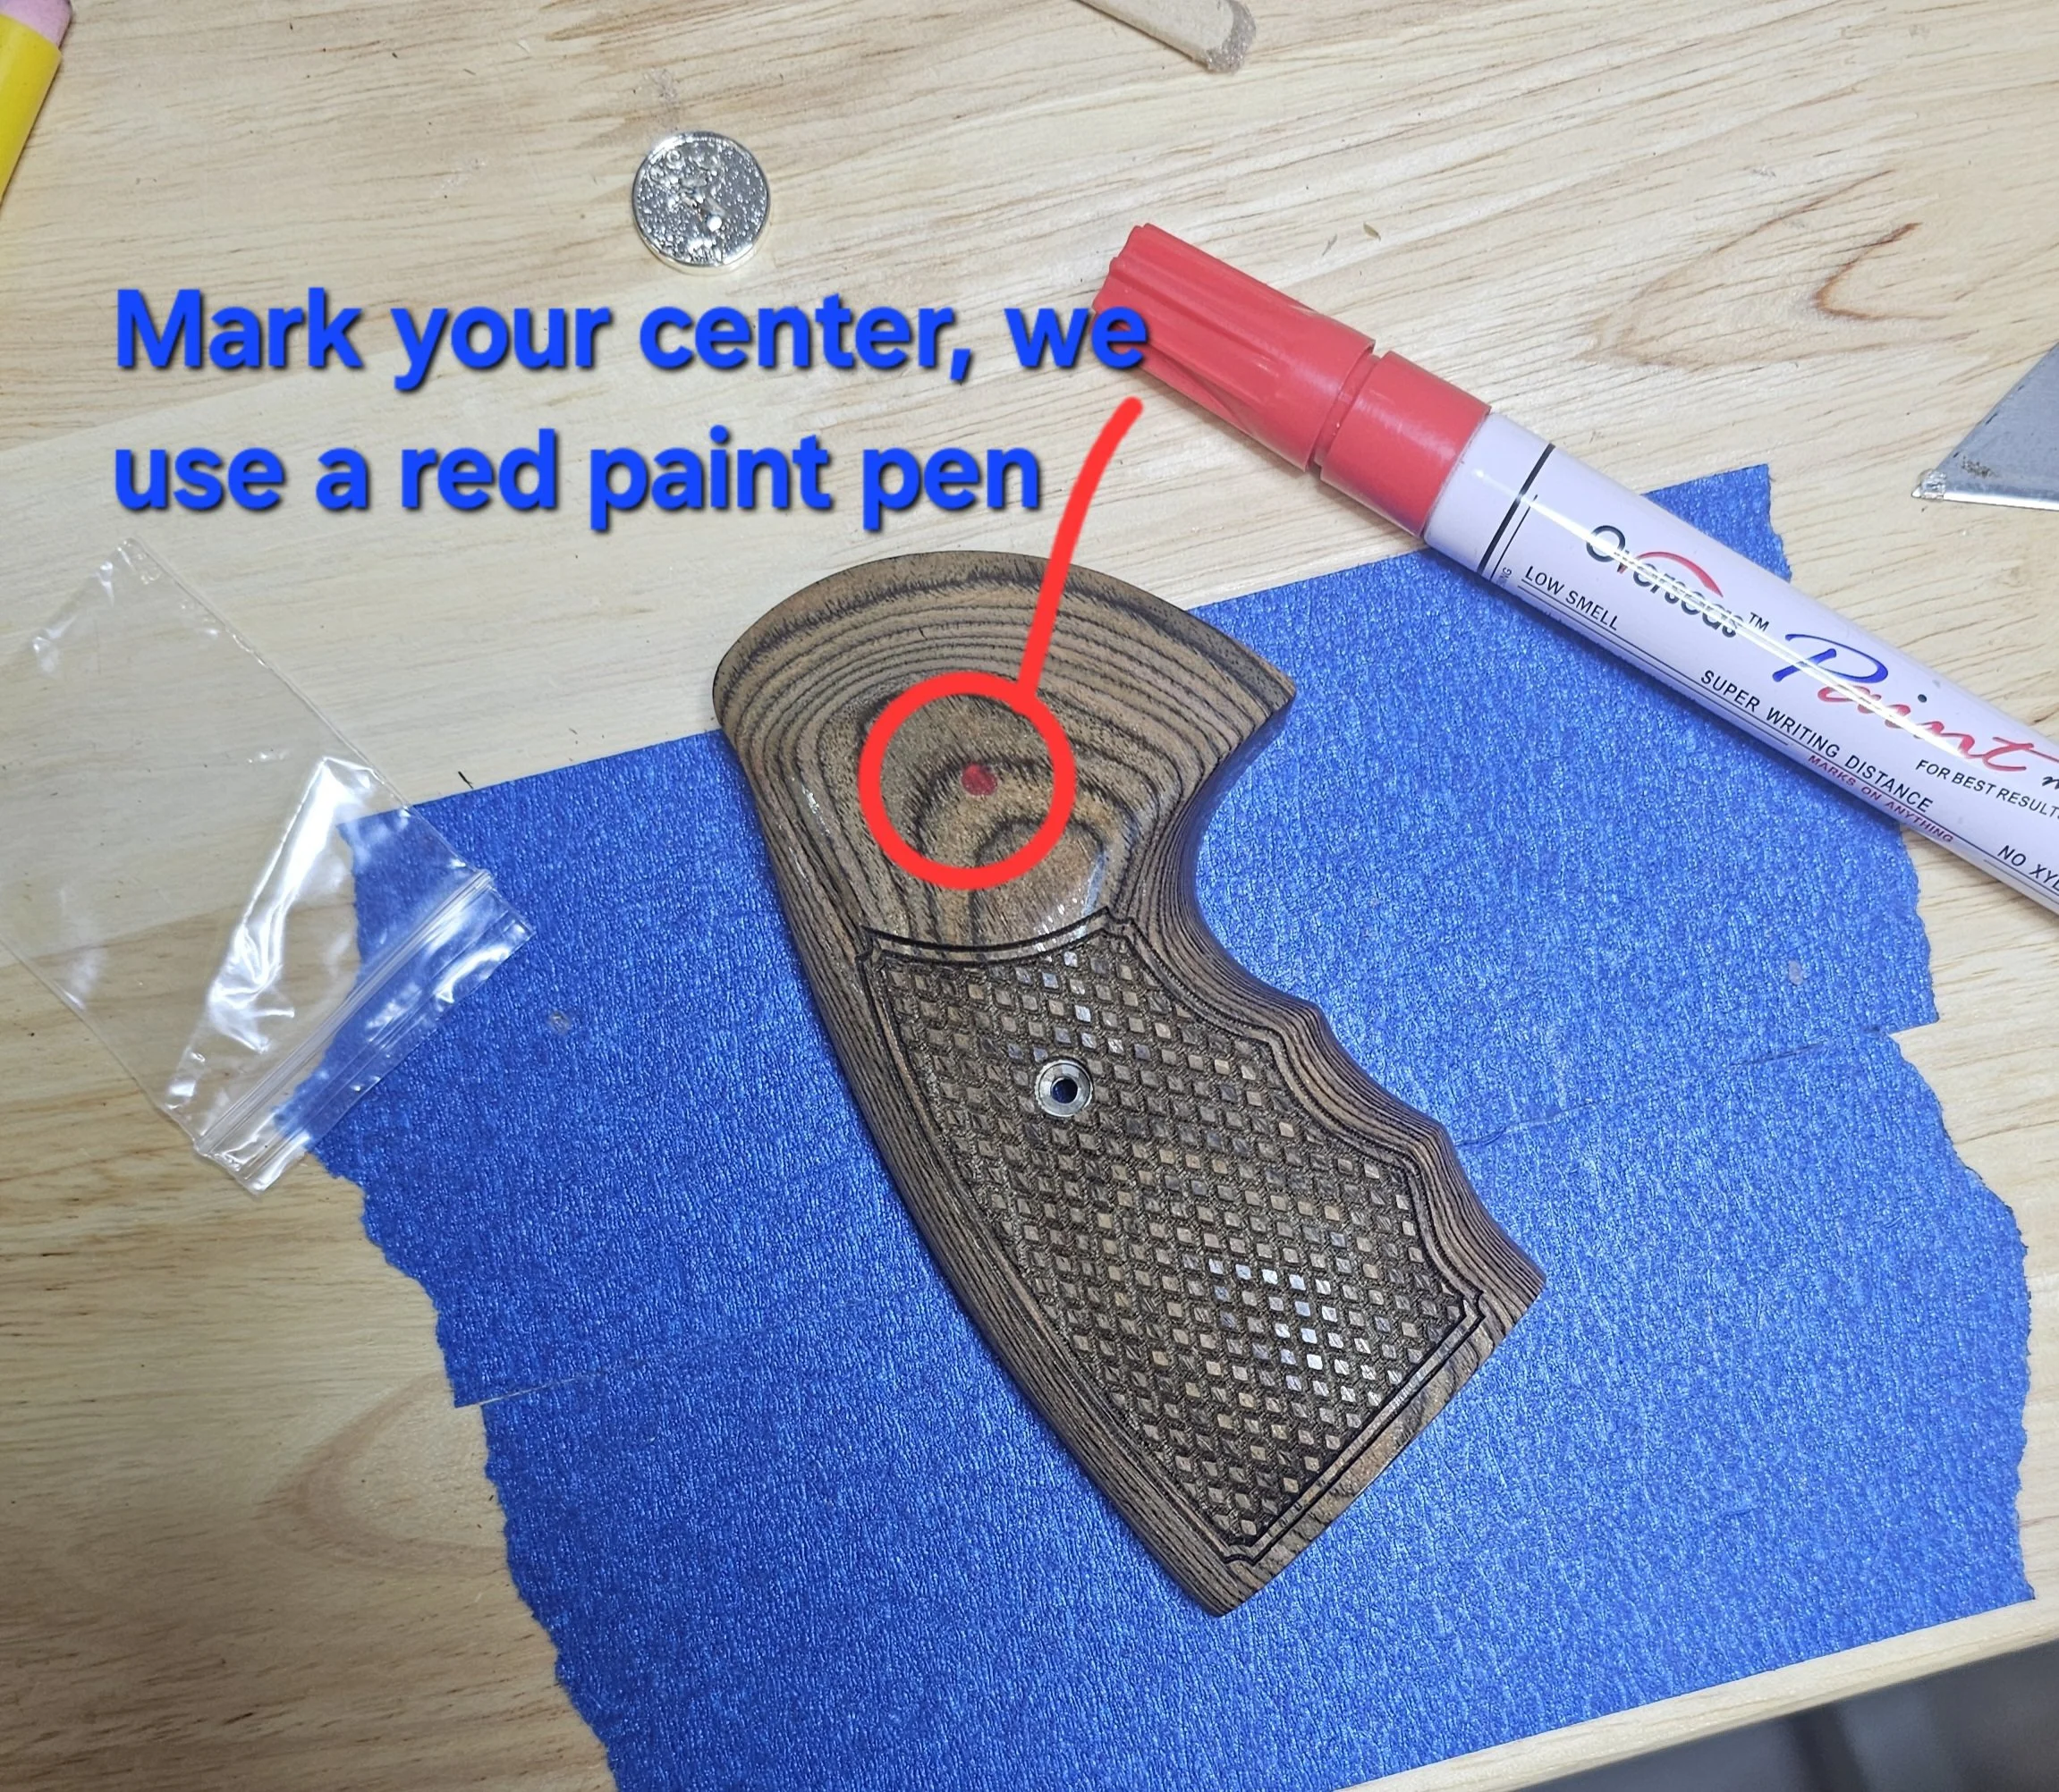
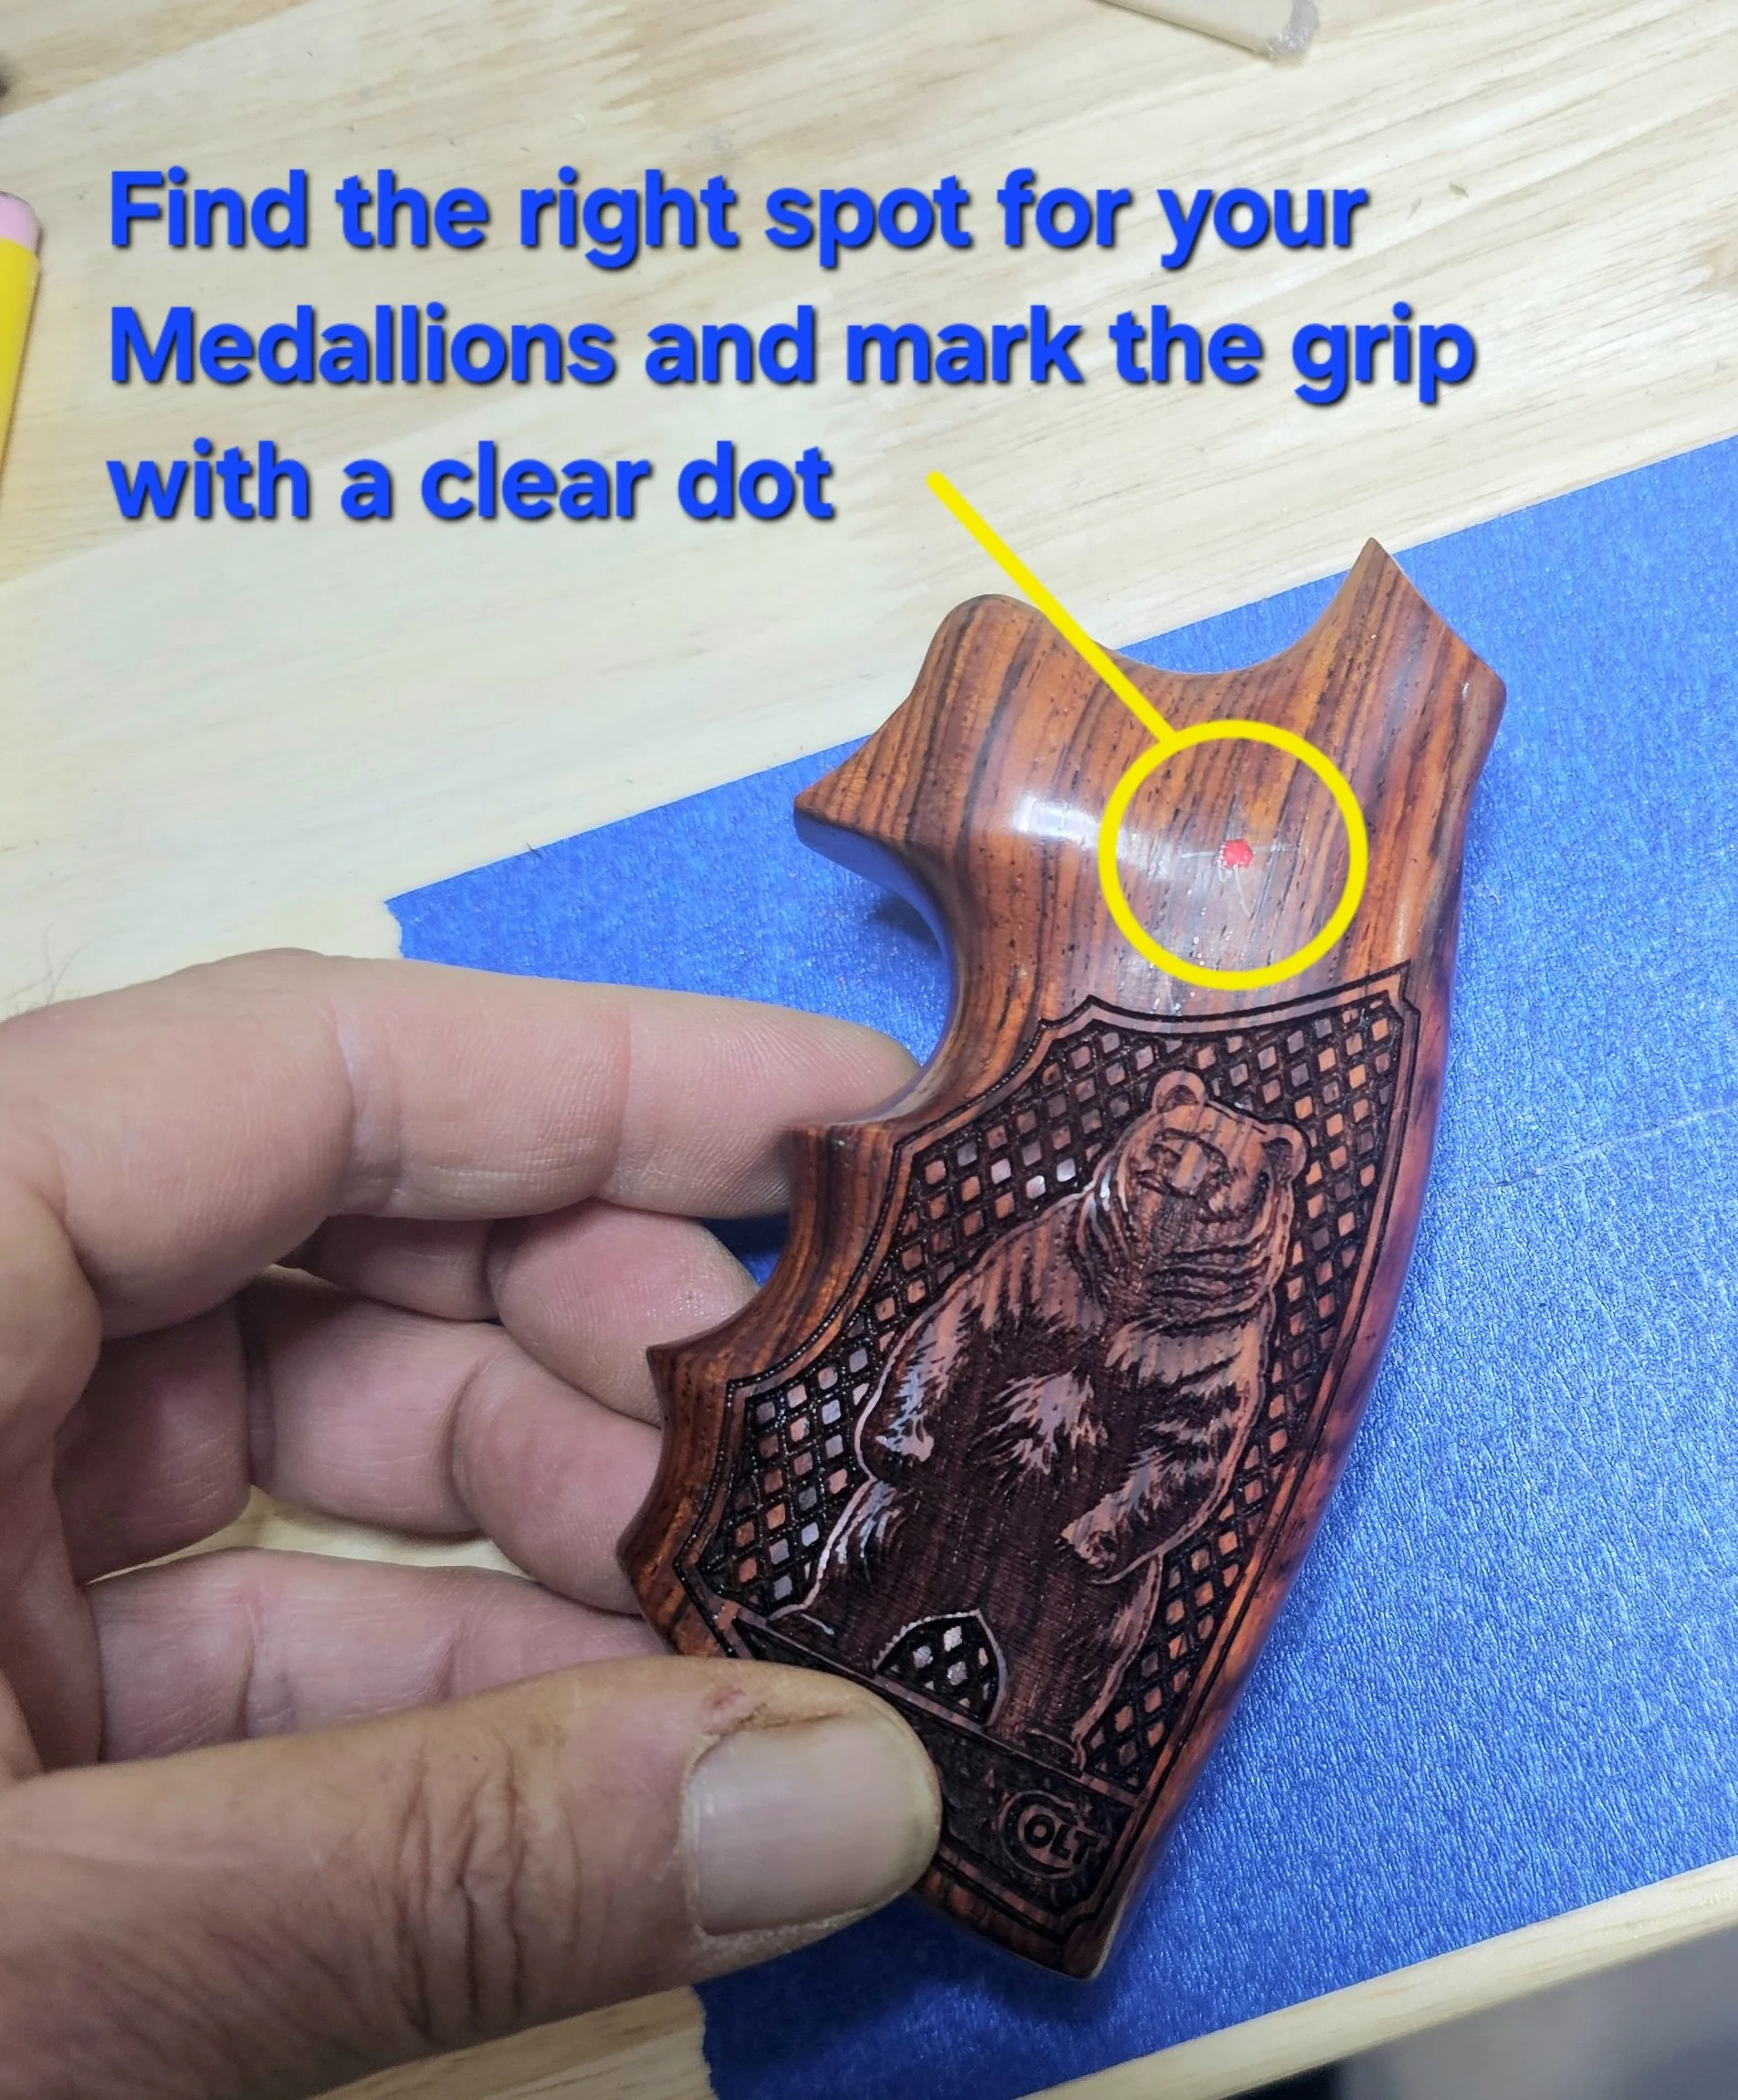
As many of you know, we’re just beginning the process of offering accessories — and this installation guide is a first step in that journey. It took time to write and organize it properly. We intend to break sections with the matching photos below. However you will find the steps above have a photo to match and help you further.
We hope this help section proves useful and gives you the confidence to take on your own medallion install. As always, HRV Customs is committed to offering the best customer service in the industry. We are truly thankful for your support and wish you the very best — in your projects and in life. Should you need additional help or have questions related to medallion installations that are not listed here, feel free to reach out to us for further help with your project. Cheers! Joy & Ron
Below you will find images of different grips with our process to install medallions properly. Being a Full Custom Shop this is how our medallions are set, by hand, one at a time, with setting time between. Now we do have some items which help us with centering and perfect hole sizes. These are very expensive tools, and are a bit more than we suggest a DIYer spend to install even a few sets. Our bits cost about $100 a piece and are changed every 2-4 weeks on average, our system works backwards to this system, by drilling the 3/16” pilot hole first and using a special bit that follows the pilot hole to create the perfect hole, however when we first started installing medallions this was the method we used successfully. This is worth the investment with the amount of medallions we install, this also is the reason we highly suggest the 3/16” pilot hole. Should your hole become a bit messed up, there is a chance that we can fix a bad hole by running a bigger bit hole using our bore drill. A small chance is better than none.
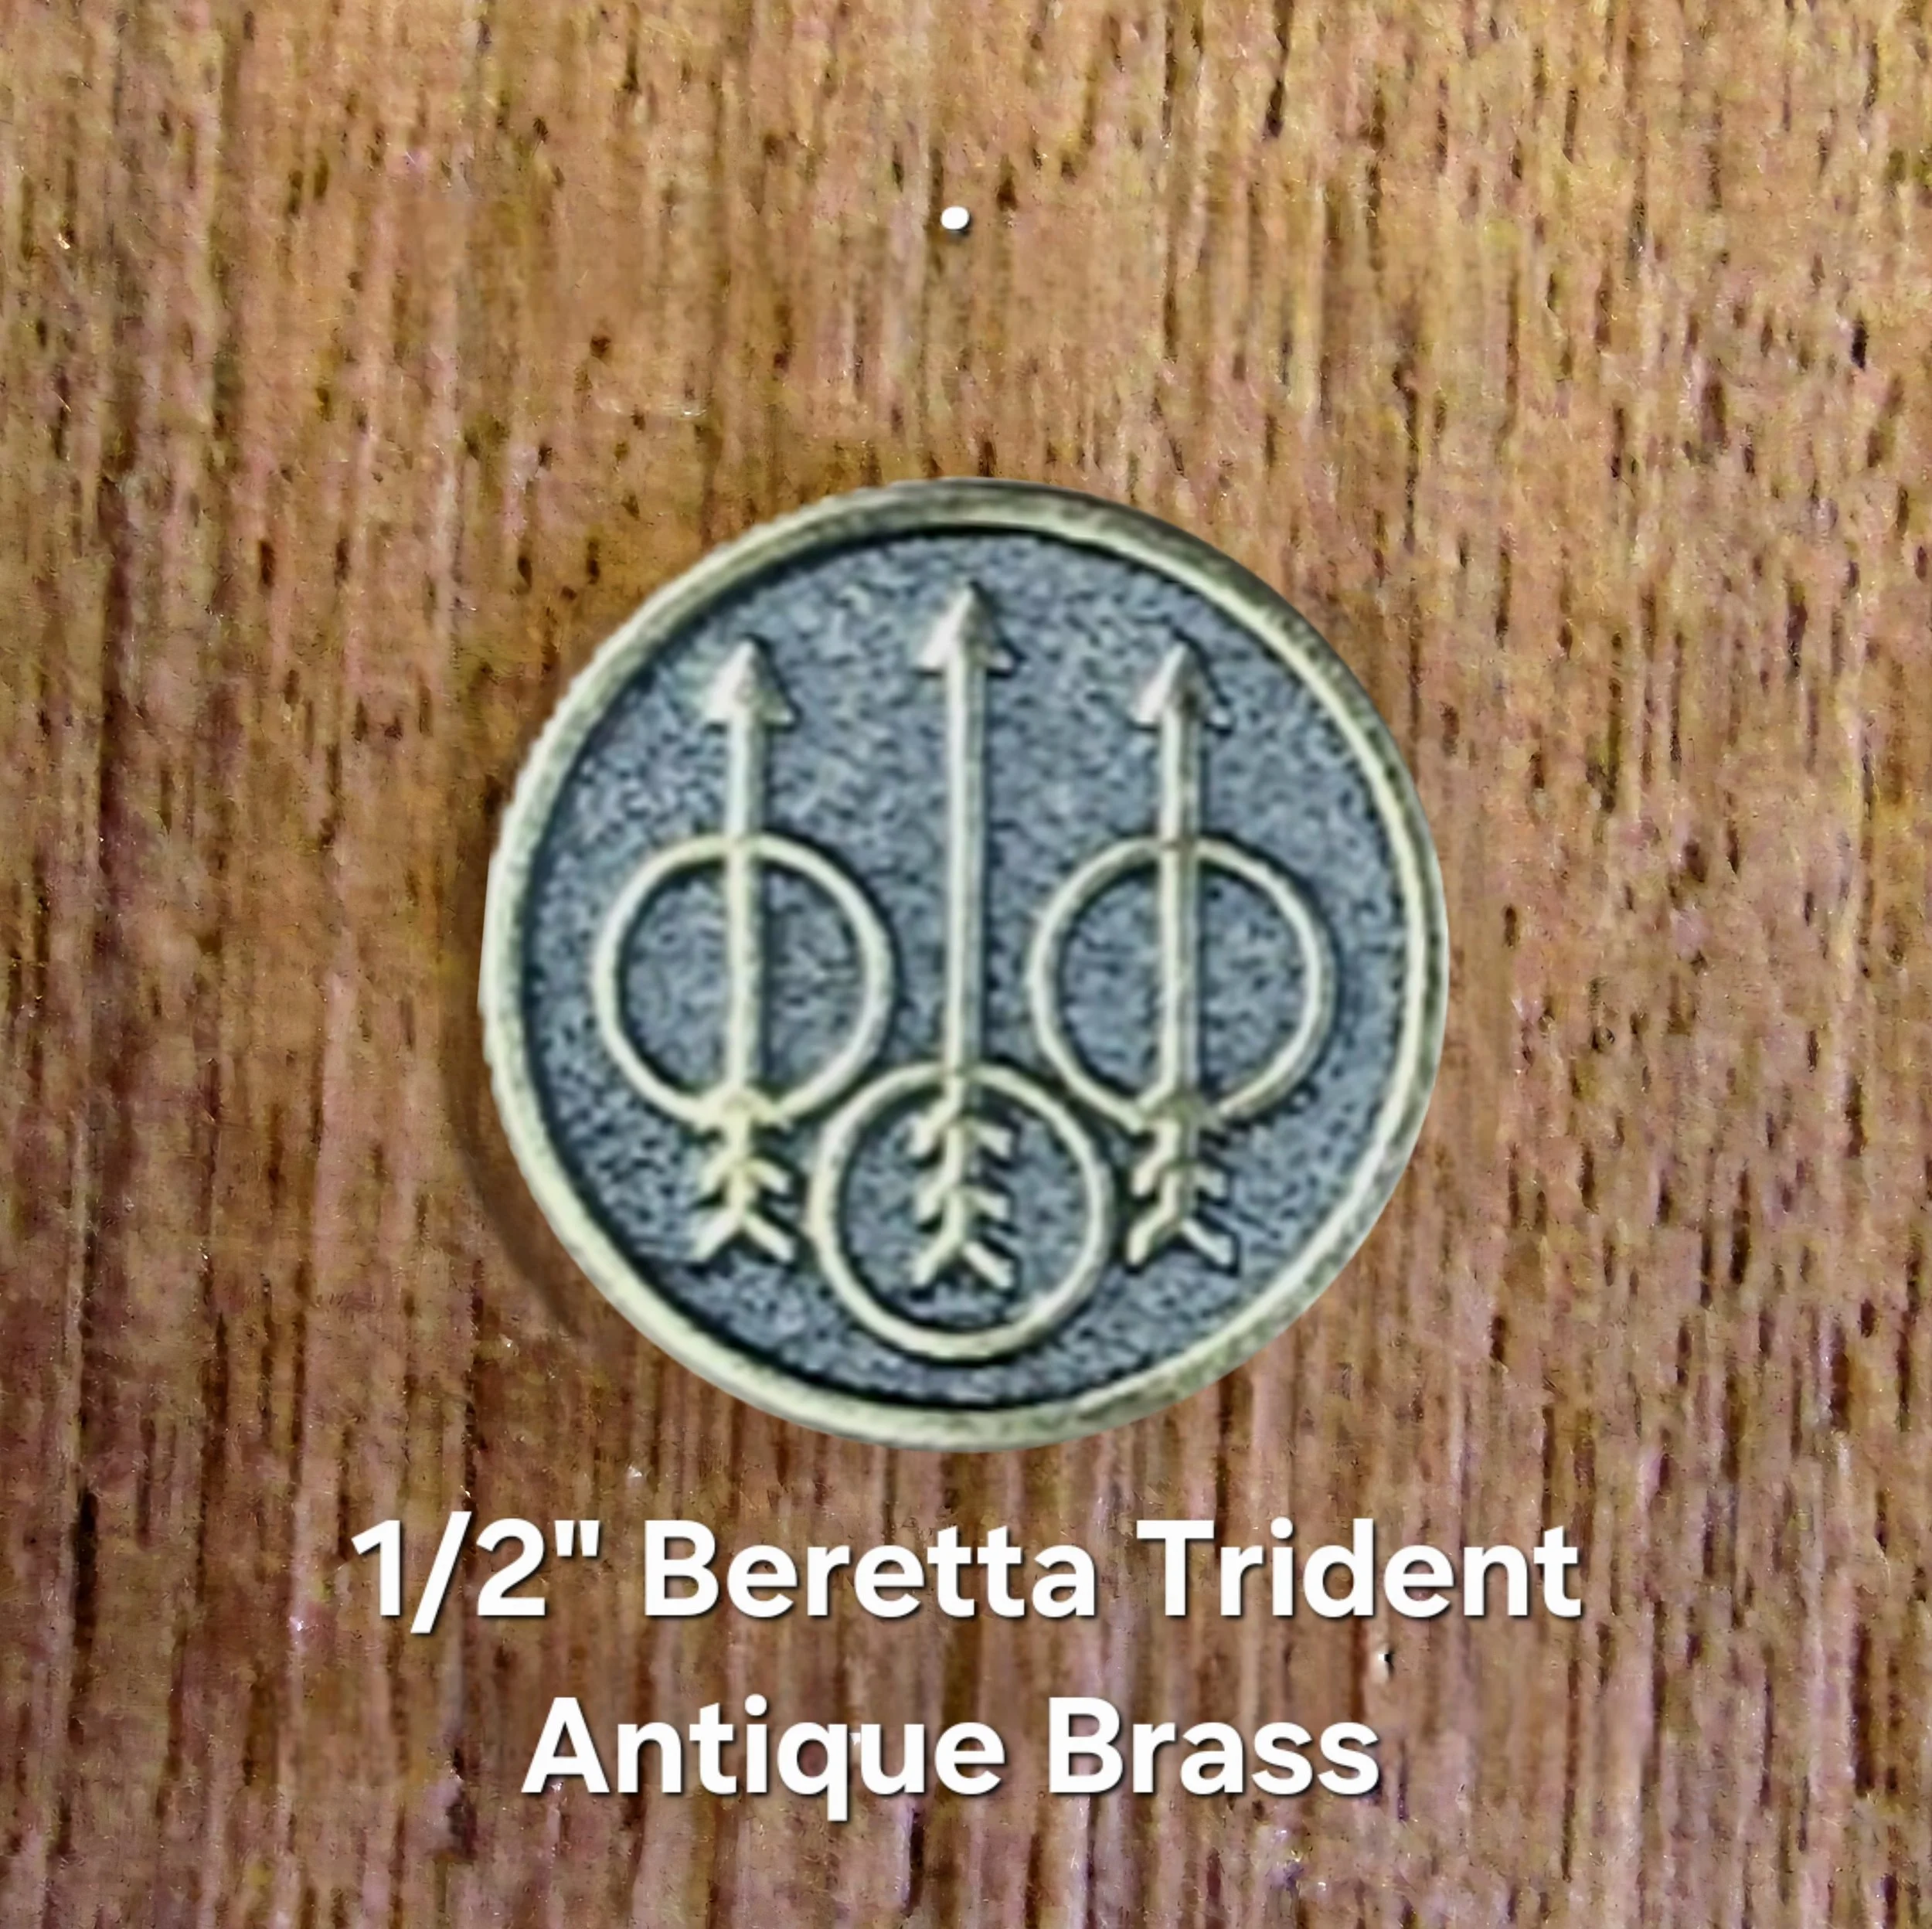
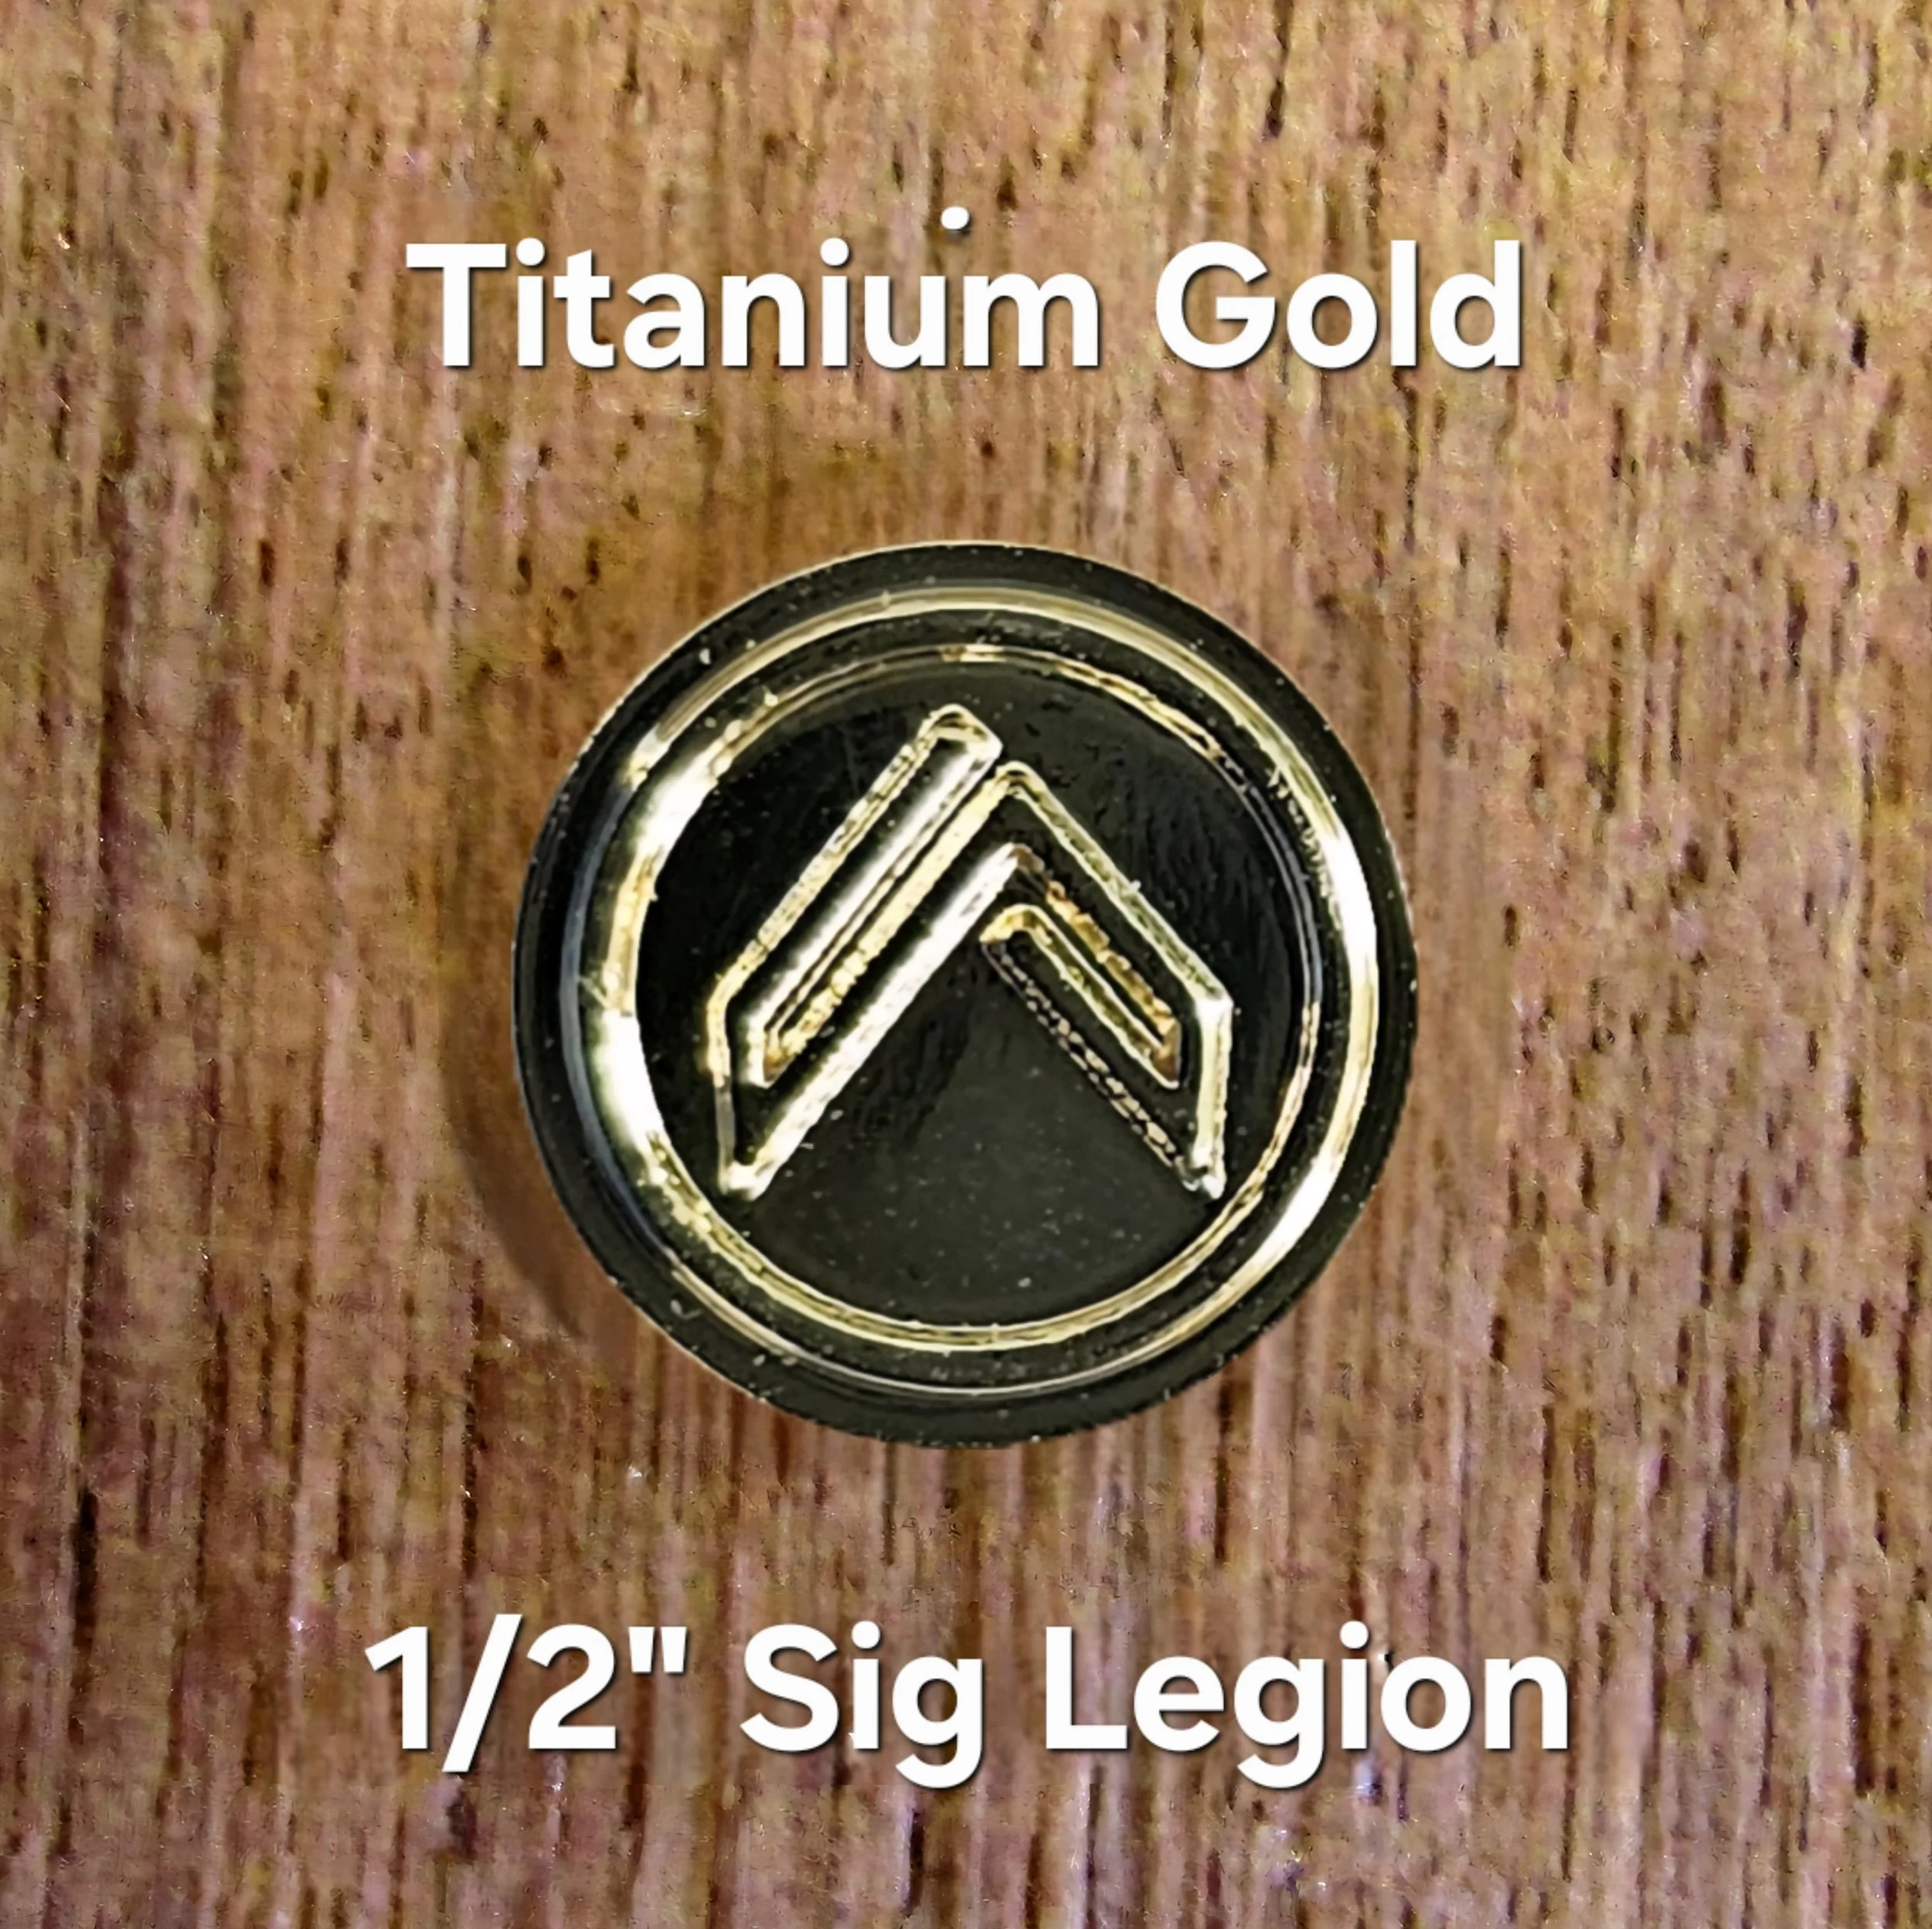
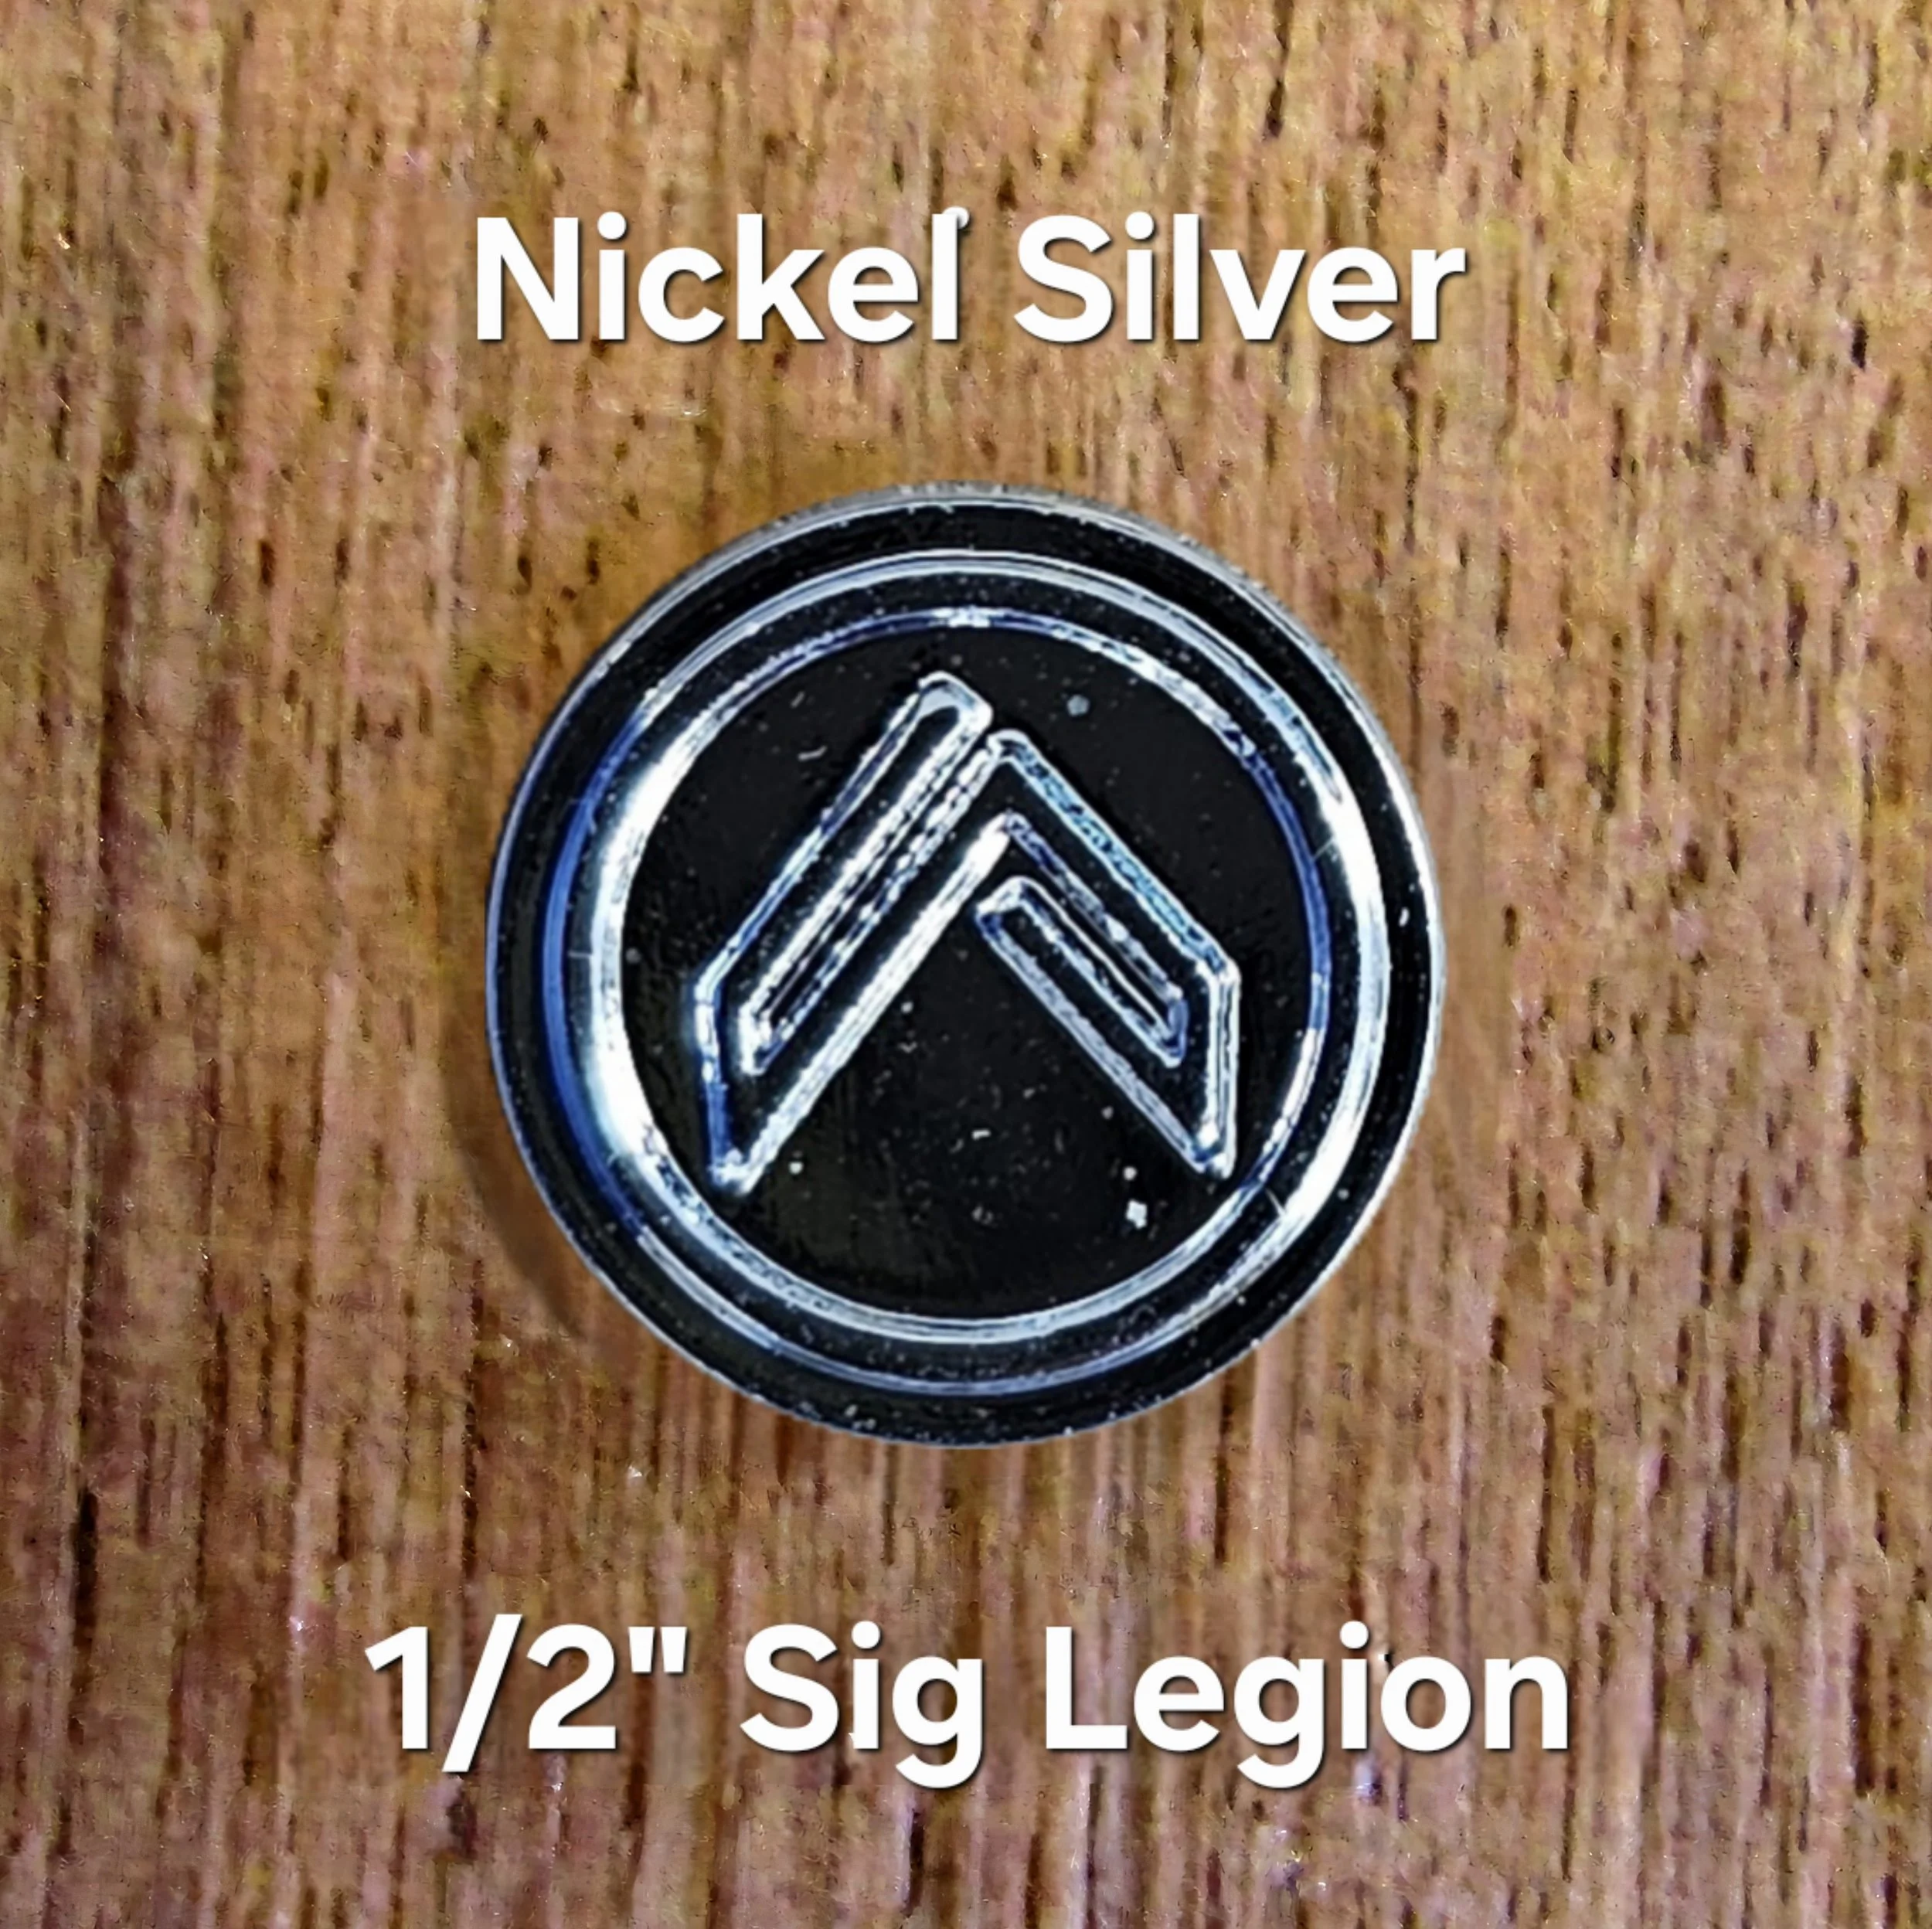
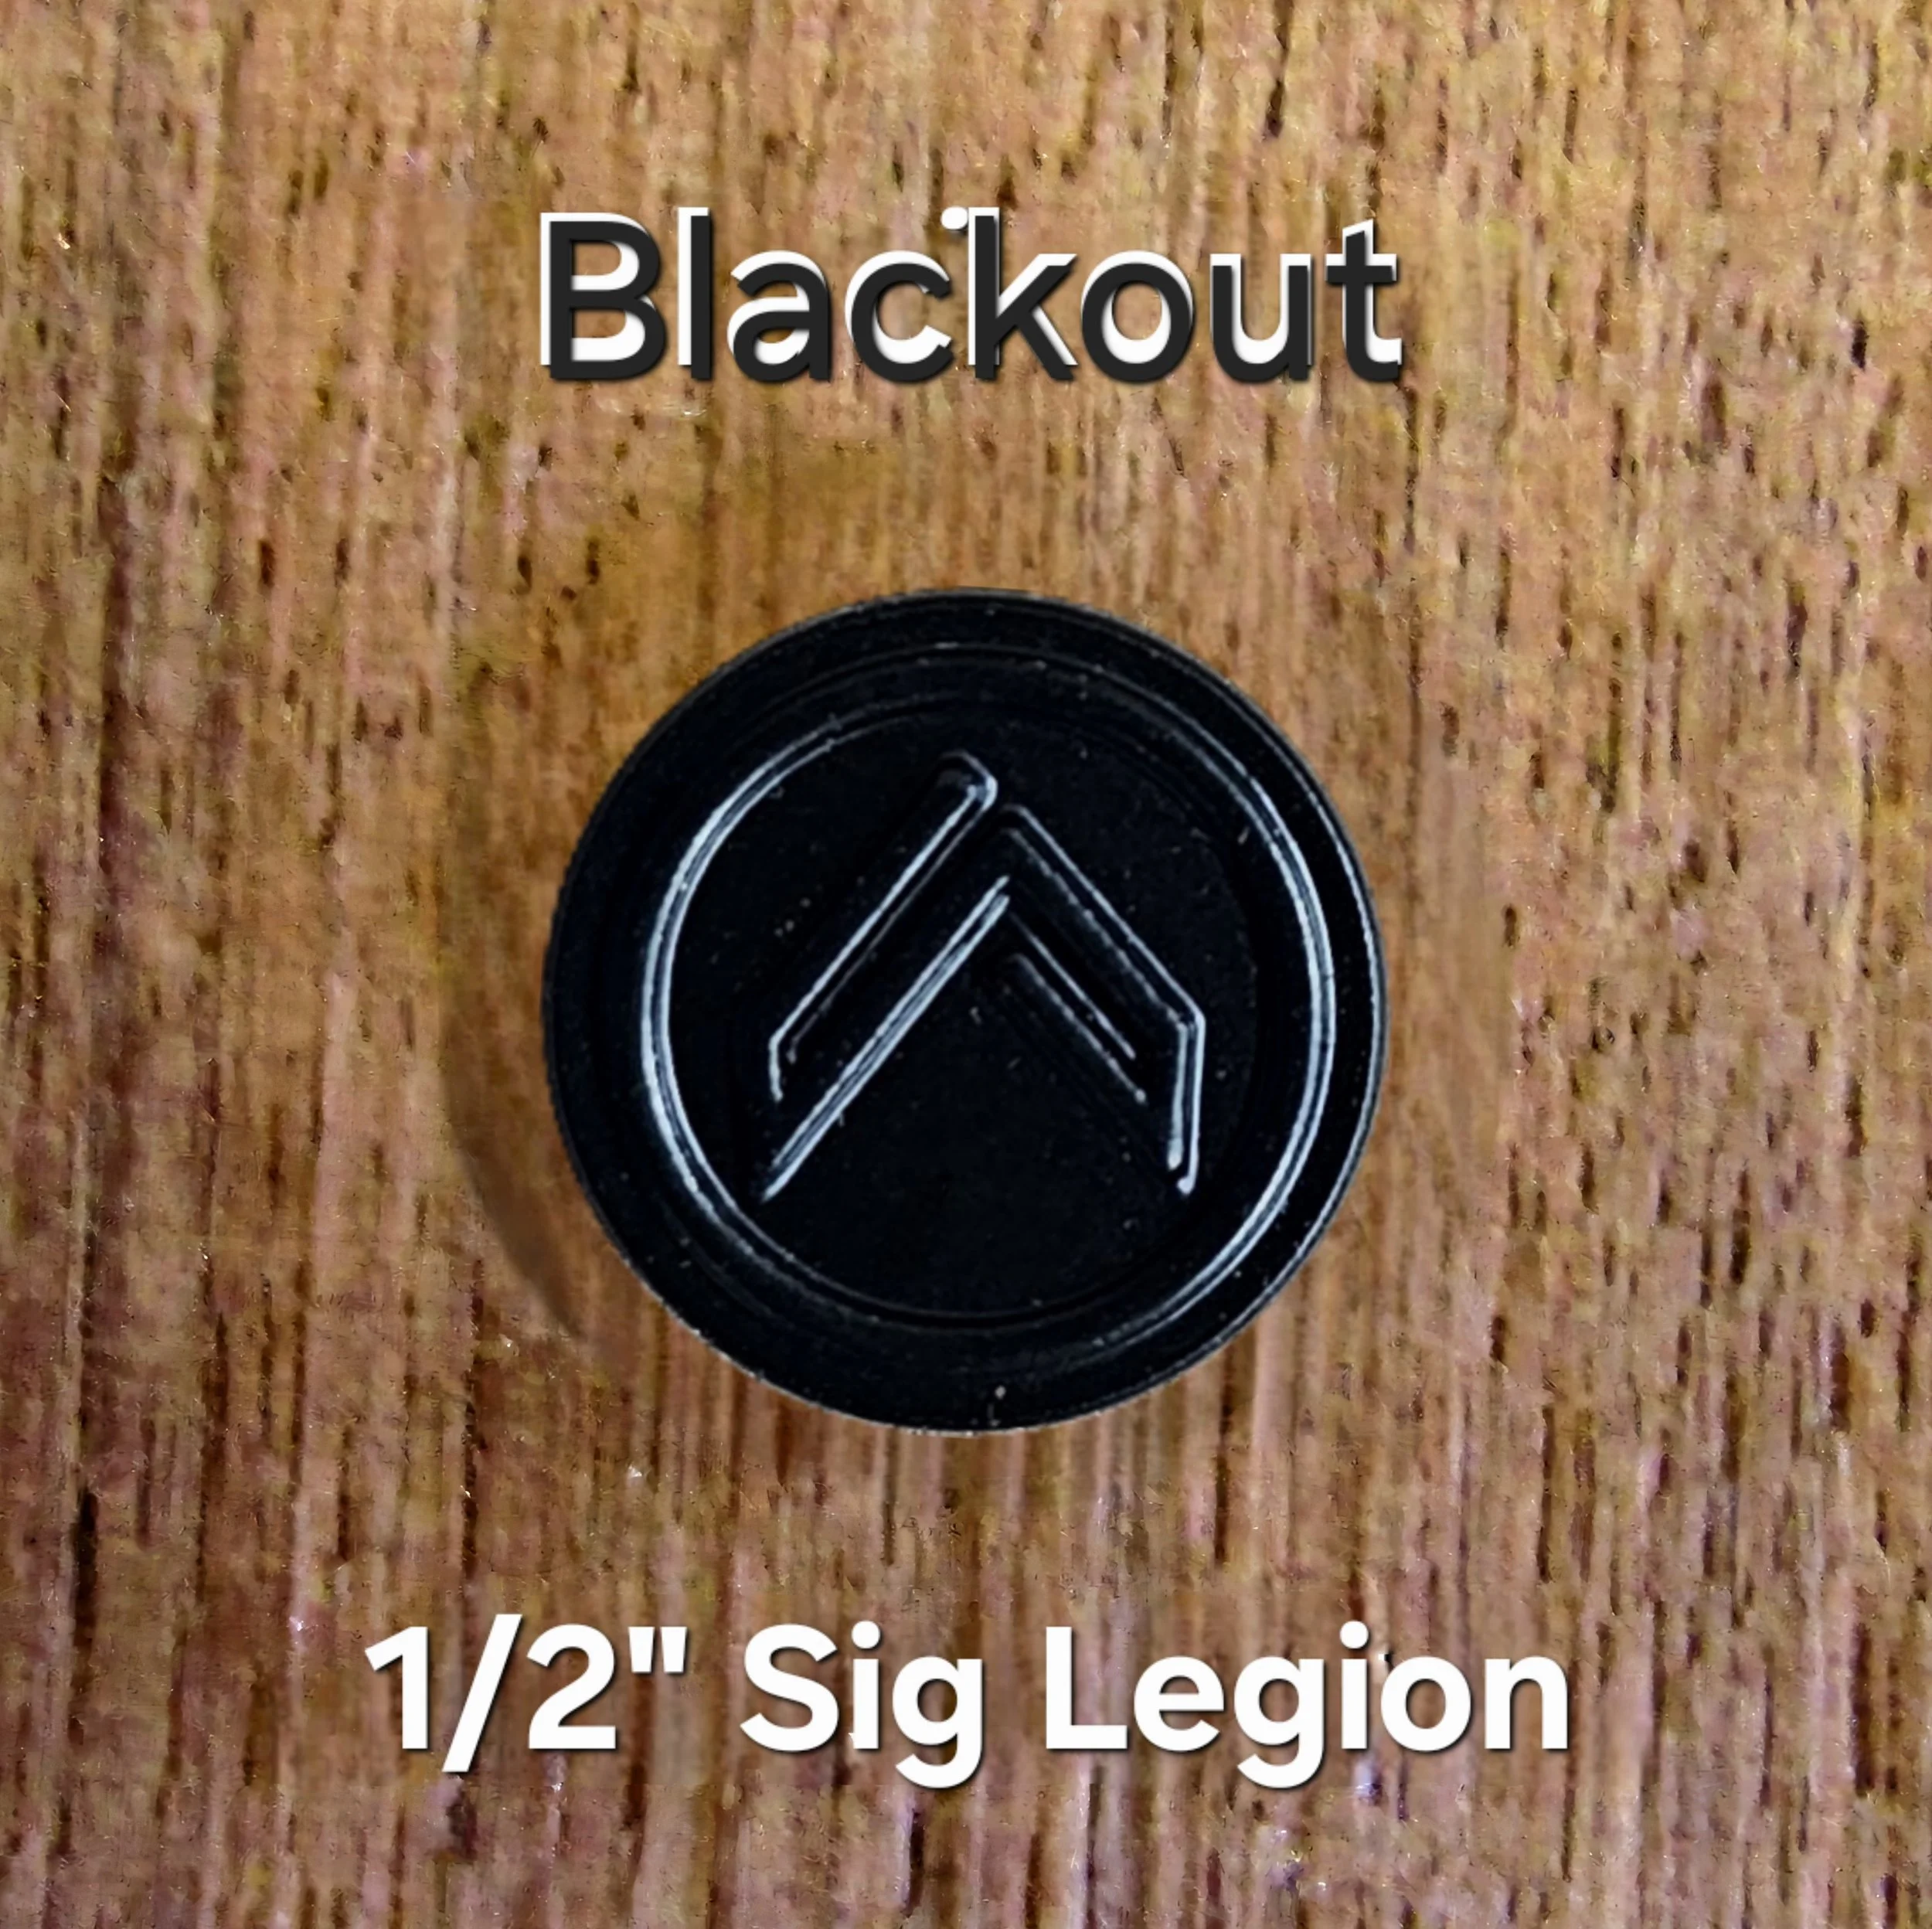
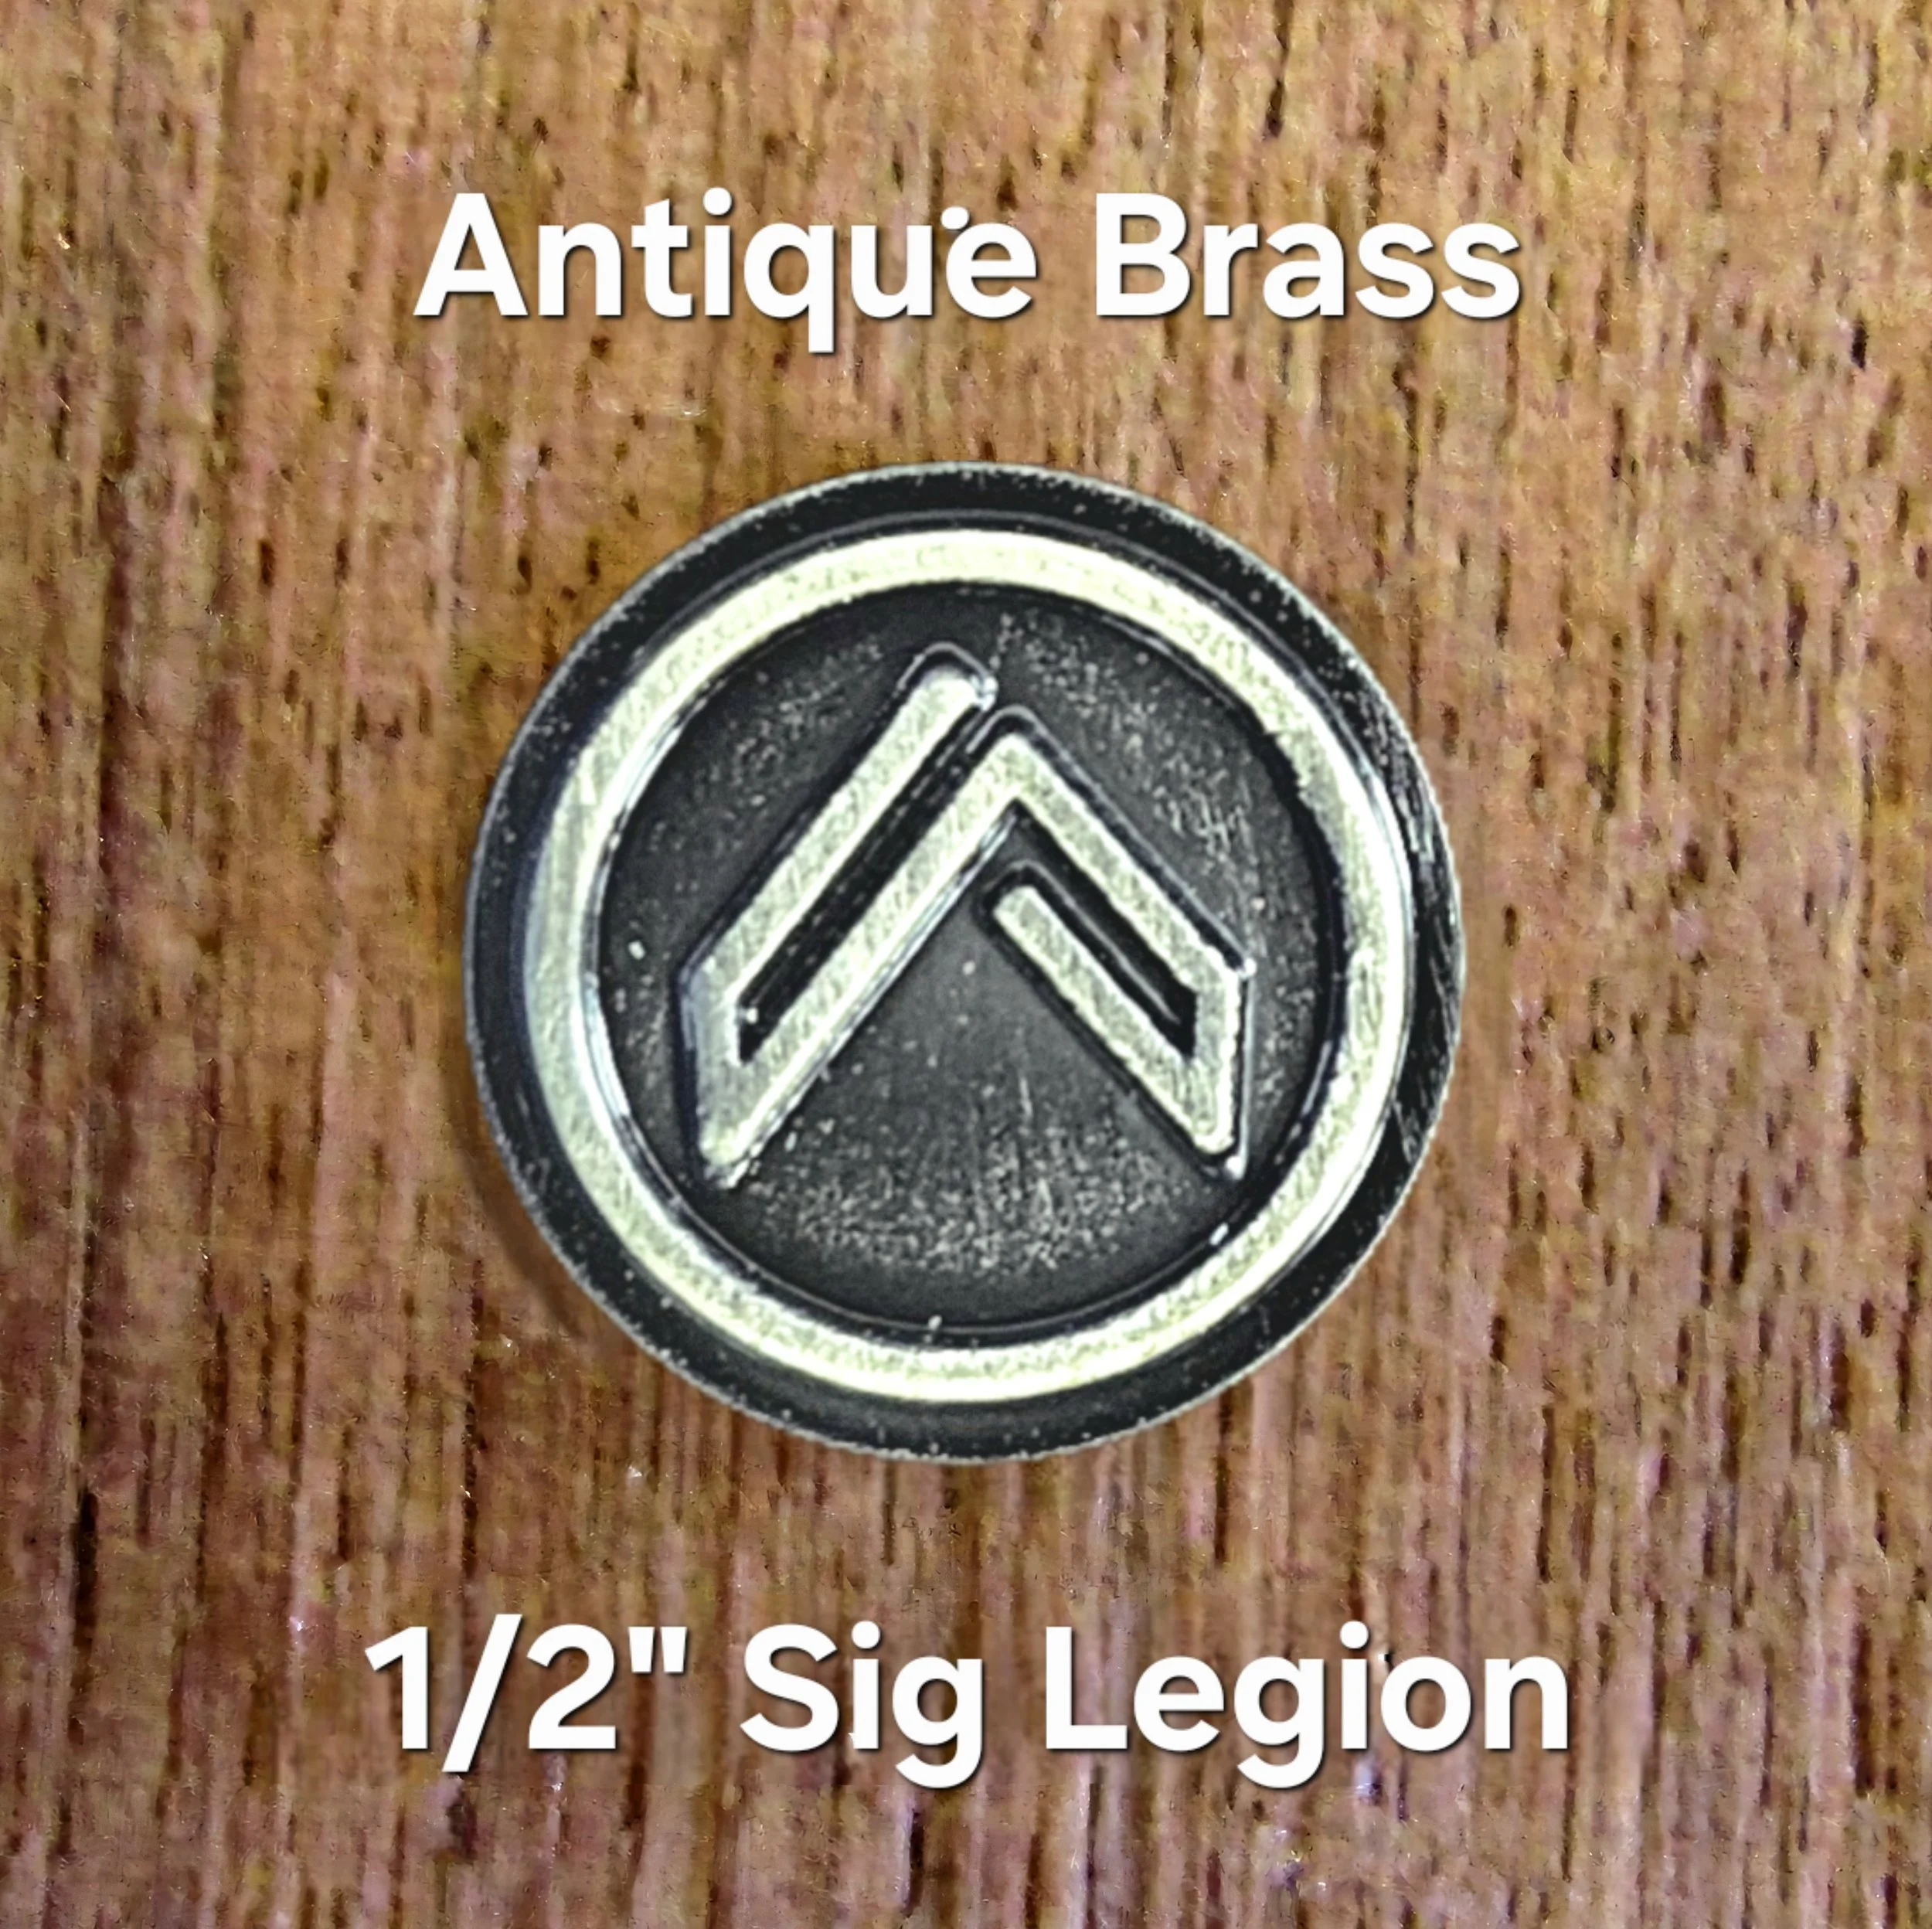
A quick note for our Sig Legion friends: We have a solid lead for Custom Legion Medallions in Gold, Silver, Black, & Antique Brass!
It is highly recommended to use this help section
with a large screen tablet, laptop, or full size desktop
Don’t forget to finish the job with a good CLP to repair the sanding or any scratches during your installation. We highly recommend our Two towel option with our HRV Grips® approved Clenzoil® soaked grey towel and our Copperhead-NG Two-Sided buffing towel
Combo - Best Value
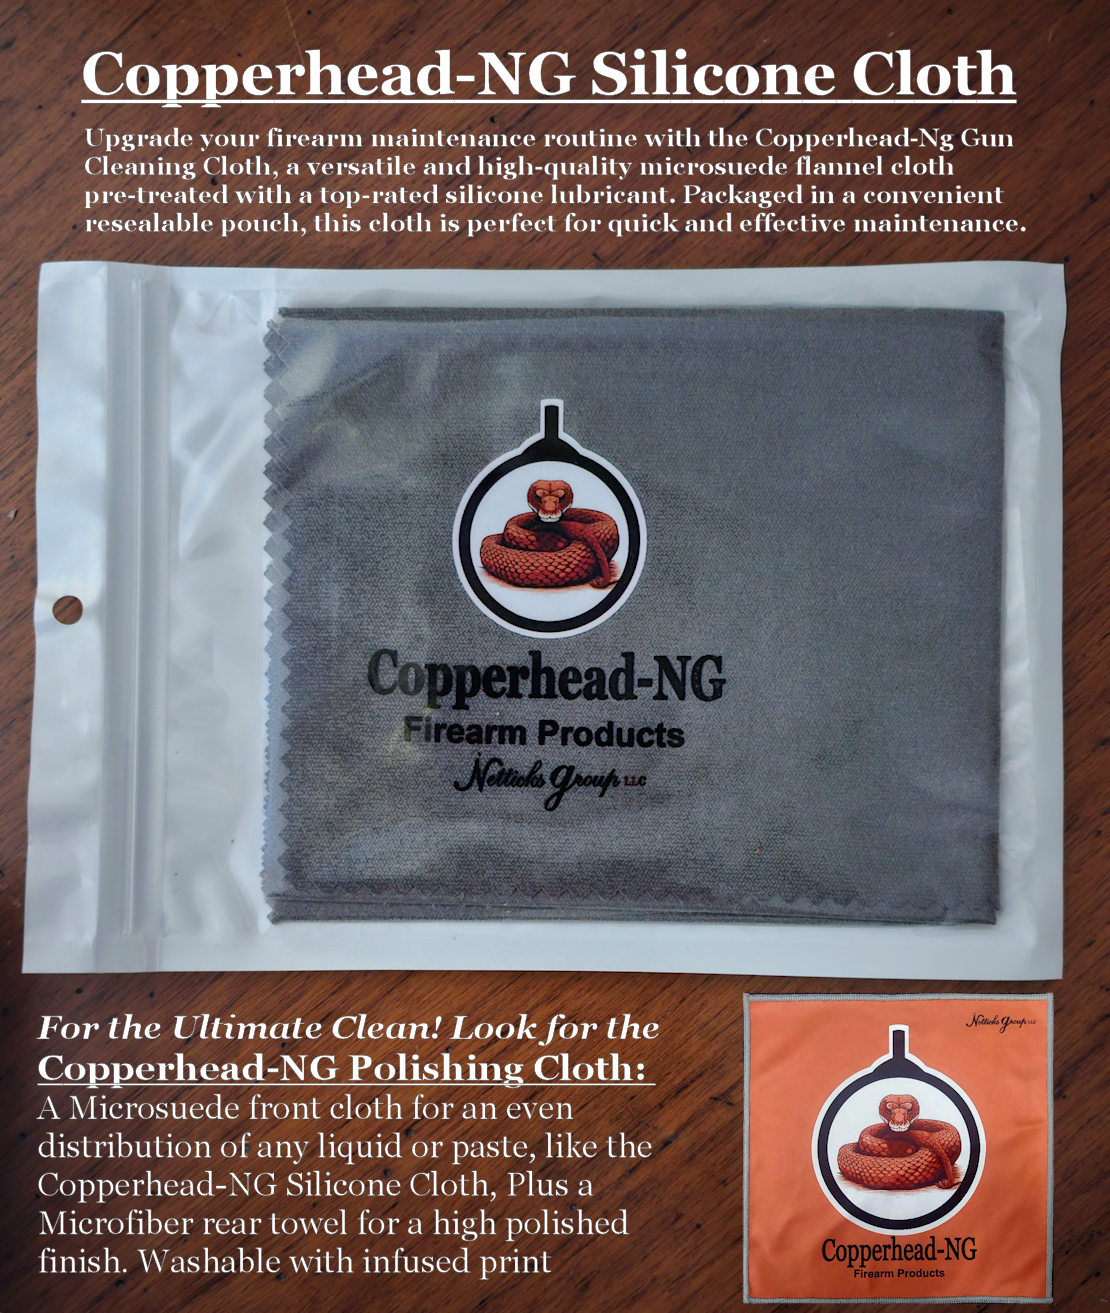
Copperhead-NG Premium Gun Cleaning Cloth Combo Pack. Upgrade your firearm maintenance routine with the Copperhead-NG Premium Gun & Reel Cleaning Cloth, a versatile and high-quality microsuede flannel cloth pre-treated with Clenzoil Range & Field!The Original CLP. Packaged in a convenient resealable pouch, this cloth is perfect for quick and effective maintenance on the go. Plus the Copperhead-NG 2-Sided Polishing Towel!
Enhanced Finish: For the best finish, pair with our dual-grade polishing cloth, featuring microsuede on the front and a microfiber towel on the back. This combination ensures an unparalleled cleaning and polishing experience for your gear.
Benefits: Protective Finish: Ensures your gear remains in top condition with a durable protective coating that is approved for use on HRV Grips® products.
Multi-Use: Ideal for firearms, fishing equipment, and any gear needing maintenance. Convenient Resealable Pouch: Keeps the cloth fresh and ready for use anytime, anywhere.
Perfect for Any Outdoor Enthusiast: Whether you're out in the field or at home, the Copperhead-NG Gun Cleaning Cloth is your go-to solution for maintaining your gear. Clenzoil Field & Range is approved for use by Hudson River Valley Customs Corp products.
This cloth is pre-treated with Clenzoil Field & Range, our preferred finishing product. Use the Copperhead-NG Clenzoil treated cloth to clean your entire gun. Paired with the 2-sided Copperhead-NG cleaning and polishing cloth to keep your gun protected and looking its best!
HRV Grips® Approved Clenzoil®

Copperhead-NG Premium Gun Cleaning Cloth. Upgrade your firearm maintenance routine with the Copperhead-NG Premium Gun & Reel Cleaning Cloth, a versatile and high-quality microsuede flannel cloth pre-treated with Clenzoil Range & Field!The Original CLP. Packaged in a convenient resealable pouch, this cloth is perfect for quick and effective maintenance on the go.
Enhanced Finish: For the best finish, pair with our dual-grade polishing cloth, featuring microsuede on the front and a microfiber towel on the back. This combination ensures an unparalleled cleaning and polishing experience for your gear.
Benefits: Protective Finish: Ensures your gear remains in top condition with a durable Clenzoil protective coating. *Approved for use on HRV Grips® products.
Multi-Use: Ideal for firearms, fishing equipment, and any gear needing maintenance. Convenient Resealable Pouch: Keeps the cloth fresh and ready for use anytime, anywhere.
Perfect for Any Outdoor Enthusiast: Whether you're out in the field or at home, the Copperhead-NG Gun Cleaning Cloth is your go-to solution for maintaining your gear. Clenzoil Field & Range is approved for use by Hudson River Valley Customs Corp products.
This cloth is pre-treated with Clenzoil Field & Range, our preferred finishing product. Use the Copperhead-NG Clenzoil treated cloth to clean your entire gun. Paired with the 2-sided Copperhead-NG cleaning and polishing cloth to keep your gun protected and looking its best!
Perfect Custom 2-Sided Buff Cloth

Introducing the Copperhead-NG Premium 2-Sided Gun Cleaning Cloth, designed for superior firearm maintenance. This versatile cloth features a copper-colored microsuede front for effective application of cleaning and polishing agents, and a grey microfiber back to remove and deeply polish your firearm. Machine washable and reusable, our cleaning cloth incorporates our logo into the fabric, ensuring the entire surface is usable. Compatible with all commercial cleaning and polishing products, this dual-purpose towel makes firearm maintenance quick and efficient. Pair it with our Premium Silicone Cloth (Sold separately) shown in picture #2 for optimal results. Measuring approximately 12x12 inches (28cmx28cm), it provides ample coverage for any firearm, making it an essential addition to your cleaning kit.
Dual-Sided Design: Copper-colored microsuede front for applying cleaning and polishing agents, and grey microfiber back for deep polishing.
Machine Washable & Reusable: Durable construction allows for easy cleaning and reuse.
Full-Surface Usability: Infused logo technology ensures the entire cloth surface can be used.
Optimal Size: Approximately 12x12 inches (28cmx28cm) for ample coverage and convenience.
Compatible with All Cleaning Products: Works efficiently with all commercial cleaning and polishing products. Works great with our Copperhead-NG Premium Silicone Cloth (Sold Separately)
Use the 2-sided Copperhead-NG cleaning and polishing cloth to keep your gun protected and looking its best!